Have you recently bought your first Apple smartphone and are you looking for some nice application that allows you to make the most of the photographic sector? Have you taken some shots with your iPhone, would you like to use them to create a collage and would you like me to recommend you some useful app? No problem: you have just landed on the right guide, at the right time!
In fact, in the following lines you will find a series of photo app for iPhone which you can use to perform all the operations described above, but also to edit images, hide the shots taken in the iOS roll and digitize analog photos. You just have to identify the resource that you think will do the most for you, download it, install it and follow the relative instructions for use.
Then? May I know what are you still standing there? Position yourself comfortably, take a few minutes of free time just for you and immediately start concentrating on reading what is reported below. I sincerely hope that in the end you can feel very happy and satisfied. Happy reading and have fun!
App to take iPhone photos
Let's start by sifting through what I believe to be the best app to take pictures with the iPhone. You will find them indicated in the following steps. Put them to the test now and I'm sure they won't let you down!
ProCam
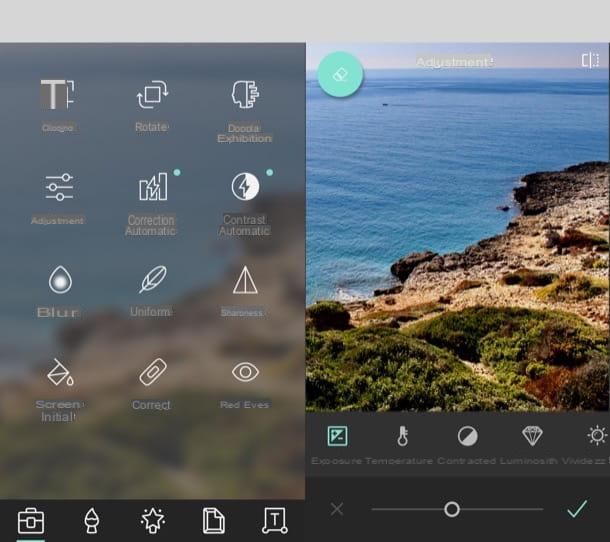
Among photo app for iPhone that allow you to make shots in a workmanlike manner, by personally setting all the technical parameters, I suggest you contact ProCam. It offers several advanced features, such as the ability to adjust exposure, focus, choose which iPhone lens to use (in the case of devices with more than one sensor) and much more, just as if a reflex was used. It costs 6,99 euros.
To download ProCam on your iPhone, visit the relevant section of the App Store, press the button with the price, quindi quello Install and authorizes the purchase through Face ID, touch ID o password dell'ID Apple. When the download is complete, start the app by pressing the button apri comparso sul display oppure sfiorando the relative icon which has been added to the home screen.
Now that you see the main ProCam screen, give it i permits necessary to access the camera and the roll of iOS, then start taking your photos, framing the reference subject with the camera and pressing the circular white button down.
If before shooting you want to adjust the ISO, white balance and other parameters, press on the appropriate items located at the bottom and move the relative adjustment bar.
Instead, to access all the other camera functions, such as the one to take advantage of the slow shutter, night mode, portrait mode, etc., tap on the arrow located at the bottom left and make your choice from the menu that opens. Also from the menu in question, you can decide to enable the display of grids and crosshairs on the display.
The button with theclock at the bottom right, then, allows you to set a timer for shooting, while the button Set adjacent allows you to access all the advanced settings of the application.
I also point out that, at the top of the screen, you will find the commands to choose which lens to use, the format in which to save the final image, to activate the rear camera and the status indicators.
RCam
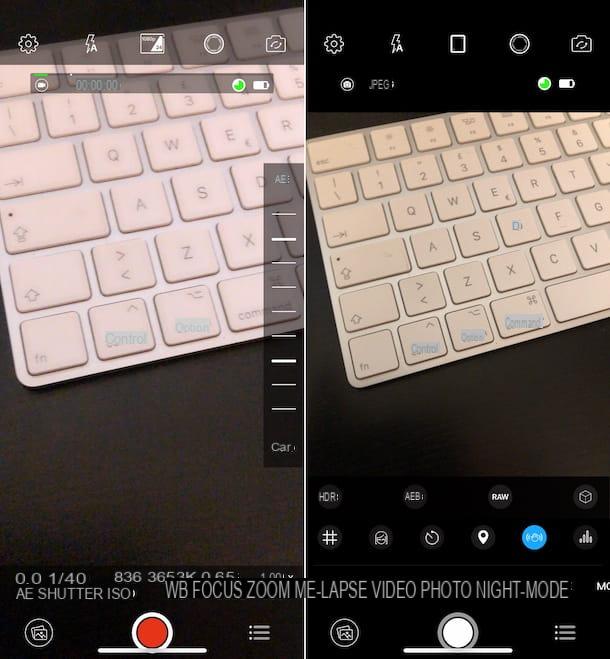
RCam is one of the few free applications on the App Store that allows you to take advantage of the iPhone camera in a more advanced way. Provides professional tools to adjust focus, false colors and supports for RAW - DNG format shots. As I told you, it is at no cost, but offers in-app purchases (at the base price of 3,99 euros) to take advantage of all the features offered.
To download the app on your iPhone, visit the relevant section of the App Store, tap the button Get, quindi quello Install and authorize the download via Face ID, touch ID o password dell'ID Apple. Once the download is complete, start the app by pressing the button apri comparso sul display oppure sfiorando the relative icon which has been added to the home screen.
Once the RCam main screen is displayed, grant it i permits necessary to use it, then start taking your photos, framing the reference subject and pressing the pulsating circolare rosso located in the lower center.
To manually adjust the lens aperture, ISO value, zoom etc., you must select the appropriate items located at the bottom and then move the adjustment bar located on the right, while pressing the button with thebulleted list placed at the bottom (always on the right) you can select additional shooting modes, set the timer, enable the grid and so on.
At the top of the screen you will find the icons to enable or disable the flash, adjust the parameters of the final file, choose whether to activate the automatic or manual mode for shooting and select the camera to use. To access all the other app settings, on the other hand, just press the d-shaped icongear located at the top left.
App to merge iPhone photos
If, on the other hand, you are looking for some app to merge photos with iPhone, so to create beautiful photographic compositions or, again, to create a single "long" image with your screenshots, the tools you can refer to are those listed below.
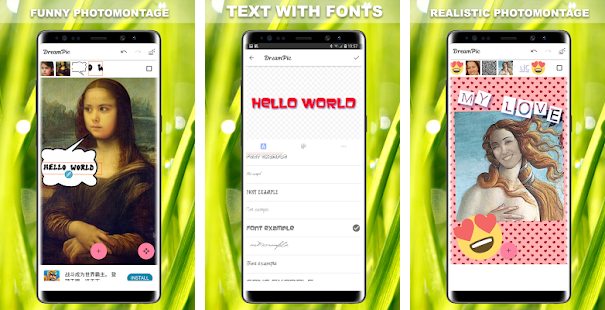
Pic Collage
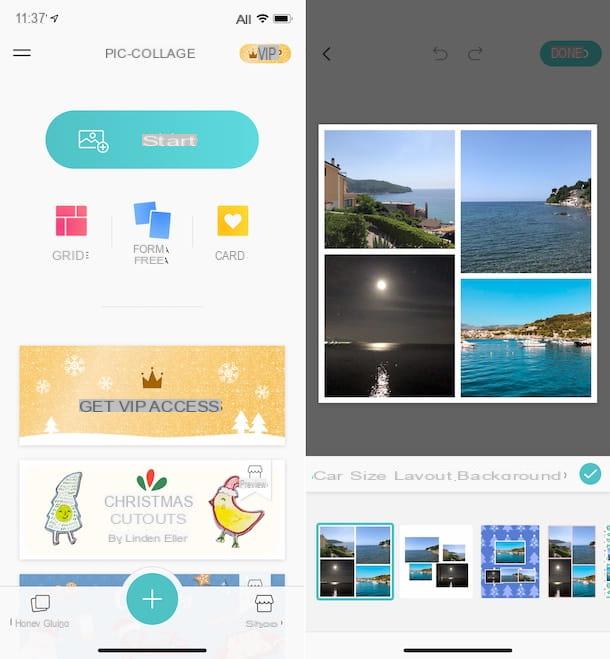
Pic Collage is a nice free app through which you can import photos from the iOS camera roll and use them to create compositions as you like, adding frames and decorating them with various stickers and effects. It's free, but through in-app purchases (at a basic cost of 1,09 euros) you can unlock extra content to customize your photographic compositions.
To download the app on your device, visit the relevant section of the App Store, press the button Get, quindi quello Install and authorize the download via Face ID, touch ID o password dell'ID Apple. Once the download is complete, start the app by pressing the button apri comparso sul display oppure sfiorando the relative icon which has been added to the home screen.
Now that you see the main screen of the application, give Pic Collage i permits necessary to access the photos on the device, then tap the button I will start, select the photos saved in the iOS camera roll that you want to insert in the collage and press the button with the checkmark, top right.
After completing the above steps, a collage with your photos will be automatically generated. To customize it, use sections Dimension, Layout e Background and the related options below. To confirm the changes made from time to time, tap the button with the checkmark that you always find at the bottom of the screen.
Subsequently, if you wish, you can complete your collage by adding a background, inserting additional photos, stickers, text, drawings or animations, by pressing the appropriate buttons located at the bottom.
Finally, click on the button Done located at the top right and tap the button Save to album, to save the final result in the iPhone Gallery. You can also decide to share the collage on Facebook, WhatsApp, through e-mail etc., by tapping on the appropriate buttons proposed in the final screen.
Tailor
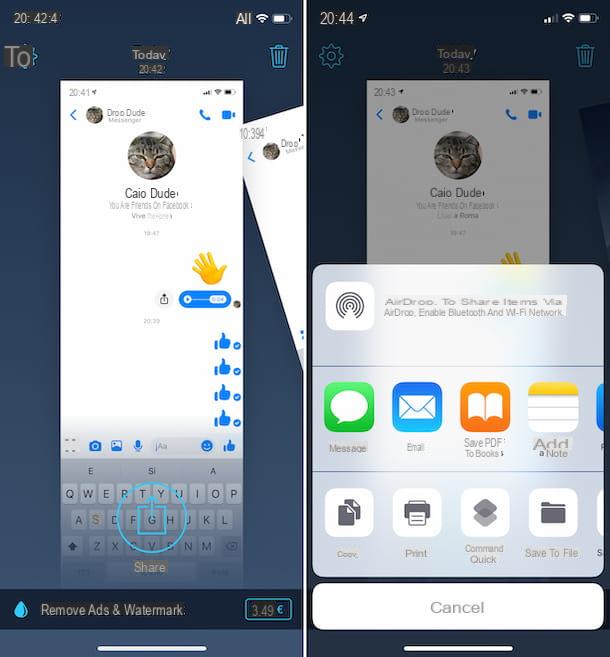
If you are looking for an app that allows you to merge the photos taken with the iPhone screen, then screenshots, you can rely on Tailor. It is, in fact, an application that allows you to unify in a single image developed in length all the screenshots belonging to the same app, acting in a totally automatic way. It's free, but offers in-app purchases (at a cost of € 3,49) to remove ads and the watermark that is applied to screenshots.
To download Tailor on your iPhone, access the relevant section of the App Store, tap the button Get, quindi quello Install and authorize the download via Face ID, touch ID o password dell'ID Apple. In segito, avvia l'app, premendo sul bottone apri comparso sul display oppure sfiorando the relative icon which has been added to the home screen.
Once the Tailor main screen is displayed, press the button Allow Access, to grant the app the necessary permissions to access the iOS Gallery, then wait for the app to locate the various screenshots captured and automatically merge them into a single image.
Per concludere, premium pulsating Share which is at the bottom and choose the app or location to save the resulting unified screen. Easier than that?
App to scan iPhone photos
Are you looking for some app to scan photos with the iPhone? Then immediately test those specifically used for the purpose that you find below. You can use it to digitize your photos on paper without having to go through traditional scanners.
FotoScan of Google Photos
One of the most used applications ever to digitize photos with the iPhone (and not only) is FotoScan of Google Photos, which allows you to scan traditional photos, avoiding glare, blur and other defects typical of photos "capture" using the apps to take photos with the camera, and save them directly on the device or on the cloud.
To download FotoScan from Google Photos on your iPhone, visit the relevant section of the App Store, press the button Get, quindi quello Install and authorize the download by Face ID, touch ID o password dell'ID Apple. Then start the app by pressing the button apri comparso sul display oppure sfiorando the relative icon which has been added to the home screen.
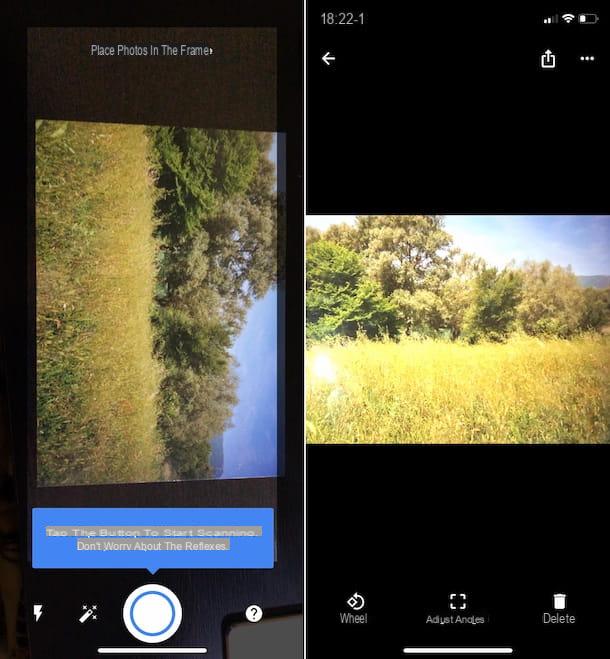
When you see the main screen of the application, follow the short introductory guide that is proposed to you, grant i permits requested by the app, press the button Start Scan, frame the photo you want to scan with the iPhone camera and press the white circular button placed in the lower center.
After that, frame i four circles appear on the screen and wait for the image to be processed. Then, tap onpreview of the shot at the bottom right and, if you deem it necessary, rotate the photo or adjust the angles by tapping on the appropriate items located at the bottom.
Once the scanning procedure is complete, the scanned image will be automatically saved in the iOS Gallery (as well as on Google Photos, if you have configured the use of the service on your iPhone).
Scanbot
Scanbot is another excellent application that, using the iPhone camera, allows you to digitize photos and documents in PDF and JPG format, but also to scan QR codes, all in a simple and fast way. It also integrates ad hoc tools for optimizing the obtained images and, in order not to miss anything, it also allows you to send faxes. It is free, but offers in-app purchases (at a base cost of 1,09 euros) to purchase credits for sending faxes and unlock other additional functions (e.g. text recognition via OCR).
To download it on your iPhone, visit the relevant section of the App Store, tap the button Get, quindi quello Install and authorize the download via Face ID, touch ID o password dell'ID Apple. Then, start the app by pressing the button apri comparso sul display oppure sfiorando the relative icon which has been added to the home screen.
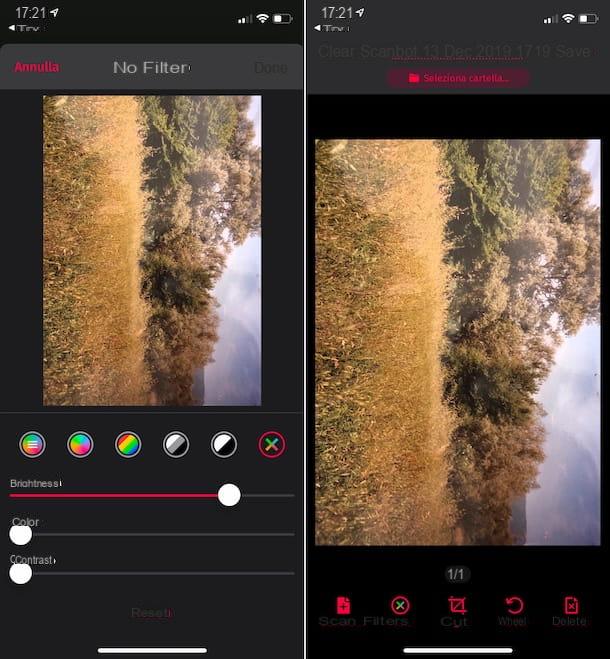
Once the main Scanbot screen appears, grant it all permits appropriate, frame the photo you intend to digitize with the smartphone camera and wait for it to be acquired automatically (if the option Automatic at the bottom of the screen is enabled).
If necessary, during the acquisition phase you can also activate the flash, by tapping on the option Luce, and you can choose the format by tapping on the icon with i two rectangles bottom left. If, on the other hand, you want to manually acquire the photo, click on red circular button which is located in the center.
In Seguito, Premium Pulsating On page that appears at the bottom right, choose any filter you want to set from those available to make corrections to the image and / or use the adjustment bars at the bottom to define brightness, color and contrast. Once the changes are complete, click on the wording Done at the top of the screen.
If you then need to crop the photo or rotate it, select the icons respectively Size e Wheel which are located at the bottom and used the available commands.
To save the scanned image, instead, click on the item To save top right. Note that scanned items are saved in PDF by default. To choose the JPG format, proceed as follows: in the screen where you are shown the history of all recent scans, tap the button (...) located at the top right, select the item Settings from the menu that appears, tap on the wording Advanced Settings e carries his ON l'interruttore situato accanto alla voce Save pages to photo library.
App to edit iPhone photos
Let's move on now to the app to edit photos from iPhone. If you need to correct parameters such as contrast, brightness, shadows, etc., to add special effects to your shots and to make various corrections to the images in the Gallery, the solutions I have found below are certainly among the most "apt".
Gallery
The first app that I suggest you consider, if you want to make changes to the shots taken, is Gallery: the tool included “standard” in iOS to view, manage and, in fact, edit photos taken with the iPhone.
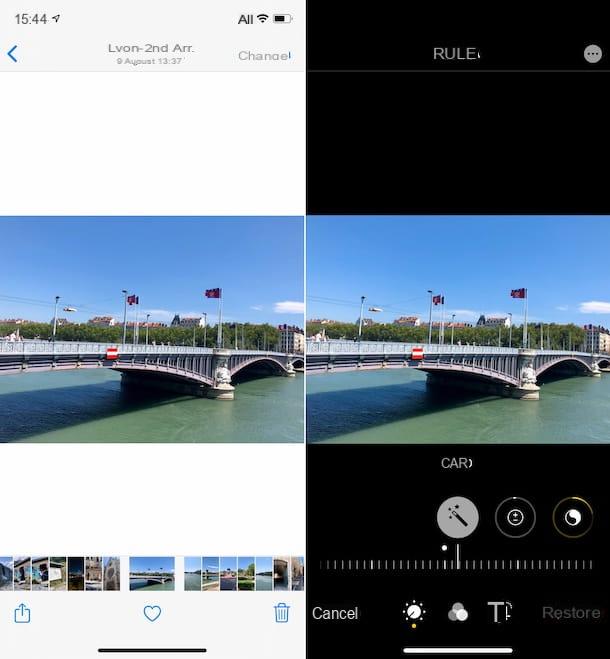
To use it, just touch theicon Photos app (the one with the white background and the multicolored flower) that you find on the home screen, then select the photos you intend to modify (you can search for them using the section Gallery, For you or through that Album). Once you have opened the photo in relation to which you are interested in going to act, tap on the item Modification at the top right.
Then use the tools available at the bottom of the new screen displayed to make any necessary changes. The instrument Car it allows you to automatically improve the photo, while to intervene on the individual parameters you have to tap on the buttons Exposure, Brilliance, Light points, Shadows etc. that you always find at the bottom and take advantage of the appropriate adjustment bar.
You can also embellish your image by applying filters to it. To do this, tap on the icon with i three overlapping circles at the bottom of the screen and choose the filter you prefer from the proposed list, also adjusting its intensity using the relative bar.
If, on the other hand, you want to cut the image or change its orientation, select the icon of cutter located at the bottom of the screen and use the buttons and ad hoc adjustment bars. When the changes are complete, tap on the item end located at the bottom right, to save the changes.
VSCO
Another app I recommend you to try is VSCO. It is a tool that offers advanced editing functions but also allows you to retouch your photos (and videos) with ready-to-use presets. It has a very minimal interface and is quite simple to use. It also includes social functions, to share and view edited shots. It's free, but offers in-app purchases (for $ 1,09) to unlock extra presets and features.
To download VSCO on your iPhone, visit the relevant section of the App Store, tap the button Get, quindi quello Install and authorize the download by Face ID, touch ID o password dell'ID Apple. Then, start the app by tapping the button apri that you see on the screen or the relative icon which has been added to the home screen.
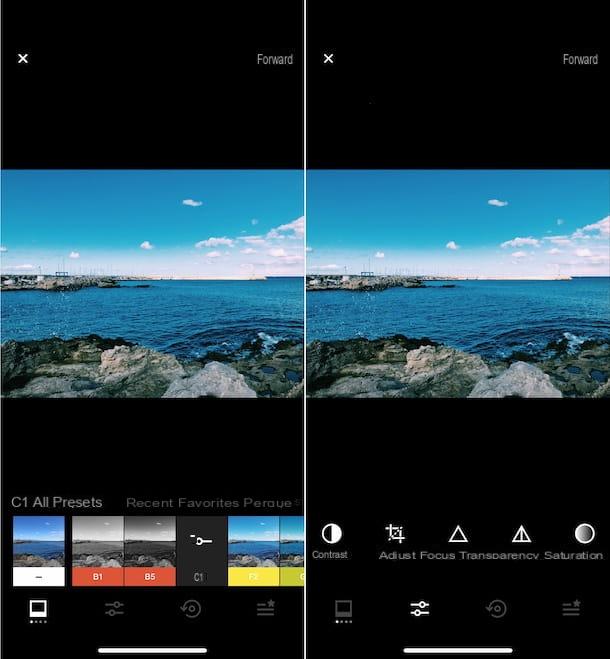
Once the VSCO screen appears, Create an account to be able to use the service, by choosing one of the available recording options, then grant the app the various permits required. At this point, tap on the icon with i two sheets located at the bottom, press the button Import a photo, select the photo in relation to which you are interested in going to act and touch the wording Edit image. Then, press the button with i cursors located at the bottom of the display.
In the screen you now see, if you want to apply one of the available presets, select the one you prefer from the list below. If you deem it necessary, you can also change its intensity by pressing on the preset name twice and moving the appropriate adjustment bar.
To intervene on parameters such as contrast, focus, exposure, etc., instead, click on the button with i cursors found at the bottom of the screen, then on the name of the tool you want to use and use the available commands.
When the changes are complete, touch the wording NEXT located at the top right, add (if you want) a title and indicate the place where the shot was taken, then press the button Save and publish. By doing so, the edited photo will not only be saved in the iOS camera roll but also shared on the VSCO network. If you want to prevent this from happening, bring up before proceeding with the save OFF the switch located next to the item Post to VSCO.
App to hide iPhone photos
Looking for app to hide photos on iPhone through which you can protect your shots from any prying eyes? I would say then that the resources I have found below are the ones that are most suitable for you.
Gallery
Gallery, the default iOS application to view, manage and edit photos on the iPhone I mentioned in the previous lines, also includes a special function that allows you to hide specific images in the Gallery, moving them to a special album, so that they are invisible to eyes of those who browse the main feed of the app.
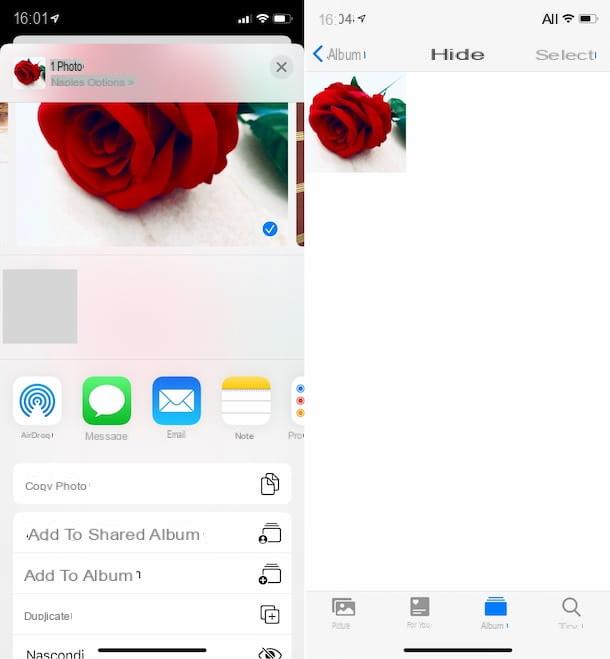
To use the feature in question, tap theicon Photos app (the one with the white background and the multicolored flower), select the images you intend to hide (you can search for them using the section Gallery, For you or through that Album), do tap sul share button (the one with the square and the arrow) located at the bottom left, choose the option Hide from the menu that opens and touches the wording Hide photos from the additional menu displayed.
The photos that you are going to hide as I have just indicated will then be accessible only and exclusively by accessing the section Album app and selecting the item Hidden found by scrolling down the displayed screen.
From the section above, you can also act by restoring the normal display of the photos on which you have had second thoughts. To do this, after logging in to the album with the hidden photos, tap on the item Select at the top right, choose the images you want to make visible again in the iOS Gallery, press on sharing button at the bottom left and tap, from the menu that opens, on the item Show.
Private Photo Eval
Another app you can use to hide your iPhone shots is Private Photo Vault, which allows you to create a “safe” in which to import the images, protecting them with a numeric password. It's free, but offers in-app purchases (for $ 5,49) to remove ads and unlock other additional features.
To download the application, visit the relevant section of the App Store, press the button Get, quindi quello Install and authorize the download by Face ID, touch ID o password dell'ID Apple. Then, start the app by tapping the button apri appeared on the display or the relative icon which has been added to the home screen.
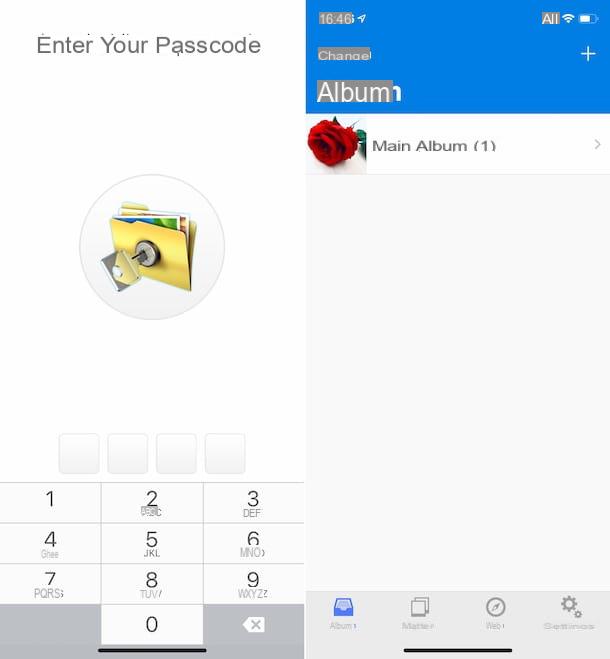
Now that you see the Private Photo Vault main screen, tap the buttons Start e Set passcode, then type the Numerical code that it is your intention to apply, choose whether to set an e-mail address for image recovery (in case you forget the previously defined password) and press in sequence on the buttons NEXT (twice in a row), I agree e I accept everything and continue.
At this point, select the tab Import found at the bottom of the display, touch the item Photo-archivewhy are you cheating? Main album and allow the application to access the iOS camera roll.
Now select the photos to import into the app and press the button end, top right. Then decide whether to delete the original images from the iOS Photos application (which is the recommended choice) or whether to keep them.
From now on, in order to access the photos stored through Private Photo Vault, all you have to do is type the password previously set when unlocking the application, go to the tab Album and select the album called Main album.
In addition to as I have just indicated, you can transfer the images to be hidden on the iPhone from the computer, by going to the section Importa > iTunes File Transfer of the app, and you can also take photos at the moment, by going to the section Import> Camera, selecting the album you want to use and using your iPhone's camera.
Furthermore, I inform you that, if you deem it necessary, you can organize the images imported into the app into albums of your choice and protect them with an additional password. To do this, touch the button capacitor positive (+) lead located at the top right, type the name of the album and the password you want to use in the ad hoc fields and tap on the item Crea.
Next, select the album Main album on the home screen of the app, tap on the item Modification at the top right, choose the photos to move to the new album, tap on the item To shift located at the bottom and select the previously created album to proceed.
When and if you want, you can make the photos visible again in the iOS Gallery, by selecting the images of your interest saved in Private Photo Vault, as I explained a few lines above, by tapping on the item Export located below and choosing the option Camera roll give the menu check if you press.
More iPhone photo apps

To conclude, I want to report you more apps for iPhone photos that you can consider using as an alternative to those I have already reported to you in the previous lines and to carry out other operations, always in relation to your shots. You will find them indicated below.
- Halide - app that allows you to take quality photos through a very intuitive user interface. To be precise, it allows you to change exposure and focus, balance white and ISO etc. The photos taken can be saved in both JPG and RAW and it also offers the wide angle view function. It costs 6,99 euros.
- Camera + 2 - another app to take pictures with the iPhone, suitable for both the more experienced users in photography, who can take advantage of the advanced manual controls, and for novices in the sector. Also, if your iPhone model has more than one camera, you can use the wide angle or telephoto function. It costs 5,49 euros.
- PicsArt - application that allows you to make changes to photos by adding effects, frames, stickers and various decorations. It also allows you to create image collages. It is very simple to use and it is free, but to remove advertising and unlock other extra features you need to make in-app purchases (at a base cost of 1,09 euros).
- Pixlr - it is a renowned application through which you can modify all the main parameters of the photos, add various effects and create beautiful collages. It's free, but offers in-app purchases (starting at $ 1,09) to unlock additional tools and remove ads.
- Photo Scanner on Photomyne - application specialized in digitizing photos on paper, very simple to use and including useful tools to automatically improve the scanned images. It is free to download, but offers in-app purchases (at a base cost of 1,09 euros) to use the service.
- Memories - another photo scanner that uses a powerful algorithm that automatically detects the orientation of the images to be captured and the relative aspect ratio. It's free, but to unlock all the functions you need to make in-app purchases (at a cost of € 3,49).
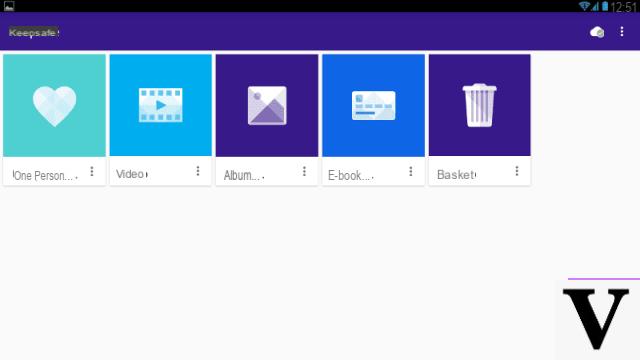
- Keepsafe - excellent app to hide photos on iPhone that provides its users with a space in their cloud to safely store files of various types, including images. It is free, but allows you to keep up to a maximum of 200 items, a limit that can possibly be circumvented through in-app purchases (at the base cost of $ 9,99 / month).
- Vault – Hide photos & videos - it is an app to hide photos that allows you to protect the contents of interest with a special password. It also allows you to generate a fake code by which you can access a fake secret folder to deceive the curious. It's free, but offers in-app purchases (starting at $ 1,09) to unlock additional features.