Do we need to create a list of Windows user accounts on our device and possibly save it in a text or csv file? Do we need a report of the accounts present in the domain?
The guide below can help us do this in minutes!
The tool will do the job for us WMIC, the command line tool that allows you to manage and modify system users. As usual, we recommend that you follow only the instructions in this guide to avoid making unwanted changes.
Preliminary information
We always recommend doing an installation through one 100% genuine and original license, this is to avoid data loss or hacker attacks. We are aware that purchasing a license on the Microsoft store has a high cost. For this we have selected for you Mr Key Shop, a reliable site with free assistance specialized in in your language, secure payments and shipping in seconds via email. You can check the reliability of this site by reading the many positive verified reviews. Windows 10 licenses are available on this store at very advantageous prices. Furthermore, if you want to upgrade to the latest versions of Windows operating systems, you can also purchase the upgrade to Windows 11. We remind you that if you have a genuine version of Windows 10, the upgrade to the new Windows 11 operating system will be free. Also on the store you can buy the various versions of Windows operating systems, Office packages and the best antivirus on the market.
Let's find out how to do it together!
Create a list of Windows user accounts
First of all, let's get familiar with Wmic: per display a "basic" list of the users present in the system we open a command prompt in administrator mode and, inside it, we type
wmic useraccount get name
We will then have a list, in the command prompt, of all user accounts present in the operating system.
The command above, however, shows usernames only of the accounts in question. To also view the name and surname of the account owner, if any, we will type
wmic useraccount get name,fullname
The result is below:
Again, the list at the top shows all the accounts present in the system, both active and inactive. To also show the status we are going to type
wmic useraccount get disabled,name,fullname
If the “disabled” entry is true the account is not active.
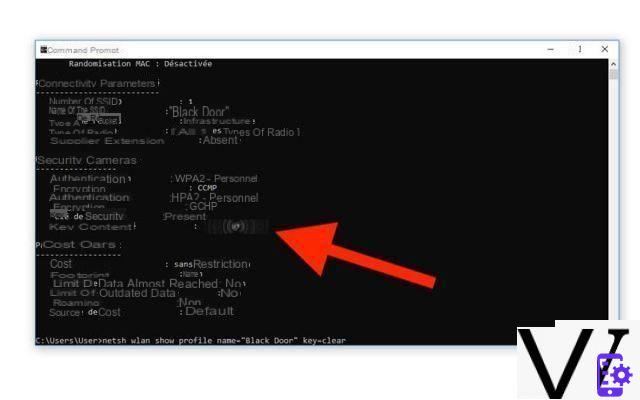
But wmic can give us a lot more information about the user accounts stored in the system: just type the command
wmic useraccount list full
to view them all! Here's what a single user on the list looks like in the prompt:
Let's see what the various information shown mean:
- AccountType: type of account, used in particular for computers belonging to domains. If our PC does not belong to any domain, the type will almost certainly be 512;
- Description: a description of the account, if any;
- Disabled: the account status (FALSE if active, TRUE if disabled);
- Domain: the name of the domain to which it belongs (or of the PC, if there is no domain);
- InstallDate: shows the date the account was created (domains only);
- LocalAccount: shows if the account is active on the local computer (TRUE) or within a domain server;
- Lockout: shows if the account is locked (for example in case of repeated password entry attempts);
- Name: the username of the account.
- PasswordChangeable, PasswordExpires and PasswordRequired: represent the security options for the password, if set; the first item denotes whether the password can be changed, the second if it is expiring, the third if it is required for all operations;
- SID: is the security identifier of the account;
- SIDType: is the numeric value that shows the type of SID for the user account (1 for user, 2 for group, 3 for domain);
- Status: represents the status of the account; if this is operational, the status is usually "OK" or "Degraded".
Including how wmic works, let's now see how report the information to a text file or on a .csv file - to be opened with a spreadsheet editor (Excel, Calc and others) or a browser for a tabular and ordered view of the information.
save the result of wmic in a text file, we will have to add to one of the commands seen above the string
/output:X:PercorsoDelFile.txt
where X is the disk, and FilePath is the full path to the text file to be saved, immediately thereafter WMIC. For example, to save the Windows user account list (names only) on our record, we're going to write
wmic /output:C:ListaUtenti.txt useraccount get name
To save the result of wmic in a csv file, instead, we will have to add to the entire command to save the string in the file as well
/format:csv
For example, to save the entire list of users with all related information on our C drive, in CSV format, we are going to type
wmic /output:C:ListaUtenti.csv useraccount list full /format:csv
Here is the result!
Doubts or problems? We help you
Remember to subscribe to our Youtube channel for videos and other reviews. If you want to stay up to date, subscribe to our Telegram channel and follow us on Instagram. If you want to receive support for any questions or problems, join our Facebook community or contact us on Instagram. Don't forget that we have also created a search engine full of exclusive coupons and the best promotions from the web!