This video is also part of my column "HOW TO TAKE BETTER PHOTOS WITH IPHONE" and instead deals with HOW TO EDIT PHOTOS ON IPHONE. And without using external apps! So ... we are at episode 15: initially I show you each tool and how to use it, what it is for, then you will find a practical example of modification (indeed, 2) and a trick / advice for Mac users.
In this article we want to summarize some key points of this method of editing photographs, so that you always have them in mind to improve your shots. Let's start:
Edit photos on iPhone without app
Below I will guide you step by step to discover the many features offered by the integrated editor on the iPhone and therefore developed by Apple. This tool is more "snubbed" than you might think, but at the end of this guide you will change your mind:

So let's click on the "Modification”At the top right while we are viewing one of our shots in the iPhone Photo Gallery. This will immediately take us to the editor, which will show a screen similar to the one you see below:
Automatic mode
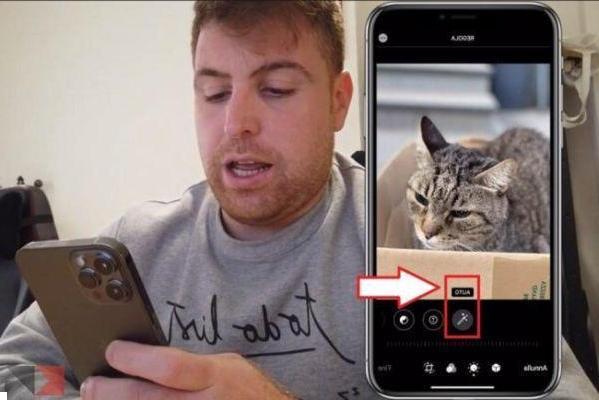
For each "symbol" that appears within the editor, there is a feature offered. For example, the first symbol you will find in front of you corresponds to the mode CAR (automatic in fact) which will modify the photo based on artificial intelligence algorithms, trying to enhance lights and shadows in particular points.
However, if you don't like the final effect, you can always act on the slider located in the lower part, with which you can modify the automatic adjustments. If you don't like the effect, let's move on to manual editing, or the other tools offered by the editor, by swiping to the left:
Exposure
The first real change therefore concerns the Exhibition, i.e. the amount of light that passes through the lens and reaches the sensor. OBVIOUSLY, these are software changes, we are not actually changing the exposure, because these are things that should be done before taking the photo. But with these tools we can act in "post-production" (in fact) to correct any smudges.
Basically, the higher the exposure, the more light enters the photo. You might therefore think of correct a photo that is too dark (underexposed) or a photo that is too bright (overexposed). Then let's go to the next tool:
Brilliance and Light Points

The next two tools we analyze are called Brilliance and Light Points. They must be treated together because they are closely linked! In fact, with the brightness slider you will go to resume the light sources (therefore the light shades of the photo) to enhance them more (or decrease them). In short, not only any light sources are enhanced / diminished but also whites in general.
Finally, by working with the Light Points tool, iPhone tries to understand which are the brightest points of the photo to act only on them. All of this is the exact opposite of what the Shadows tool does:
Shadows and Contrast
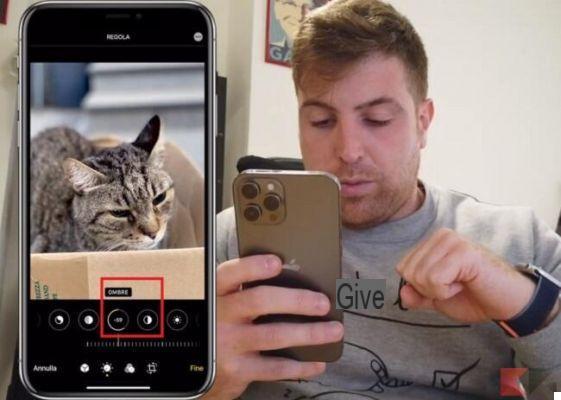
With the tool Ombre it acts directly on the dark shades of the photo, or to enhance them even more (and therefore intentionally underexpose the photo) or to correct the underexposure to slightly “fade” the dark shades of the photo. This goes hand in hand with the contrast which instead seeks to increase / decrease the gap between light and dark shades. By acting sparingly on the contrast it is possible to enhance the play of light / shadow of a photo with a really interesting effect.
Brightness and Black Point

Two other setups that go hand in hand. Let's start with the brightness (not to be confused with the exposure) thanks to which we will be able to raise / lower the clear tonal values of the photograph, while the exposure acts on the whole photo. Added to this is the mode Black spot which instead acts as the brightness but purely on dark tonal values (therefore not to be confused with shadows).
Saturation and Vibrance
La Saturation it is one of the most used parameters, and erroneously, because used in an exaggerated way. In fact, saturation saturates or de-saturates the colors, increasing or decreasing their hue, the tonal values. It can be used to increase the presence of colors in a photo (but sparingly) or precisely to decrease the hue of a photo that is too saturated. Then there is the vividness which instead always takes care of the colors - accentuating or lowering them slightly - but without acting as aggressively as saturation. We need to say to give a more precise touch once the saturation of the image has been decided.
Temperature and Ink
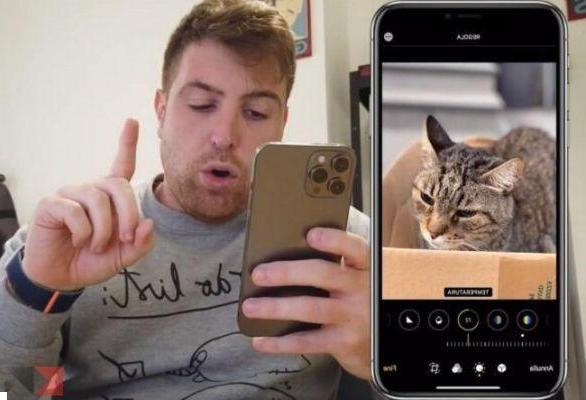
These settings are used to further adjust the colors of the photo. There temperature is able to change the colors of the photo from cold to warm shades (depending on the occasion), while the ink it acts on the three fundamental channels (RGB) and serves to adjust these three colors in order to correct any errors such as the color of the skin.
Sharpness and Definition
Sharpness and definition are two useful parameters to play with the contours of the photo. There sharpness obviously it will try to enhance and improve the contours (or on the contrary make them softer, almost blurred), while the definition will try to enhance / diminish the highlights and shadows of these outlines.
Noise and Vignetting
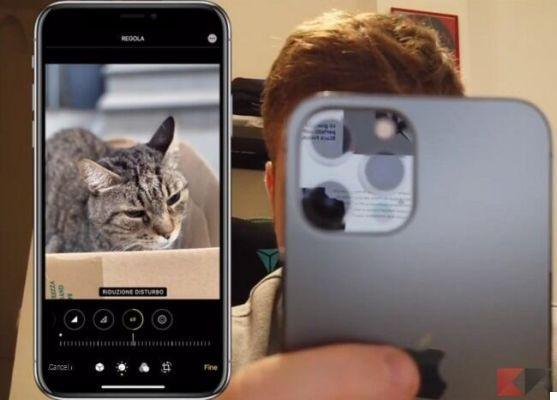
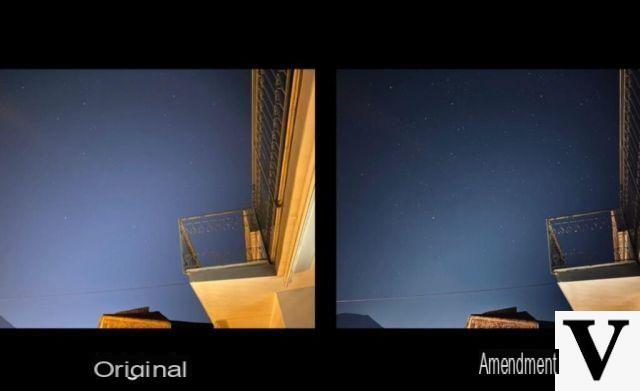
Il disorder acts on particularly noisy photos, i.e. photos that you have probably taken in low light conditions. In these photos there is a lot of thermal or digital noise that can be “attenuated” thanks to this parameter, with an almost blurred effect (to be used therefore sparingly). Finally there is the vignetting which is simply a graphic effect with which you will add a shadow along the frame of the photograph. Here is an example:
Other useful tricks
Once you have mastered this mode, you can also add a few more tricks that we have seen in the other episodes. For example, you can use the Burst mode, that is, hold down the shutter button to take many more photos and then choose the best one.
Another trick is to change the exposure: once you have focused on a point of the photo, with your finger swipe on the screen in order to increase / decrease the brightness level of the photo, so as to enhance lights or shadows. Finally, don't forget to always carry a comfortable bag with you tripod like these:
Doubts or problems? We help you
Remember to subscribe to our Youtube channel for videos and other reviews. If you want to stay up to date, subscribe to our Telegram channel and follow us on Instagram. If you want to receive support for any questions or problems, join our Facebook community or contact us on Instagram. Don't forget that we have also created a search engine full of exclusive coupons and the best promotions from the web!


