Do you know that your computer (PC or Mac) can also become a “mini” recording studio? All you need is audio recording software and a microphone. Regardless of what you need to do, like adding your voice to a video file or recording your voice to a song, the microphone is an essential device because it allows you to transmit your voice to your computer's sound card. Below we will see how connect microphone to PC or Mac, which is not always trivial to do also because you have to do a minimum of configuration for it to work properly.
How to Connect Microphone to PC or Mac OS X
Depending on the type of microphone you have, it can connect to your PC or Mac in different ways. For sure, however, it must be said that the simplest and fastest connection of the microphone is the one via USB port or via 3,5mm jack.
However, the best and easiest type of microphones to use and configure is that d USB microphones. For these just connect the USB cable of the microphone to any USB port on your PC or Mac and that's it. These microphones usually also have a small built-in pre-amplifier chip that allows them to pick up audio and output a digital signal.
PC and macOS compatible headphone microphones can be connected via either USB or headphone jack. There are no major configurations to do to get the mic to work. Just make sure you select the microphone as input before using it (read the second part of this guide to understand the configurations to do)
Another type of microphone (used for professional use) is the one with type connector XLR (see following image).
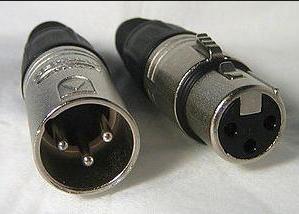
This connector is circular with three pins and accepts an XLR cable. Computers (both Windows PC and Mac OS X) do not have XLR ports. This is why there are “USB preamplifier” devices that allow you to accept an XLR connection and send the signal to your computer via USB.
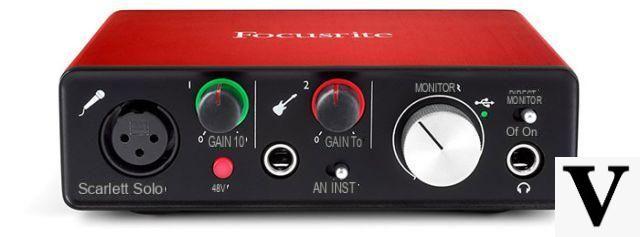
The pre-amplifier is an external USB device (can also be referred to as an external sound card) that can accept an XLR connection. Among the most popular preamps there is certainly the Focusrite Scarlett line which is cheap (costs around € 100) and is simple to use. How does this usb preamp work? Just connect the preamp to your computer through the USB port. The device connects to your computer with a USB 2.0 type B “printer style” connector. Then you connect the microphone to the preamp and the other end of the cable to the USB port on your PC / Mac.
Some audio interfaces also connect via a "Thunderbolt" connector. These interfaces do not function differently from USB-type audio interfaces. They just use a different connection protocol.
Microphone configuration and audio interface
Once all devices (microphone and / or preamplifier) are connected and activated, it's time to configure the audio interface. Windows may also require the installation of audio interface drivers, but the macOS system generally does not require a driver. It is simply plug and play!
On Windows (eg Windows 10) after connecting the microphone via USB to the PC, you have to do it click destroy icon of volume (bottom right) and then click on the option Open audio settings. The following screen will open:
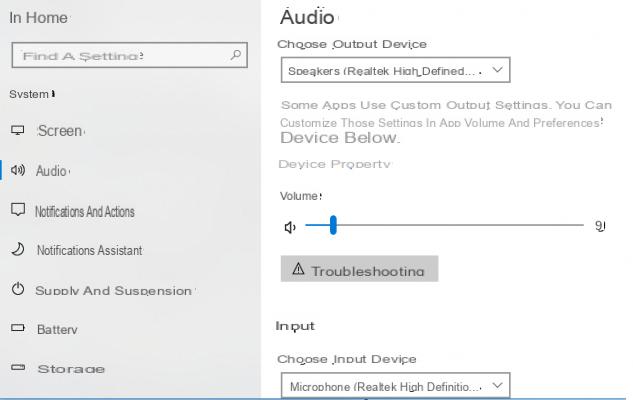
From this screen you will simply have to select the connected Microphone from the drop-down menu under the writing Choose input device, under the section Input. Once this is done you can try speaking into the microphone and see below the section Test the microphone if the signal comes.
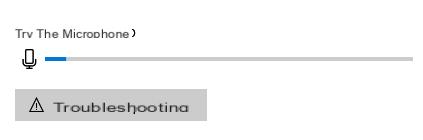
If you see the blue line moving, it means that the signal is arriving correctly and you are ready to use the microphone for recording or other purposes.
On Mac OS X, as mentioned, the procedure is very simple even if you will still have to change some settings so that things work the way you want.
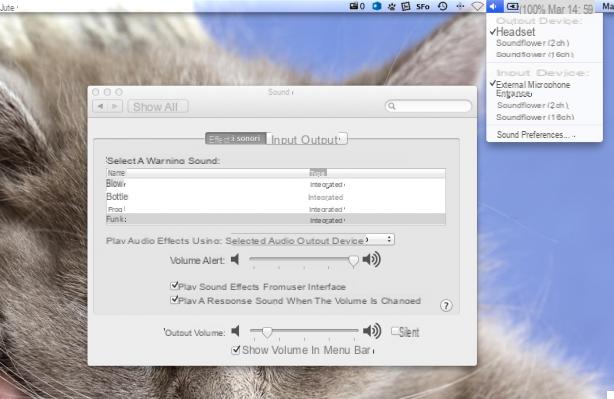
On MacOS open the System preferences panel and click on "Sound"
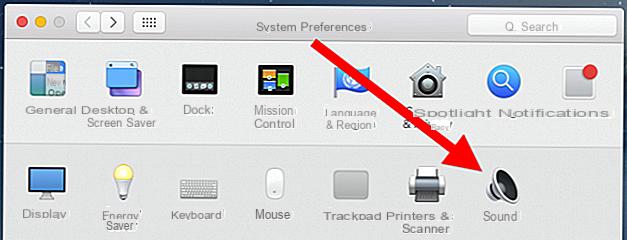
Within this preferences panel, two tabs will be displayed: "Input"And"output". Click on the “Input” tab and select your microphone or audio interface and set it as system input.
Most digital audio workstations allow you to select your input from within the application itself, simplifying setup.
If you don't see the audio interface in this list, first make sure the audio interface is turned on and connected properly. Make sure it's plugged directly into your Mac rather than a USB hub.
You will also need to set up the Exit appropriately. If you are controlling the microphone from the headphone jack of the audio interface, make sure the audio interface is selected in the "Output" tab of the preferences panel Sounds. If you connect headphones to the Mac's headphone jack, you also need to make sure that "Built-In”Is selected as the audio output.
NB: If you have to make a recording it is always advisable to use headphones because this is the only way you can get a clean audio and a double sense of tracking.
All the above talks refer to the connection of a microphone to the computer, and therefore to the INTERNAL sound card of the computer. As an alternative to the internal sound card, you can also use one external sound card device that must be connected via USB to the computer and allows you to manage all the audio inputs and outputs of the PC or Mac. Qui su Amazon you will find many models, with very affordable prices.
How to Connect Microphone to PC and Mac -