Set the page layout
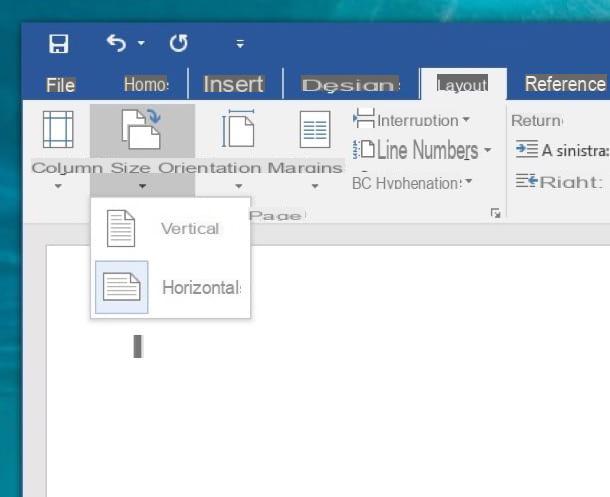
If you want to learn how to make a leaflet with Word, the first thing you need to do is start the program via its icon in the menu Home and set the display of the sheet from vertical to horizontal by going to the tab layout (top left) and selecting the item Horizontal from the button Orientation.
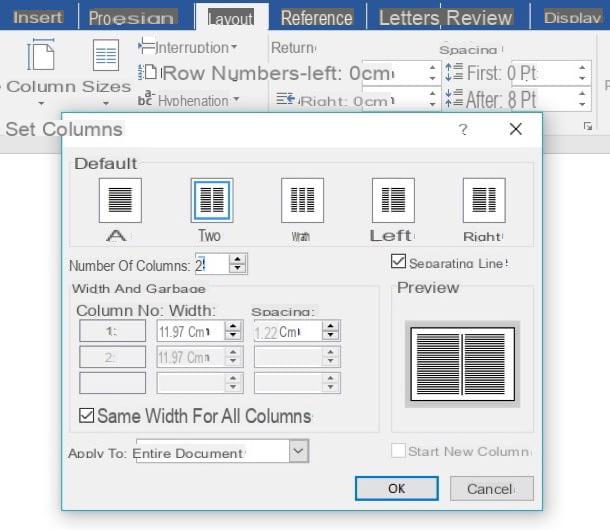
At this point, you need to split the page into two different columns so that it can take on the appearance of a leaflet. To do this, you need to stay on the tab layout, click on the button Columns I will select the voice Other columns give the menu to compare.
In the window that opens, click on the box Due, metti il segno di spunta accanto alla voce Separating line (in order to visualize the dividing line between the two columns) and click on the button OK per salvare i Cambiomenti.
Insert text and images in the leaflet
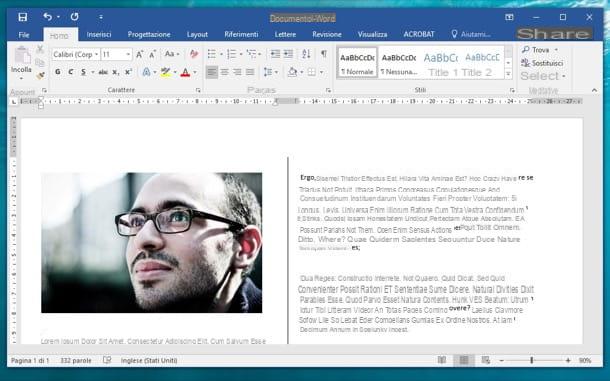
Here we are! You now have a split sheet where you can write and insert images freely, like in any Word document. To write on the second column and display the dividing line, you need to run out of space in the first column: instead of going back to a new page, Word will jump to the second column.
You can easily adjust the margins and indents of your brochure using the Word rulers (you can view them by placing the mouse pointer on the sides of the Word window and double clicking or enabling them from the Show) and fields Come back in e Spacing contained in the card Layout on the pagina in Word.
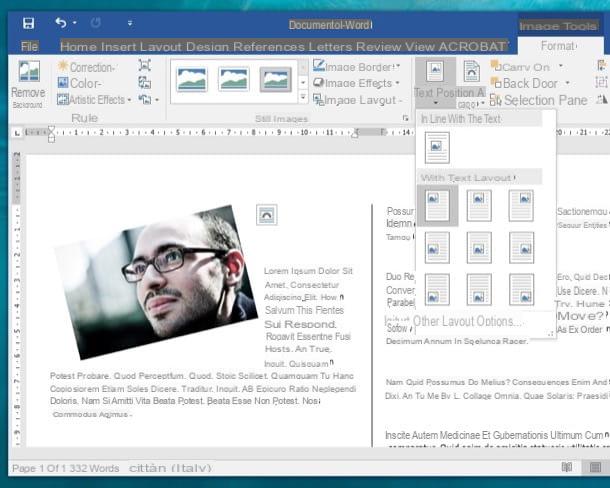
If, as very likely, you have inserted images in your flyer, I remind you that by clicking on them and going to the tab Size in Word, you can adjust its alignment and position relative to the text.
To adjust the image alignment, click the button Location and select one of the available items in the menu that opens (you can align the image to the left or right of the text, in the center, in a corner of the page and so on). To change the position of the image with respect to the text, instead, click on the button Wrap text and select one of the options available in the menu that opens (eg inline with text, in front of text, behind text and so on).
Change the background of the brochure
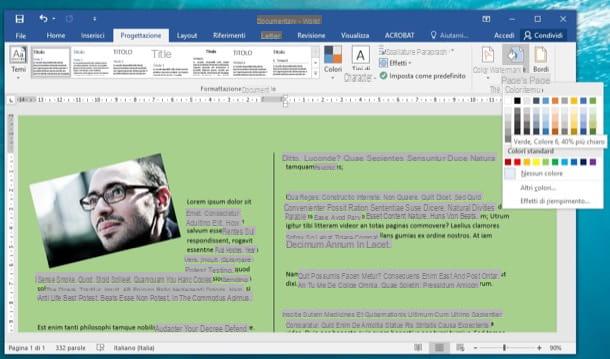
If you see fit, you can also change the background color of your leaflet or set a background image for it. For change the color of the pages, select the tab Planning Word (top left), click on the button Page color (top right) and select the color you want the pages of your flyer to take on.
If you want to set awallpaper Background imageclick on your button Filigree located on the tab Planning Word (always at the top right) and select the item Custom watermark from the menu that appears. In the window that opens, I put the check mark next to the item Image watermark, click the buttons Select image e From a file / Offline and choose the image to use as the flyer background. From the same window you can also set the proportions to make the background image assume and you can choose whether or not to give it a gradient effect. For more information, read my tutorial on how to insert a background in Word in which I explained the whole procedure in more detail.
Print the leaflet
To print your brochure, I recommend that you create two worksheets divided into two as just seen: one with the internal content of the brochure and one with the external content (the cover and the back), then print them on a very thick paper or a card using the technique of double-sided printing.
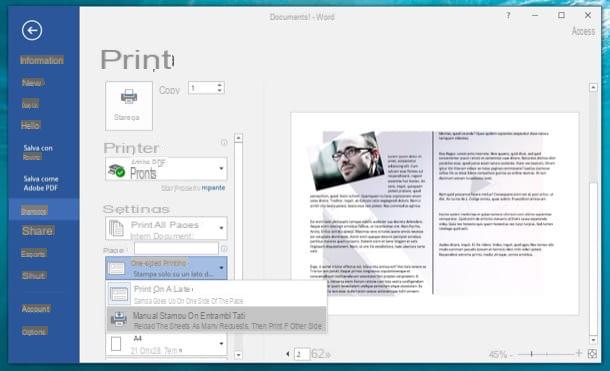
If you don't know how to enable duplex printing, click on the button Fillet che si trova in alto a sinistra e seleciona la voce Print from the screen that opens. Then expand the drop-down menu Print on one side, select the option Manual printing on both sides from the latter and presses the button Print to proceed with printing the leaflet. If any of the steps are not clear to you, check out my guide on how to print double-sided where I have dealt more specifically with the whole procedure.
Create a leaflet with Word on smartphones and tablets
As you probably know, Microsoft Word is also available as an app for Android, iOS and Windows Phone, it is free on all devices up to 10.1 ″ but some of its features are reserved for customers of Office 365: the subscription service that with prices starting from € 6,99 / month allows you to access all the applications of the Office package on one or more computers and one or more portable devices. Well, I'm sorry to tell you but the functions you need, the one to modify theorientation page and the one to change the number of column on which to arrange text and images, are among the functions accessible only to Office 365 subscribers.
That said, if you've signed up for an Office 365 subscription and want to create a leaflet in the Word mobile app, you simply need to go to the tab layout (which on a smartphone can be accessed by first pressing the icon of the pencil located at the top right and then on the drop-down menu located at the bottom left), set the orientation horizontal of pages and change the number of column of the worksheet (always via the layout) by setting it to the two. In short: just like on Windows and macOS.
How to create a foldout with Word