How to draw on Word PC
First, let's see how to draw on Word PC using the classic desktop version of the Microsoft word processor.
If you have not already done so, then, open Word on your computer and click on the entry Blank document present in the main program window, or open a document you are already working on, and follow the instructions below.
How to draw lines in Word
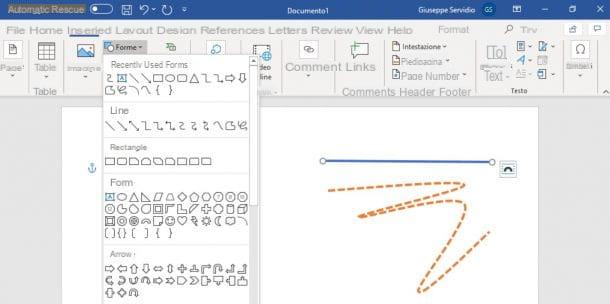
If you want to learn how to draw lines in Word, click on the tab Inserisci placed in the upper part of the Word window (on the left), then select one of the many types of lines in the section Tiers, in the opened box: No crew, Elbow connector, Curved connector, Curve, Figure by hand free: shape, Freehand figure: drawing and so on.
Next, you need to draw the line on the worksheet: if you have decided to draw a simple straight line, move the cursor to the point where you want to insert the line and, holding down the left mouse button, move it towards the desired direction, then release the pressure And that's it.
If you have decided to draw a curved line, instead, you have to click on the points where the line makes the curve and give Submit on the keyboard to complete the drawing.
Once the line has been drawn, you can move it, resize it, change its color, etc. in a very simple way. To move it, place the cursor on it and, holding down the left mouse button, drag it to the desired position. To resize it, instead, click on one of the white dots present at the ends of the line and make the shape larger or smaller according to your preferences.
To change the appearance of the line, on the other hand, after selecting it with the mouse, click on the symbol (⌵) located near the button Contour shape (l'icona della pencil present nella sezione Shape styles from the menu Size appeared in the meantime at the top right) and select the color to be given to the line by clicking on one of the colored squares in the menu that appeared on the screen (if you want to choose a custom color, just click on the button Other outline colors in the opened menu and choose the one you prefer the most).
From the menu in question, you can also select it thickness and tratteggio of the drawn line, by clicking on the appropriate items and choosing the options you prefer from the menus that are shown on the screen.
How to draw graphics in Word
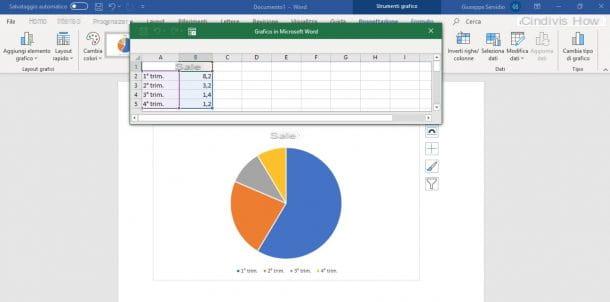
If you have come to this guide with the aim of draw graphics on Word, I'll settle you immediately. In this case, click on the tab Inserisci, select the voice Graphic and, in the window that opens, select the type of chart to insert in the document (eg. Columns, Tiers, Cake, etc.), by clicking on one of the items in the sidebar on the left).
After selecting the type of chart you prefer, click on one of the templates available in the box on the right and, when you are ready to do so, click on the button OK, to continue. As you can see, the type of graph you have chosen will be added to the Word document you are working on: to change the default data of the graph, use the window with the spreadsheet related to the chart itself, so as to customize it.
On the right of the graph there are then some buttons: by clicking on them you can customize the layout and appearance of the graph; by clicking the button instead Layout options you can choose the way the object interacts with the surrounding text; pressing the button Graphic elements you can choose whether or not to include some elements concerning the chart (eg the legend, the grid, the data label, etc.); by clicking on the button Graphic styles, you can set a style or color scheme while clicking on the button Graphic filters you can choose to change the data points and names visible in the chart.
How to draw arrows in Word

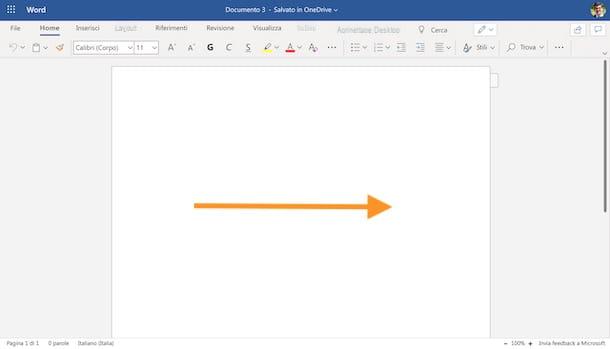
It is your intention draw arrows on Word, open the tab Inserisci program (located at the top left) and click on one of the arrows present in the sections Tiers e Arrows of the pane that has just opened (eg. Arrow, Arrow: double, Connector: curved arrow; Right arrow, Circular arrow to the left and so on).
Next, you need to draw the arrow: to do this, move the cursor to the point where you want to insert the shape and, while holding down the left mouse button, move it towards the desired direction. Then release the pressure of the key to complete the drawing.
Once the arrow is made, you can move it, resize it, customize its appearance, etc. very simply. To move it, make the cursor rest on it and, holding down the left mouse button, drag it where you prefer; to resize it, instead, click on one of the white dots present at its ends and enlarge or reduce it by dragging the latter to the desired position; dragging i yellow dots present in some types of arrows, moreover, you can change the curvature, the thickness and the tip of the latter.
To change the appearance of an arrow, instead, select it with the mouse, click on the symbol (⌵) placed next to the button Contour shape (the symbol of pencil present nella sezione Shape styles from the menu Size appeared at the top right) and select the color to give to the outline of the arrow by clicking on one of the colored squares present in the opened menu. To choose a custom color, just click on the button Other outline colors.
You can also customize the fill color of some arrows. To do this, click on the symbol (⌵) placed next to the button Form filling (the symbol of bucket located in the section Shape styles from the menu Size appeared at the top right) and select the color you prefer to use, by clicking on one of the colored squares, or by selecting a customized one, using the button Other fill colors.
How to draw in Word online
Do you want to draw on Word Online, the online version of Word that can be used on all major web browsers at no cost? Well, know that it is possible to do this, either by creating new documents or by modifying existing ones (button Load and open).
As for its operation, you can refer to the instructions I gave you in the chapter dedicated to Word for PC, since the operation is practically identical.
How to draw in Word for smartphones and tablets
Now is the time to see how to draw in Word for smartphones and tablets, using the Word app for Android and iOS / iPadOS, which can be used for free on devices with dimensions equal to or less than 10.1 ″ (otherwise you have to subscribe to Microsoft 365, which starts at 7 euros / month).
Since the procedures to follow on the tablet version are almost identical to those I indicated in the chapter dedicated to the desktop version of Word, below I will focus mainly on the smartphone version.
How to draw lines in Word
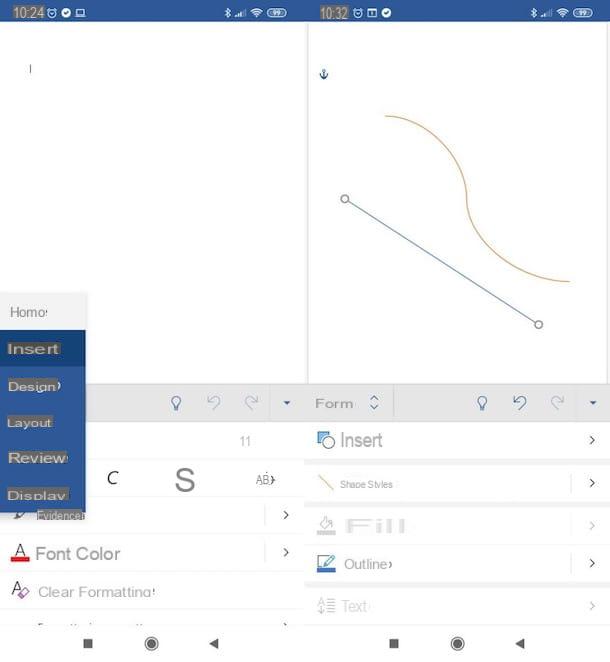
draw lines on Word from smartphone, after creating or opening the document of your interest, tap on A with the pencil placed at the top, presses on the card Home (bottom left) and tap on the item Inserisci. At this point, fai tap sulla voce Form, locate the section Tiers and, after selecting the line of your interest, it will be automatically inserted in the worksheet.
To move it, you simply have to keep your finger pressed on it and drag it to the desired point. To resize it, just click on one of the white dots at the ends of the line and drag them to change the size of the shape.
To change the color of the line, on the other hand, after tapping on it, select the item Boundary and choose the fill color you prefer by pressing on one of the colored squares or your voice Another colors (to select a custom color).
If you want, you can also draw freehand lines. After pressing on A with the pencil and have selected the tab Home (bottom left), presses on the voice Design, select the tool Pen and, after adjusting the colore and thickness section (using the appropriate buttons) and having activated the function Draw with mouse or touch (from the menu below), draw the line using your finger or a touch-screen pen.
If you prefer to act from tabletinstead, just tap on the tab Inserisci, select the button Form and select the type of line to be traced on the sheet.
How to draw graphics in Word
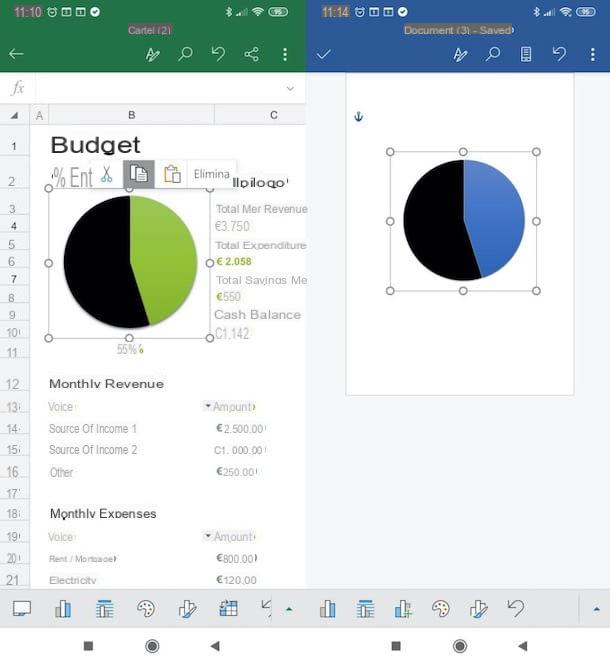
If you want draw graphics on Word acting as a mobile, I have to give you bad news: at the time of writing, it is not possible to do this. The only thing you can do is create the chart on Excel, using the appropriate app for Android and iOS / iPadOS and copy it into the Word document.
In any case, this is a practice that I generally do not recommend, since the data modified in Excel, once the chart is pasted on the text document, is not synchronized to Word.
If you really want to draw a graph in Word, I recommend that you act from its desktop version of the program, following the steps I gave you earlier.
How to draw arrows in Word
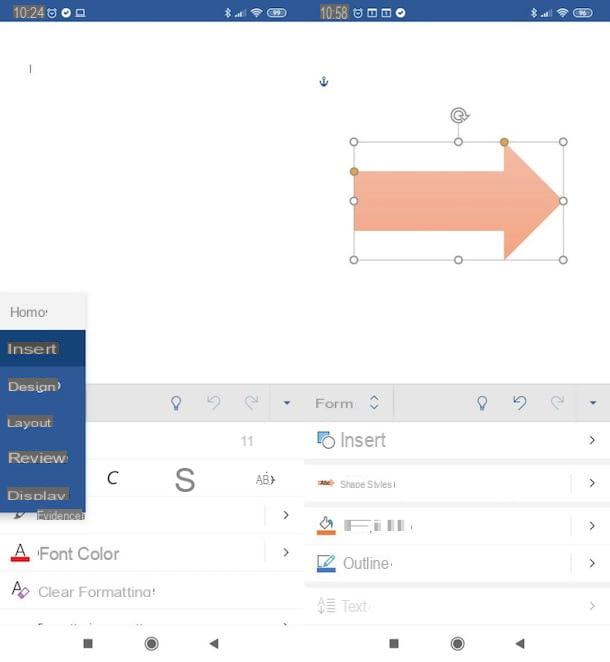
draw arrows on Word from your smartphone, after having opened or created the document of your interest, tap on the icon of A with the pencil which is located at the top, press on the tab Home located at the bottom left, tap on the wording Inserisci and select the item Form in the opened menu.
Then identify the type of arrow you are interested in (there are several in both the Arrows than in the section Tiers) and, as if by magic, this will automatically be inserted into the worksheet.
To move the arrow, then, keep your finger pressed on it and drag it to the desired point. To resize it, instead, hold your finger and press on one of the white dots at the ends of the arrow and drag them to make the shape larger or smaller.
Doing the same thing on the yellow dots, available for some types of arrows, you can instead modify their curvature, thickness and tip.
To customize the color of the arrow, on the other hand, after tapping on it, select the item Filling and presses on one of the colored squares or your voice Another colors, to choose another color of your liking.
In case you want to draw a freehand arrow, after pressing on A with the pencil and have selected the tab Home (bottom left), tap on the item Design, select the tool Pen and, once you have chosen the colore and thickness section (using the appropriate buttons) and having activated the function Draw with mouse or touch (from the menu located below), draw the arrow with your finger or a touch-screen pen.
In case you prefer to act from tablet, just activate the card Inserisci, press on the voice Form and choose the type of arrow to be included in the document.
How to draw in Word