The reasons why the need arises record the computer screen there are many, such as if you want to make a video tutorial for a program, make a video presentation for work or entertainment, or more. Fortunately, there is no shortage of solutions for recording video and audio (simultaneously) on the computer screen and below we want to report one of the best programs for record PC screen with Voice, that is, able to record everything that happens on your desktop while you speak for the description of the various steps.
Article index:
- Part 1. Preparation to record PC screen
- Part 2. Record PC Screen with Audio (Microphone Voice)
- Part 3. Advice on registration
Part 1. Preparation for PC / Mac screen recording
Whatever you want to record on the desktop, you must first understand the software to use to do this. While Mac users can take advantage of QuickTime Player for the screen recording, Windows users do not have an app already integrated into the Windows operating system.
But you can rely on professional software Screen Recorder which can be the perfect tool for Windows and Mac users to capture computer screen, record any part of desktop, create online video, record games or webcam video, online meeting, etc ...
Part 2. Record PC / Mac Screen with Voice (Microphone)
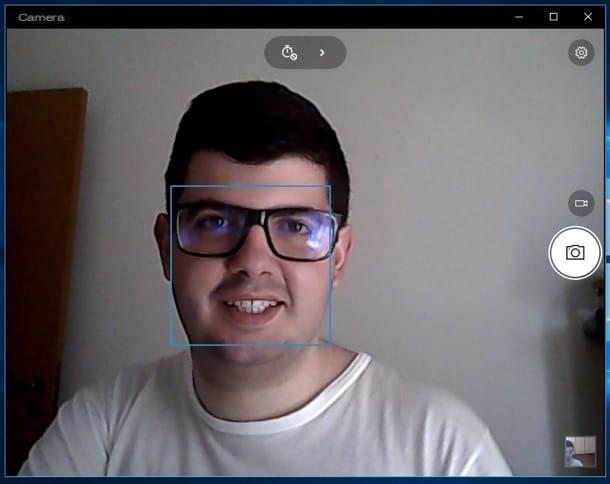
Step 1. Install and launch Screen Recorder on your PC or Mac
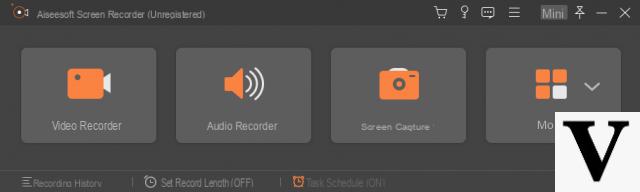
Download the software to your computer for free. Follow the on-screen instructions to install and run it. After installation this bar will open:
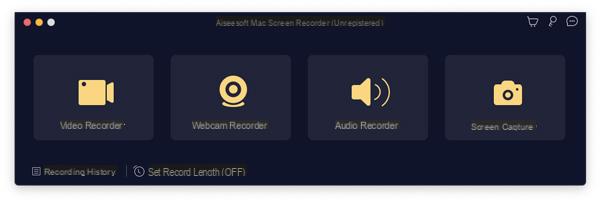
On mac you will see an interface very similar to that of Windows:
Step 2. Record Settings
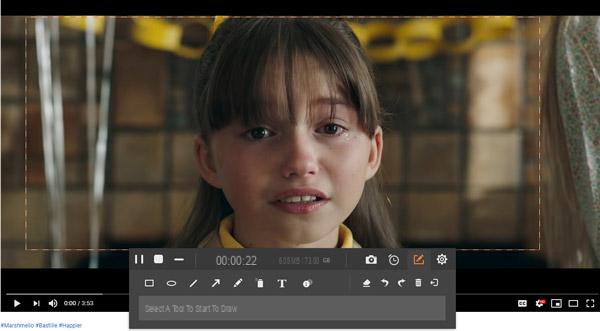
In the main interface, you need to click "Video recorder”To record video with or without audio.
At this point you will see the following screen:
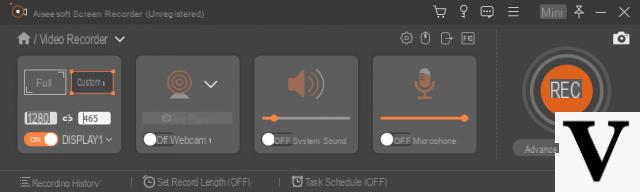
You will have three options related to the registration area:
Fixed region: you can select the fixed window and drag the cursor to position the frame where you want to record.
Full screen: you can capture the entire screen via this option.
Custom: you can use the mouse to draw the rectangle area to decide the recording area.
As for the audio instead, you can decide whether or not to activate recording via microphone or system audio recording from the two areas on the right, as highlighted in the following figure:
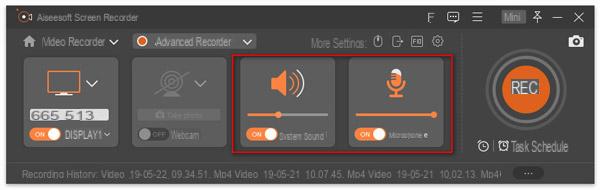
This software supports audio recording from PC internal card (system sounds) and microphone. You can activate / deactivate both or one of them.
System sound: when you want to record video with audio from your computer system, you need to enable this option.
Microphone: When you wish record your voice from the microphone, this option must be activated.
For example, if you want to record an online video call with your friends, such as recording a video call on Skype, then we recommend that you activate both options!
If, on the other hand, you want to record streaming videos from YouTube or record movies on Netflix (from PC), it is necessary to activate the system audio and deactivate the microphone to avoid interference and various noises.
By clicking on the gear icon at the top right you will access the program settings:

From this window you can set up recording, mouse, keyboard shortcuts, output and more.
Registration: Here you can set a countdown before recording, hide the floating bar, desktop icons, etc.
Mouse: Shows or hides the mouse cursor and changes the colors of the mouse clicks.
Shortcuts: You can set hotkeys to stop, pause and resume recording, take screenshots, etc.
output: You can adjust the recording position, snapshot format, video / audio format (MP4, MOV, F4V, AVI, TS, GIF, WMA, MP3, AAC and M4A), video / audio quality, etc.
Step 3. Record video screen with Voice
When all the settings are OK, you just need to click the "REC”To start screen recording. While recording, you can click the “Edit” button to draw, add caption, caption, blur, airbrush, etc.
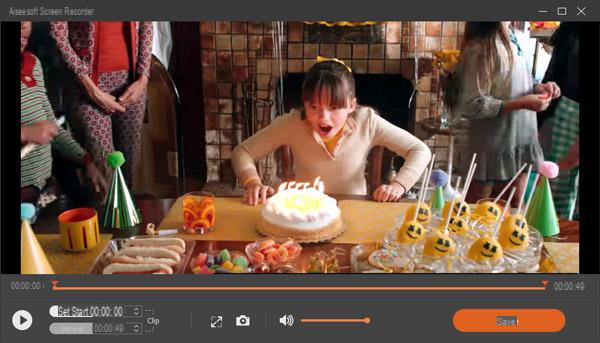
Step 4. Preview and save recorded video
After completing the recording, click the stop button and preview the recording.
Here the trimming function is available to cut unwanted recordings.
Click the "Save”To save the recordings on your computer.
Part 3. Notes on registration
With Screen Recorder, it is very easy to record your computer's desktop. However, there are still some tips to consider while recording your desktop screen. Here are the:
> Work in a quiet environment
Whether you want to record your voice with the microphone, or want to record computer music from the system, you need a "quiet" environment. Noise will disturb the screen audio recording and your work.
> Manage your computer desktop
If you want to create video tutorials and share your computer screen, it is good to clean your computer desktop and remove unnecessary icons, because icons on your computer may reveal your private information and make your recording messy.
> Use good hardware
The resolution of the computer screen, CPU, graphics card, etc. they are all hardware components that also affect the quality of the screen recording.
It is impossible to create a high resolution 4K screen recording with a 1080p resolution screen. Poor CPU also affects recording speed.
Is it also possible to play background music while recording the PC screen?
-
Yes, you just have to play some music on your computer while you record and automatically you will also have the background music to your video.
Just make sure to turn on system audio recording on the program's taskbar.