If you've wondered how reinstall Linux Ubuntu on my PC?, or because the system becomes slow, or you just want to restore it to factory state, because here we will explain how to do it without losing files.
Like any other operating system, Ubuntu can be affected by bugs and problems, this usually happens when we have been using the operating system for a long time. Ubuntu, like other Linux distributions, has a large number of tools that we can have access to right from the start.
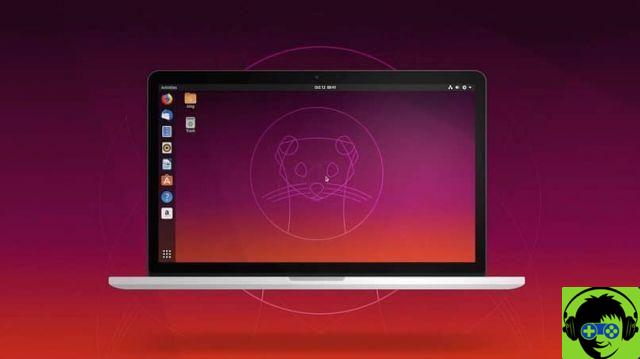
How to reinstall Linux Ubuntu to repair and recover files?
First, as usual, it doesn't hurt to back up your files. This is to avoid losses due to human error during reinstallation. This is something that will take no time and can be very useful.
You also need to have the ISO image of the system to be able to install it, this can be obtained from any database of Linux systems, if you still keep the previous one you will also need it.
First you need to boot the ISO image to a USB drive, after which we will proceed to restart the computer. While it turns on we have to press the start key, usually it is the F11, but this varies depending on the model of computer you have. In some cases when it turns on it appears in a corner which is the indicated button. Pressing it will open a window with all units connected to the PC, you have to choose the one for your pendrive.

Usually in Linux installations a black window appears with a list of options. Here we will only have to select install, after which the installer will open and in this menu you will first have to choose the language and click Next, then you will have to select to install the multimedia packages and finally and, most importantly, click on «reinstall». This will not delete any files.
What happens to my computer when I reinstall Ubuntu?
When we install an operating system, what we do is copy some key files from USB to main disk. This provides the information necessary for all system files to be installed. This is the common way to install an operating system and it is almost always done from scratch.
For this reason all files are deleted, as the installation wizard itself does a quick format to our unit. By allowing it to be cleaned of any viruses or corrupted files, personal data is lost in this type of installation, so it is not recommended in cases where information cannot be lost.
In this particular case, what we're doing is a similar process, but eliminating the factor that deletes files. When we reinstall a system, we don't format the hard drive, but we replace the original files with the new ones, thus allowing for error correction.
Depending on the Ubuntu version we will install, we may have a different tool. So we have to take into account what our needs are in order to choose the best version.
What reasons may lead me to want to reinstall my system?
Ubuntu is one of the Linux distributions most used nowadays, which has a very pleasant graphical interface to look at. In addition to being based on Linux, it does not require special attention.

However, although it is common to think that this system is completely safe against attack. The reality is that Viruses have been developed that can damage it, so currently you need to be careful when installing applications.
The reasons why someone needs reinstall Ubuntu they can be very different, but it is usually due to some error while installing a plug-in. And that this is responsible for the partial corruption of the system or the elimination of utilities from it.
Fortunately, that's not necessary for us to lose our files during this operation and in case a backup is impossible. We will be able to perform the same process and will not lose our database.
How to recover deleted or corrupted files with Linux Ubuntu
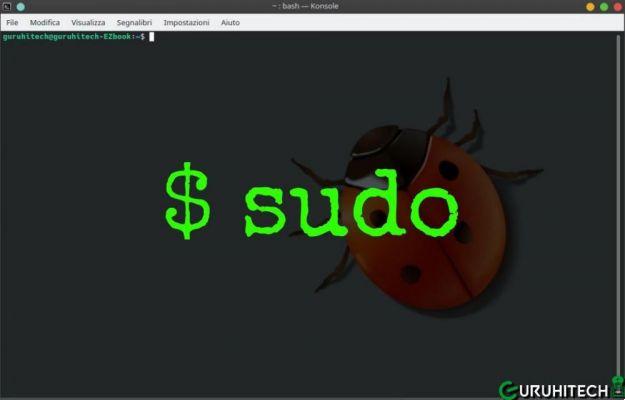
Linux Ubuntu offers its users several very versatile tools for recover deleted or damaged files. And in this case we will use TestDisk, which we must first install via the direct package manager. For this we will use the following command 'sudo apt Install testdisk'.
The next step we will take is to run this tool and for it we will use the following command 'testdisk sudo'. This action will generate a series of options to be displayed on the screen, to navigate between them you need to use the keyboard arrows. The next step is to select the "Create" option and then press the Enter key.
When you perform this action, the different disks will appear on the screen and you will need to choose the one where the file was located. Then select the «Continue» option, now we will select the partition type and then the «Advanced» option. Now we will select the partition which will generally be the one with the most sectors and then we will select the 'Restore' option.
Now we will observe that the deleted file will be shown on the screen, the next step to recover it is to select it and then we will press the C key. And finally we will choose the location we will give to the recovered file. And ready this way you have recovered a deleted file using a very efficient tool in Linux Ubuntu.

How can I easily install Ubuntu on Windows 10?
Installing Linux Ubuntu on Windows 10 can be a very simple task to perform as well in our case we will show you how to install version 19.10. But first you will need to activate the Windows subsystem for Linux WSL.
And to do this, go to the Windows Start button, then select "Control Panel", then "Program" and finally select " Turn Windows features on or off ". In these windows you will have several options and check the "Windows for Linux" subsystem box.
Once this step is complete, you need to download Linux Ubuntu and to do that we will go to the Start menu and select 'Microsoft Store'. From this application we will search for the latest version available and in our case it's Ubuntu 19.10 LTS. Then we have to click on the "Install" option.
After the download is complete, we need to go back to the start menu and search for Linux Ubuntu which we will select to start the application. All we have to do is go through the setup process, where it will ask us to enter a username and password. And ready in this simple way we have installed Linux Ubuntu on Windows 10.
How to install and boot Ubuntu from USB or Pendrive
In case you have Linux Ubuntu on USB or Pendrive and you want to install and boot it on your computer, you just need to follow these simple steps. First you need to download UNetBootin on your PC, which you can do very simply from the Synaptic tool. You should also download the Linux Ubuntu ISO image to your computer.
Once these steps have been performed, you need to go to "Applications" and then select the "System Tools" option and run UNetBootin from there. The next step is to insert the USB drive into the input port. You will be asked to choose a source and in our case we will select the ISO image we previously downloaded.
Now we have to choose the destination and select the Pendrive or USB drive and then press the 'OK' option. The process will begin and this may take a few minutes, upon completion you will need to proceed to restart your PC and run the BIOS settings. This is so that the boot is done from the USB drive or the Pendrive.

Change the BIOS settings
In order to enter the BIOS e thus being able to modify its configuration, we must, as we said, restart the PC. When the process of starting and loading the operating system, repeatedly press the «Cancel» or «Esc» key. Although in some devices this key may vary and could be F1, F2, F10 keys. F11, F12, to enter the BIOS.
Choose the boot mode
Once we enter the BIOS we will be able to make the necessary changes in its configuration to choose how to boot from the USB drive. We will then use the arrow key to move to this window. And in our case we will select the option «Advanced BIOS features» and then we will press the Enter key.
We will be taken to a new window and in it we will find several options in which we will locate the option that will allow us to start from the Pendrive. We will then go to the First Boot Device option where the CDROM option is marked. And we will change this selection to USB, then press the F10 key to save and exit the BIOS.
How to create boot memory for Ubuntu
To create boot memory for Ubuntu you need to do the following, vai al program Boot Disk Creator. Once there, you will select the ISO image to load, the next step is to choose the USB drive or the Pendrive. To finish you need to select the 'Create startup disk' option and wait for the process to complete.
Can Ubuntu be used without installing on the computer?
One of the many advantages that distribution offers us Ubuntu Linux is that it can be used without having to be installed on our personal computer. Since it allows it to be run from RAM in Live mode. This way we will use this amazing tool without taking up space on our hard drive.
How to use Ubuntu without installing it
One of the advantages that this Ubuntu Linux distribution offers us is that we can use it without having to download it to our hard drive. As we have already mentioned, it is possible to use this instrument from a USB memory and use the Live mode. But we can also use Ubuntu via the VirtualBox program.
Ways to Install Linux Ubuntu on VirtualBox - How to
While it may not seem like it, installing Linux Ubuntu via the VirtualBox program is very simple and will only take a few steps. The first and most logical step is download the VirtualBox program on your PC. This tool is available for computers with Linux, Windows and MacOS operating systems.
The next step is download the Ubuntu ISO file, this must be the latest version and LTS. Which can be contained in a USB stick or Pendrive, but it can also be on a DVD. Having all this, we will need to configure a virtual machine and for this we will open the VirtualBox program, in it we will select the "New" option.
Now we will put the name which can be the Ubuntu version installed, in Type we will select Linux and in the version we will choose Ubuntu 64 bit and click on 'Next'. Now we are going to determine which will be the size area of the memory who will have the our virtual machine, which must have 25% of the RAM memory and then click on 'Next'.
The next step is to create a virtual disk and for this we will select the "Create" option, then the VDI option must be selected and click "Next". The next step is to select the "Dynamically assigned" option and then click "Next". Finally select the Create option, now we just have to attach the ISO to the virtual disk drive.

The next step is to choose the Ubuntu virtual machine and select the option «Settings», then «Storage». Then choose «Controller IDE», then in the attributes window you have to choose the IDE Secondary Master option. The next step is to select " Choose a file on disk » and you will find and select the Ubuntu ISO option and finally "OK" and then "OK".
Now you will just have to boot into Ubuntu so that the virtual machine loads and then you can click on one of the two options the system will give you. But in our case we will click on the "Install Ubuntu" option. After the installation is complete you will proceed to make the configuration settings that the installation wizard will show you.

![[Solved] Headphones connected to PC but audio coming out of the Speakers? -](/images/posts/ef3c1bf530218782f3bf61ff7d2e07d1-0.jpg)