You are not very familiar with computers, far from it, but with a little good will you were able to download all the photo that you took during the last weekend out of town. Now, however, you are faced with a small obstacle: there are some inverted images, taken vertically instead of horizontally, and you don't know how to “straighten” them.
No fear. Regardless of the device you use, be it computer, smartphone or tablet, you can easily rotate images that are not oriented in the right direction, even without installing any additional software. The subject of this guide will be, in fact, to explain to you how to rotate a photo through the integrated functions of the operating system you are using, or through some famous programs and apps dedicated to the manipulation of images and / or the creation of documents.
So, without hesitating a single second more, make yourself comfortable and carefully read everything I have to explain to you on the subject: I'm sure that, in a couple of minutes, you will be able to acquire the skills necessary to achieve the goal that you set out. That said, there is nothing left for me to do but wish you good reading and good work!
How to rotate a photo on Windows
Rotate a photo on Windows 10 it's much simpler than you can imagine! After opening the image in the Photos program pre-installed in the operating system (you should just double click on the image, otherwise right click and select Gallery from the list Open with that is proposed to you), click on the icon of circular arrow (located at the top) for turn it 90 ° and repeat pressing the same button to apply a rotation of 180 ° or 270 °.
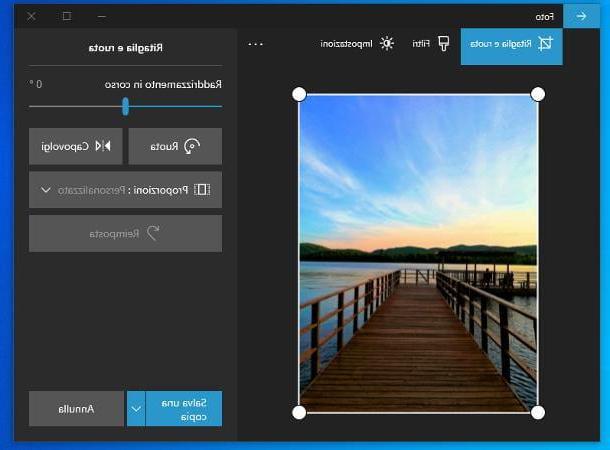
If, on the other hand, you are interested in rotating the photo slightly to "straighten it", do this: click on the icon crossed pencils located at the top right, select the item Modification from the proposed menu and click on the tab Crop and rotate, placed at the top.
Finally, use the slider under the item Straightening in progress to define the straightening angle to apply. Using the button Flipinstead, you can rotate the mirror image. When you are done, click on the button Save a copy, per confermare I modify it apportate.
Alternatively, you can quickly rotate an image 90 °, to the right or to the left, using the context menu of File Explorer: to do this, right-click on the icon of the photo of your interest and click on the items Rotate to the right o Rotate to the left attached to the proposed context menu. This procedure also applies to pre-10 editions of Windows.
How to rotate a photo on macOS
A Mac, you will be pleased to know that Gallery, il programma principale dedicato alla gestione delle libreria fotografica su macOS, include una serie di strumenti di manipolazione basilare, tra cui un sistema per ruotare le foto (ed eventualmente raddrizzarle).
Dunque, per prima cosa, avvia l’applicazione Gallery (l'icona a forma di stylized flower attached to the Dock bar), locate the image you want to retouch and double-click its preview to open it. If the file in question is not present in Photos, locate its icon in the Finder and drag it into the Photos window.
Once this is done, use the button Wheel (Quello with l'icona del rectangle with angular arrow) to turn the photo of 90 ° counterclockwiseby repeating the pressure of the same key several times to apply a rotation of 180 ° or 270 °.
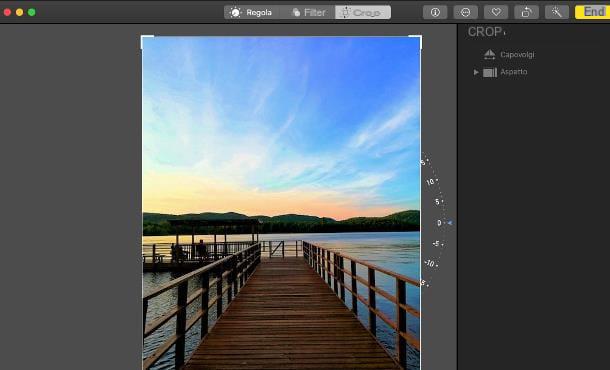
If you wish, you can use the same program for straighten the image o flip it horizontally, applying the so-called mirror effect: to be able to do this, click on the button Modification located at the top right, then presses on the card Cut out and use the slider next to the image to straighten it, and / or the button Flip, to reflect it horizontally. Anyway, once you have completed the changes, click on the button end located at the top right and that's it!
In alternate, you can also use Preview, by opening the photo of your interest in this application and selecting one of the rotation options in the menu Instruments, up. If you are interested in learning more, take a look at my guide to programs for straightening photos, in which I told you about numerous other solutions of this type.
How to rotate a photo on Android
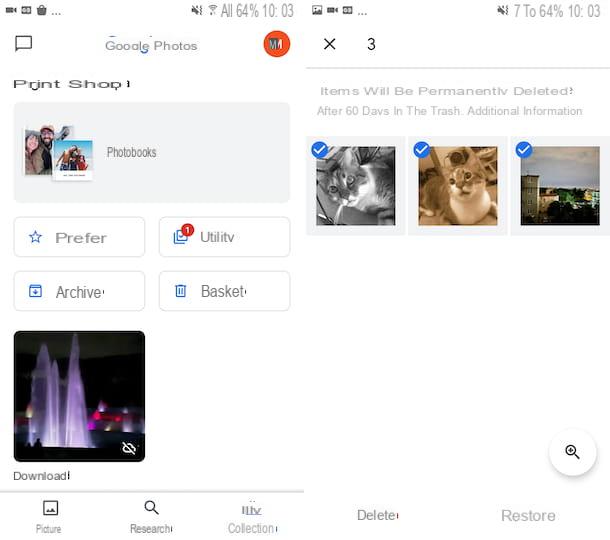
Shoot a photo on Android it's really a no-brainer! To begin with, open the photo of your interest using the photo management app installed on your device (eg Google Photos) and tap on the regulators located at the bottom to access the editing area.
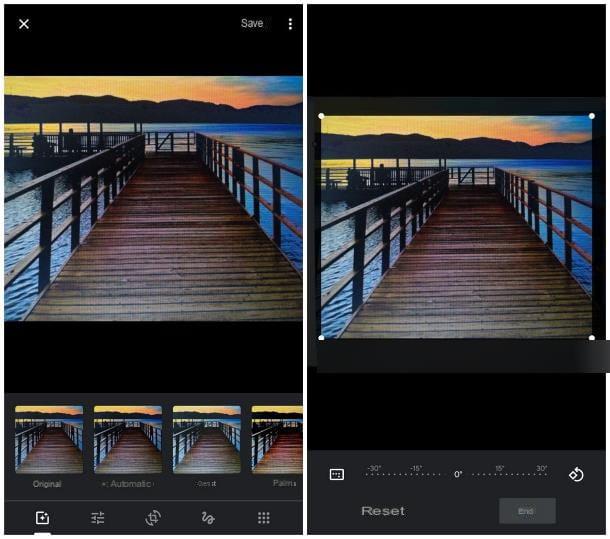
Next, tap on the icon of Crossed L (located at the bottom, center), to view the rotation options, and tap the button several times wheel (the one with the circular arrow with rhombus) to rotate the photo 90 °, 180 ° or 270 ° to the left.
Se, invece, ti interessa raddrizzare l’immagine (applicando dunque un angolo di rotazione/espansione personalizzato), intervieni sull’apposito cursore posto subito sotto l’immagine. Quando hai finito, tocca il pulsante end and then the voice Save, to apply the changes made.
In case of need, you will be pleased to know that you can rotate a photo into a mirror using apps like Snapseed o Flip Image: to learn more, see my guide on apps to shoot photos.
How to rotate a photo on iPhone
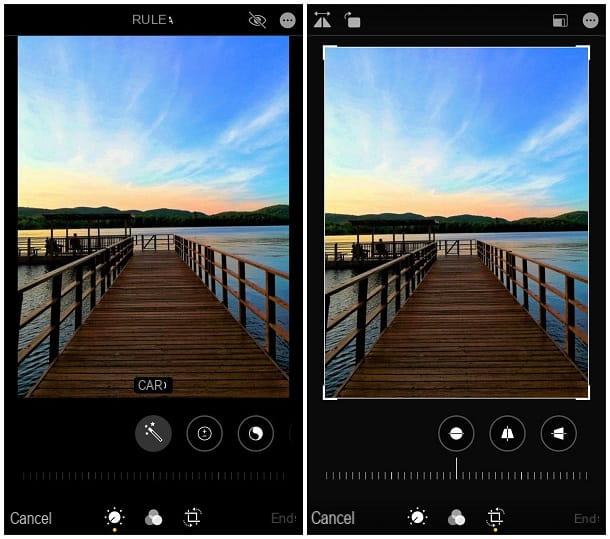
Apply a rotation to photos saved to iPhone è tutt’altro che difficile: tanto per iniziare, apri l’immagine di tuo interesse all’interno dell’app Gallery, touches the voice Modification e fai tap sul pulsating Crop and rotate, the one with the icon of Crossed L with angular arrows.
Now, use the button Wheel (The rectangle with curved arrow) placed at the top to apply a 90 ° rotation to the right (repeated presses will rotate the image 180 ° and 270 °); to apply themirror effect, touch the button next to it instead (i two triangles with arrows). Finally, if you want to straighten the image further, use the slider placed under its preview. When you're done, tap the item end to apply the changes made.
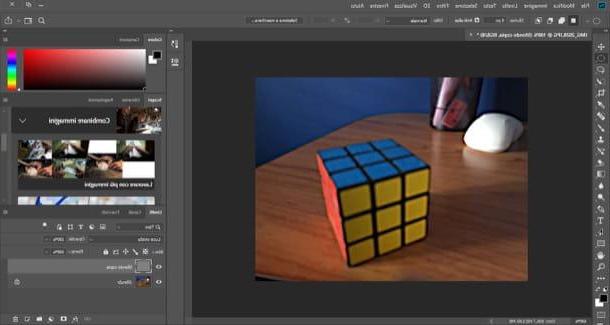
How to rotate a photo in Photoshop
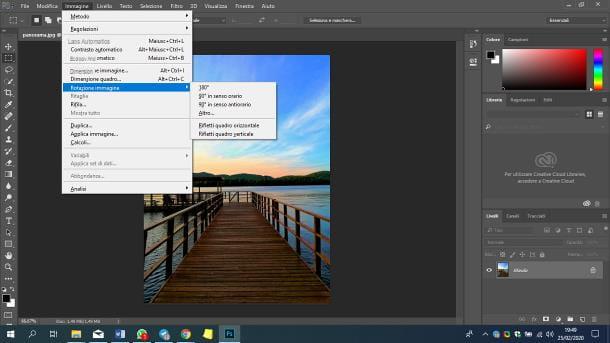
The steps to take for rotate a photo in Photoshop for computers are very simple: after loading the image into the program, click on the menu Image (located at the top), select the item Rotation Image and, using the sub-menu displayed on the screen, choose whether to rotate the image of 180 °, of 90 ° clockwise, of 90 ° counterclockwise, or by defining a custom angle (option Other…).
If you see fit, you can rotate a mirror photo making use of the option Flip Horizontal Picture, or flip it using the option Flip Vertical Picture.
It was used Adobe Photoshop Express, that is the mobile counterpart of Photoshop available for Android, iOS and iPadOS, do this instead: after importing the image of your interest in the app, tap the button Cut out (Quello forma di intersected corners, which is at the bottom center), select the tab Wheel and, using the cursor displayed on the screen, define therotation angle to apply.
If you see fit, you can straighten the image automatically (button straighten), ruotarla di 90° per volta, in senso orario (pulsante wheel), reflect it in a mirror (button mirror horizon) or turn it over (button reflect vert). When you're done, tap the button sharing and choose the option for save the file in memory.
To learn more about how to use Photoshop, I refer you to reading the user guide that I have dedicated entirely to this software.
How to rotate a photo in Word
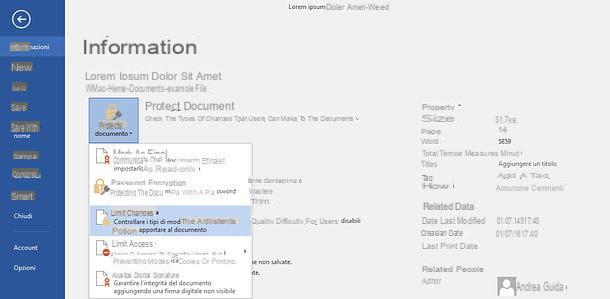
Rotate a photo presente in un documento di Word è oltremodo semplice: se utilizzi Word per computer, right click on the image in question, select the item Dimensions and positions from the proposed context menu and click on the tab Dimension, located at the top. Finally, he indicates therotation angle to be applied within the text field Wheel.
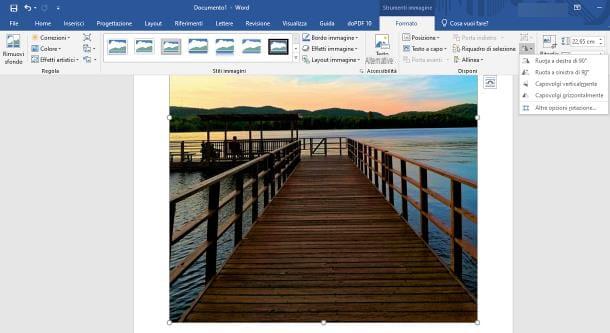
If you prefer, you can get the same result using a function included in the Word toolbar: click on the image of your interest, in order to highlight the card Size, premium pulsating Rotate objects (l'icona dei due triangoli con la freccia) and indicate the angle of rotation of your interest (90 ° to the right, 90 ° to the left, horizontal flip o vertical) by selecting it from the proposed choices.
To turn a photo into Word for smartphones and tablets, instead tap on the image in the document, tap the menu functions located at the bottom and choose the option Design. At this point, locate the item Organize, tap on it and use the options Rotate 90 ° to the right, Rotate 90 ° to the left, Flip horizontally e Flip vertically to act on the image.
Alternatively, "grab" the round arrow at the top of the photo and drag it until you reach the desired degree of rotation. For more information about image manipulation in Word, you can read the specific study I made on the subject.
Come ruotare una foto su Open Office Writer
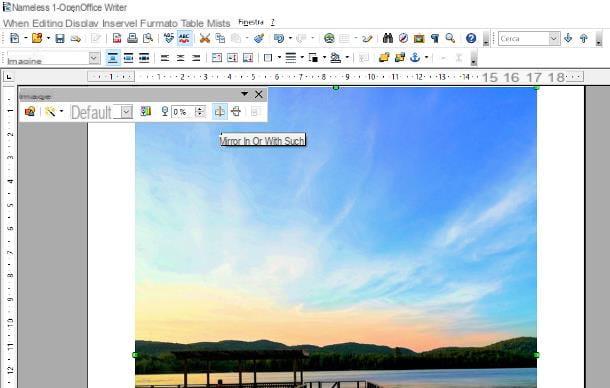
You are editing a document on OpenOffice Writer and you need to rotate a photo inside it? In this case, I believe it is right to specify that, in the current state of things, the program only allows you to reflect images horizontally (mirror effect) or vertically.
To do this, locate the image in the document you are interested in, click on it and, to reflect the image, click on the buttons Mirror horizontally o Mirror vertically located on the right side of the small toolbar that appears at the top.
If you need to apply very specific angles of rotation, I advise you to act directly on the original image file using one of the alternative methods that I have shown you in this guide, before even adding the photo to the OpenOffice document.
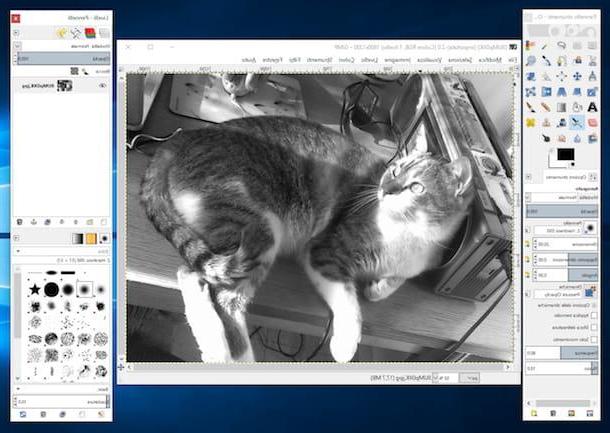
How to rotate a photo in Lightroom
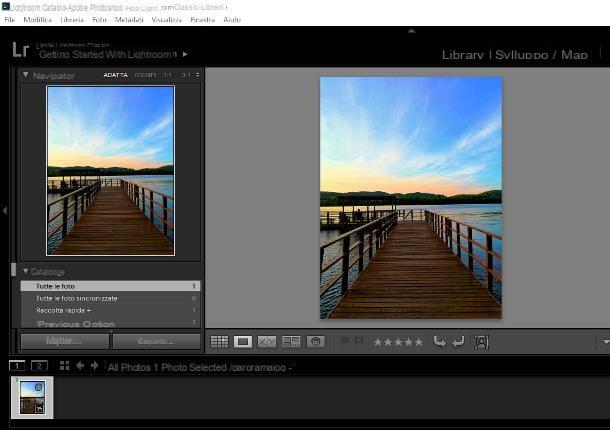
You need rotate a photo imported into a project Adobe Lightroom? Nothing simpler! To begin with, locate the image of your interest from the view library, double click on it, to enlarge it, and use the curved arrows placed just below the main frame, to rotate the photo 90 ° to the right or left.
If you prefer, you can get the same result using the context menu of the image: then right-click on the preview of the photo on the timeline and select the item Rotate left (counterclockwise) o Rotate right (clockwise) to turn the photo to your liking.
If you want to change the orientation of a photo even more quickly, move the mouse cursor over its preview and use the curved arrows that appear overlay to rotate the corresponding image.
If, on the other hand, you are interested rotate a photo in Lightroom for Android or iOS / iPadOS, after opening the image, tap the button Cut out located at the bottom and use the buttons that are proposed to you, to carry out the requested operation: turn right to turn the photo 90 ° clockwise, turn left to apply a 90 ° counterclockwise rotation, mirror horizon to apply the mirror effect e reflect vert. to flip the image.
To straighten the photo, you can instead act on the slider placed under the image preview. When you're done, tap the checkmark located at the top left, in order to save the changes applied.
How to rotate a photo on iMovie
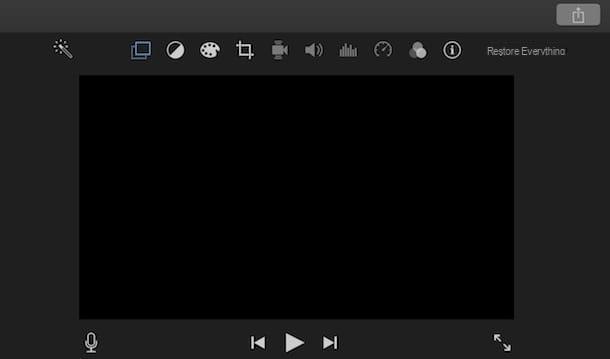
As you certainly know, iMovie per macOS includes a handy toolbar (just above the player) that allows you to make a variety of enhancements to the images and clips included in the project, including image rotation.
So, first of all, select the content of your interest (photos or videos) from the timeline, click on the icon clipping (the two Crossed L) placed immediately above the viewer and use the buttons that are proposed to you for rotate the image clockwise, turn it counterclockwise, reflect it horizontally or vertically.
Unfortunately, iMovie for iOS and iPadOS does not allow to rotate still images, but only the movies added to the project. To do so, select the video from the animation timeline, tap the scissors and, through the thumb and forefinger of your hand, makes a “rotation” movement on the preview of the movie, in order to rotate it by 90 °. Repeat the same operation several times to apply 180 ° or 270 ° rotation.
For more information about using iMovie for Mac, iOS and iPadOS, please consult the in-depth guide I dedicated to the topic.
How to rotate a photo on Facebook
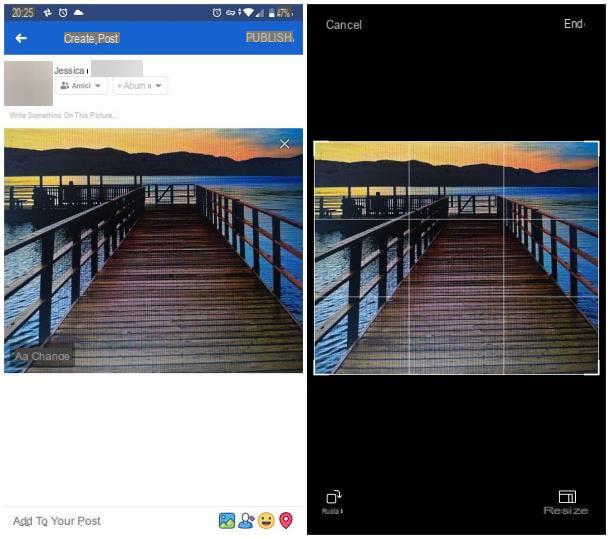
If you need to rotate a photo on Facebook (Android / iOS / iPadOS), do this: after starting the phase of composing a new post with image, tap on the item Modification located in the lower left corner of the photo, tap the button Cut out (bottom left) and then touch the button Wheel, located in the same position, to rotate the photo of 90 ° clockwise.
By pressing the aforementioned button several times, you can also apply a rotation of 180 ° and 270 ° (which correspond to 90 ° counterclockwise). When you're done, tap on the item end to confirm the changes applied, then on the button end and finish creating the post as you normally would.
If you use Facebook from your computer, instead, do this: after uploading the photo of your interest, place the mouse on its preview click on the icon of the brush that appears as an overlay and click on the button Cut out, located in the sidebar of the panel that appears. Finally, press the button several times Wheel to apply a rotation of 90 °, 180 ° or 270 ° and confirm the changes by clicking on the button Save, located at the bottom right.
For more information, I invite you to take a look at my guide on how to post photos on Facebook.
How to rotate a photo on Instagram
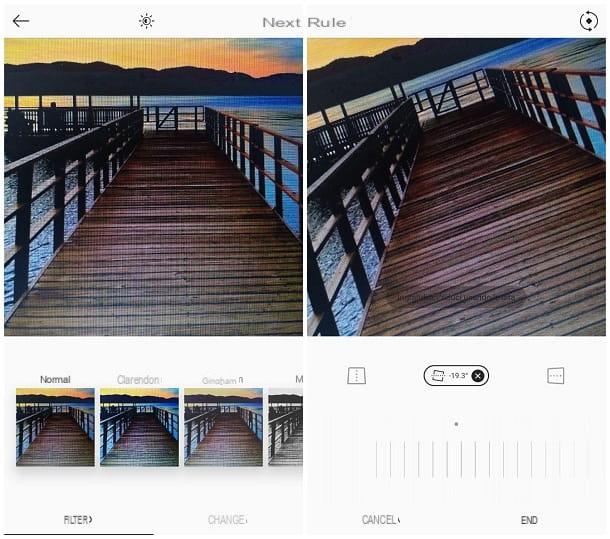
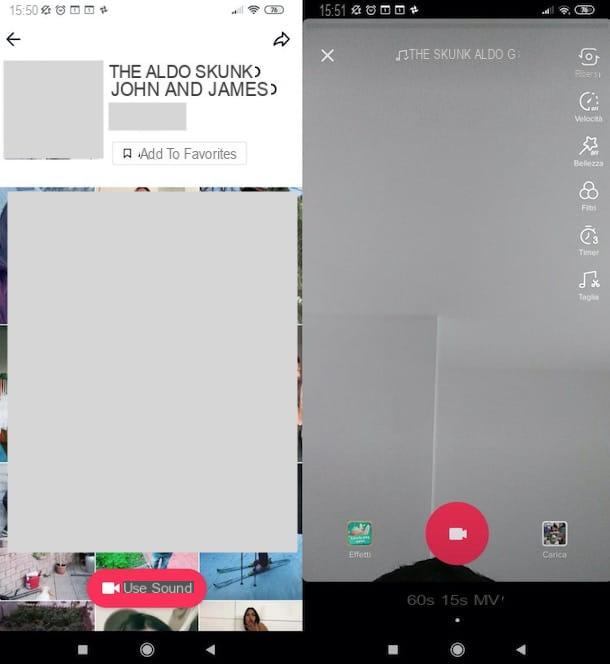
To rotate a photo to post on Instagram (Android / iPhone), proceed as follows: after starting the classic procedure for creating a new post and uploading (or taking) the image of your interest, tap on the tab Modification and then on the button Rule, to access photo customization options.
Now, tap on the icon circular arrows, located at the top right, for rotate the image 90 ° clockwise (pressing the same icon several times to obtain a rotation of 180 ° and 270 °).
Finally, if you prefer to apply an additional level of partial rotation / enlargement, tap the button with the icon of square with dashed line, which is located in the center, and use the cursor immediately below the image to define the angle of rotation. To learn more, feel free to check out my guide on how to upload photos to Instagram.
How to rotate a photo