Downloading all your photos from Facebook is a quick and easy process, but what if you want to keep them without consuming space on your device? The best option is to transfer them to Google Photos, a cloud image storage platform where you can save all your photos without affecting your phone memory.
Transferring photos from Facebook to Google Photos was already possible, but at the end of 2019 the social network introduced a new tool that allows this information transfer in just 5 steps. If you dare to store your Facebook images in the Google Photos cloud, we explain how to do it from your Android phone.
Transferring your photos from Facebook to Google Photos will only take a few seconds
How to transfer your photos from Facebook to Google Photos in 5 simple steps
Although this Facebook photo transfer tool was announced in late 2019, it was not available to all users until mid 2020, as Mark Zuckerberg's company explained. Fortunately, now all Facebook users can access this feature to safely save all their images in Google Photos.
At the moment, Google's service is the only one to which all images, including videos, can be transferred, albeit other options should be added in the future. Without further ado, we will explain what are the 5 steps you need to follow to transfer all your photos from Facebook to Google Photos from your Android phone.
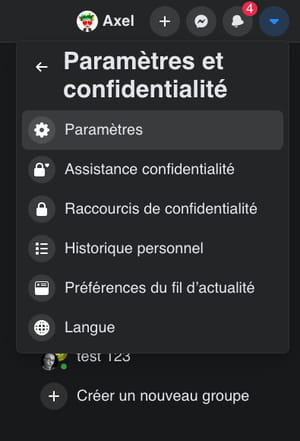
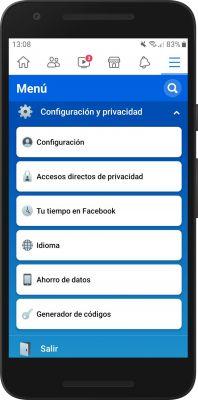
- Open Facebook on your Android and click on the button Menu, represented by three horizontal lines in the upper right corner. Click on Settings and Privacy and, in the menu that appears, select Settings.
- On the new page, scroll down until you find and select the option Transfer a copy of your photos or videos, included in the Your information section of Facebook.
- Enter the your password to continue with the process.
- click on Choose destination and select the option Google Photos. In the next box, choose Photos or Videos depending on the information you want to transfer to Google Photos. After selecting both options, click Next. To continue, you'll need to grant Facebook the necessary permissions for enter to the your Google Photos library.
- Click on the button Confirm transfer and it will start sending your Facebook photos to Google Photos.
Once the photo file transfer is finished, Facebook will notify you to notify you. Depending on the number of images you have on the social platform, delivery may take more or less. Whatever you expect, this is a good feature to make sure the your Facebook photos are safe in the Google Photos cloud.
Finally, we take this opportunity to remind you that you can too save your WhatsApp photos and videos in the cloud with Google Photos, another good way to take advantage of this free tool from Google with unlimited storage for high-quality images.