Some of the photos you took over the course of the last weekend have come a bit crooked and therefore you would like to straighten them out before sharing them on social media. The good intentions are there but, not knowing how to use photo editing programs, you are afraid of not being able to complete this feat. That's the way it is, am I right? Then know that don't be so negative: if you want, I can help you by showing you how to proceed.
In the next paragraphs of this guide, in fact, I will have the opportunity to explain to you how to straighten a photo using both some very famous photo editing programs and some online services that can be used directly from the browser. If you are interested, then, I will also provide you with a list of apps to straighten photos directly from smartphones and tablets.
So, are you ready to get started? Yup? Well: make yourself comfortable, concentrate on reading this tutorial and, more importantly, follow the instructions I am about to give you step-by-step. There is nothing left for me to do, except wish you good reading and, above all, have fun!
How to straighten a photo with Photoshop
On your computer you have installed Photoshop? Optimal! There is no better solution than this for straighten a photo.
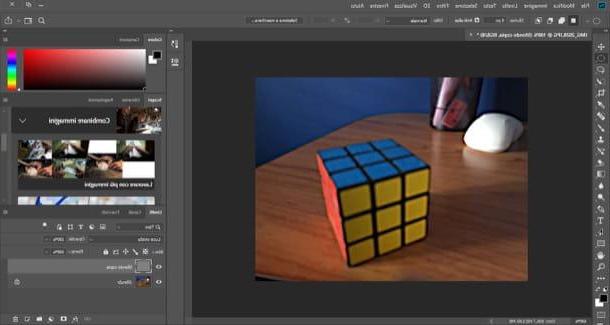
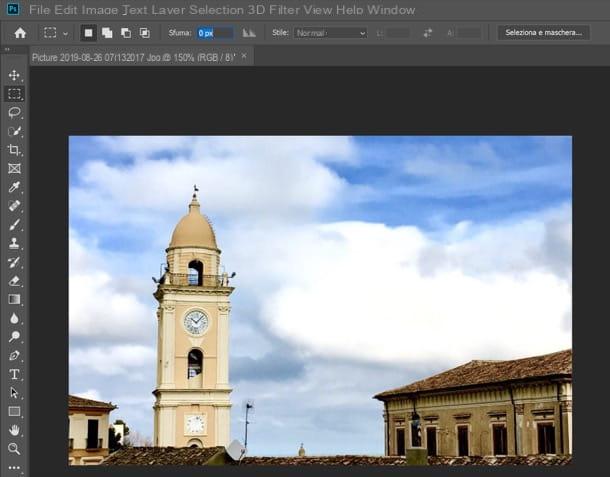
To proceed, start Photoshop on your computer (if you have not yet installed it, consult the guide where I explain how to do this), select the item Apri ... from the menu Fillet (top left) and choose the image you want to retouch.
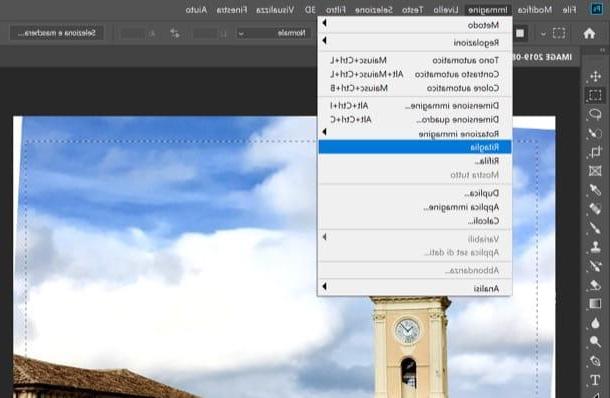
Once this is done, press the keys at the same time Ctrl + A (your Windows) or cmd + a (on macOS), to select the entire photo, and go to the menu Edit> Transform> Rotateat the top to activate Photoshop's “Rotate” tool.
Now, place the mouse pointer on one of the corners of the image. When you see one appear double black arrow, hold down the left mouse button and move the photo towards the top or bottom of the screen, so as to rotate it in the desired direction.
When you are satisfied with the result, click on the button (✓), located at the top right, to apply the changes made.

Now the photo has finally been straightened, but white corners are likely to be present - to remove them, select it Rectangular Marquee tool from the toolbar located on the left, draw with the mouse a rectangular selection that excludes the white corners and, as soon as you are ready to do so, go to the menu Image> Crop, for trimming.
At this point, all you have to do is save the edited photo: select the item Save with name ... from the menu Fillet, indicates the name of the output file, the position in which to save it and the format in which to export it and click on the button Save, I'll give you confirmation.
Have you seen that straightening a photo with Photoshop wasn't as complicated as you thought? In case you need further clarification, read the guide where I explain in more detail how to straighten a photo with Photoshop.
How to straighten a photo with GIMP

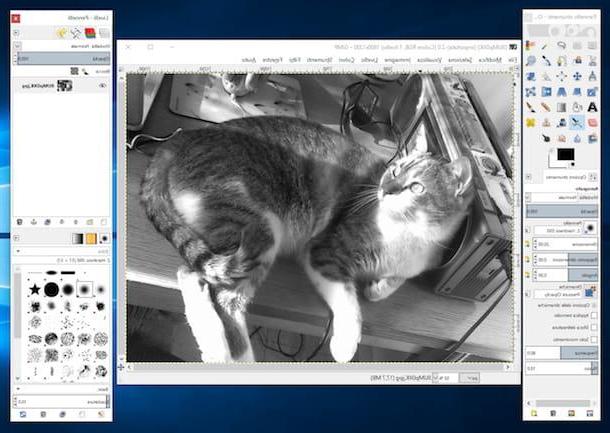
GIMP, the best free and open source alternative to the aforementioned Photoshop: it allows you to straighten your photos in a rather simple and intuitive way. Let me tell you how to do it.
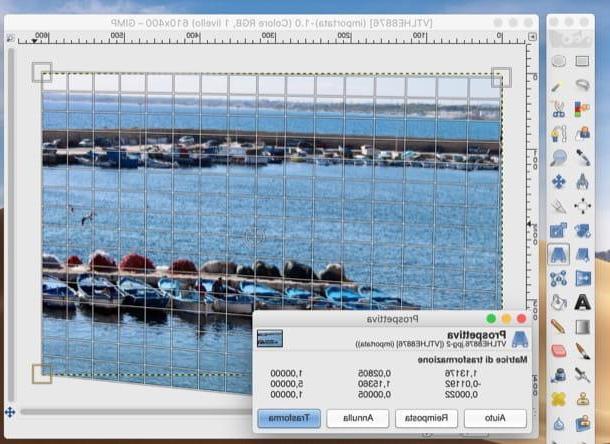
For the first thing, avvia GIMP (if you have not yet installed it, consult the guide in which I explain how to do this) and import the photo of your interest into it, selecting the item Apri ... from the menu Fillet (top left).
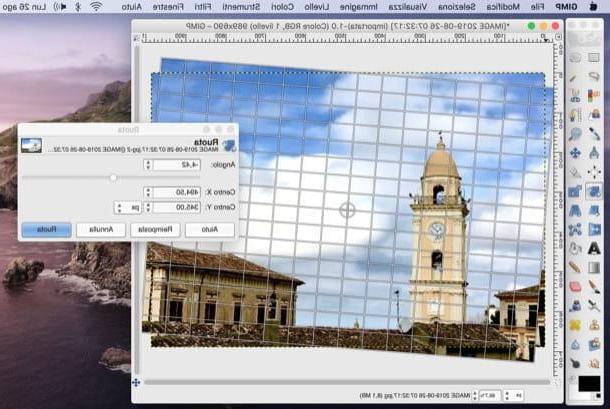
Now, call it back Rotate tool (l'icona dei two rectangles with the circular arrows) from the toolbar located on the left and, in the window that opens, drag the cursor located on the adjustment bar, so as to straighten the photo.
If you want, you can also do this by clicking on the darts placed in correspondence with the wording Angle. When you are satisfied with the result, click on the button Wheel present in the window itself, to apply the change.
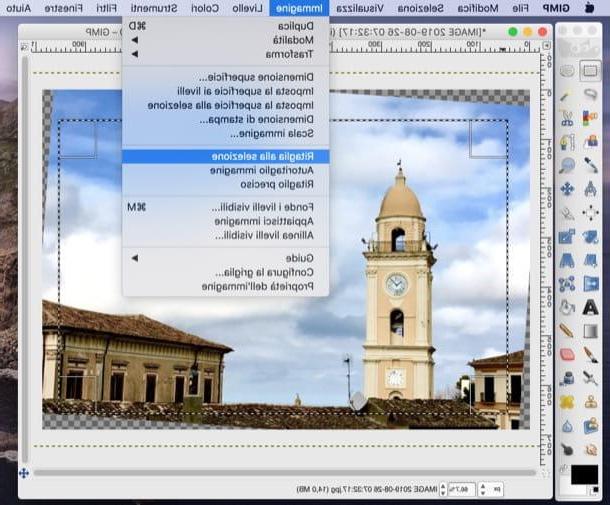
To eliminate the empty corners created as a result of the straightening operation, click on Rectangular Marquee tool (l'icona del dashed rectangle) in the toolbar located on the left and select the image, taking care to exclude empty corners.
As soon as you are ready to do so, then click on the item Crop to selection on the menu Image And that's it.
If you are ready to do it, all you have to do is save the image you straightened by going to the menu Fillet, selecting the item Esporta eats… from the latter and choosing name, position e format to assign to the output file. Then confirm everything by clicking on the button Save.
How to straighten a photo with Paint
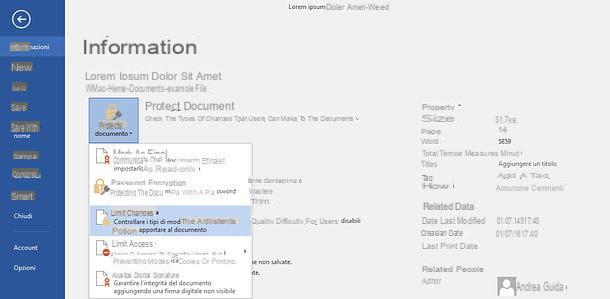
You would like it straighten a photo with Paint, the Microsoft digital drawing program, included in virtually all versions of Windows? I'm sorry, but unfortunately it is not possible to do this, as it does not integrate ad hoc tools to straighten the photos. However, if your PC is upgraded to Windows 10, you can succeed by making use of Paint 3D, the updated version of the good old Paint available for free on the Microsoft Store.
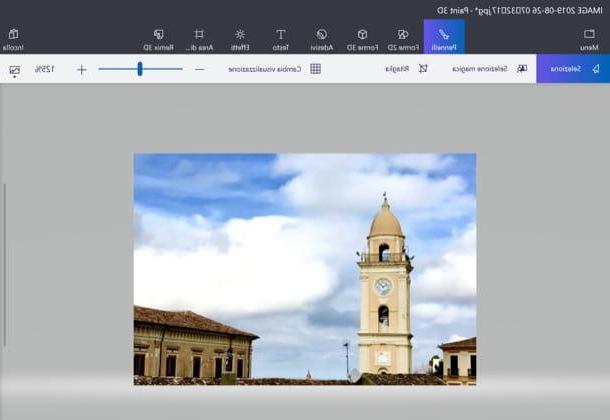
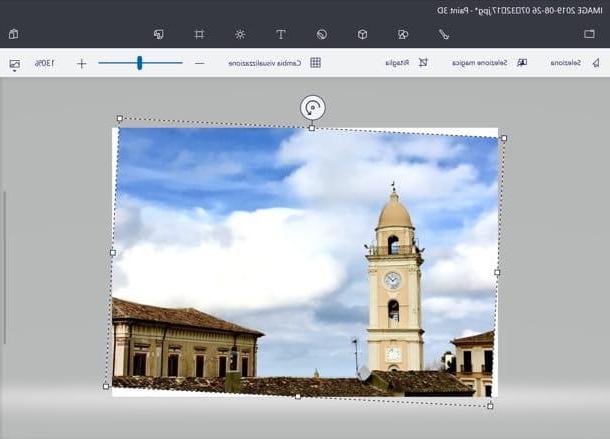
To proceed, import the photo you want to straighten into Paint 3D by right clicking on thepreview photo and selecting items Apri con > Paint 3D from the menu that opens. With the image imported, press the keys simultaneously Ctrl + A on the keyboard, to select the entire photo, and use the button depicting the circular arrow, placed at the top, to straighten it: then position the cursor on it and, holding down the left mouse button, move it to the left or right.
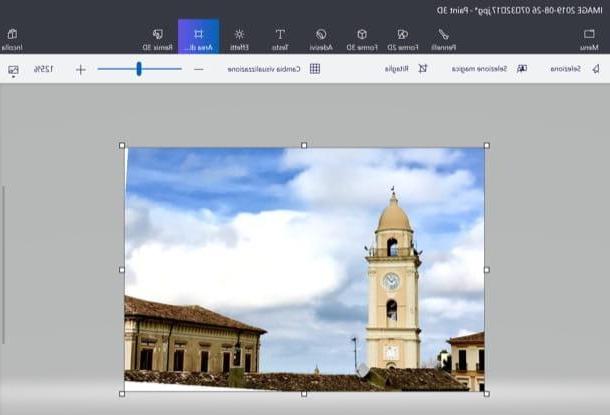
Once the photo has been straightened, click on the button Cut out placed on the right. At this point, all you have to do is remove the white corners that have been created on the photo as a result of the straightening operation: to do this, click on the button Drawing area (the symbol of rectangle top place) and serve yourself gods white squares placed in the four corners of the photo, to remove the white corners.
When you are ready to do so, save the photo you have edited: then click on the button Menu situato in alto a sinistra, selects the voice Save with name from the sidebar on the left and choose the output format you prefer, by clicking on one of the buttons on the right (eg. 2D – PNG, 2D – JPEG, Etc.).
How to straighten a photo online
Would you straighten a photo online, without having to “bother” any photo editing software? If so, I suggest you turn to Photopea: a well-known Web application which, being based on technology HTML5, works on all major browsers without having to resort to any additional plugins. While the basic service is free, it's good to know that it features banner ads that you can remove by signing up for the $ 5 / month Premium membership.
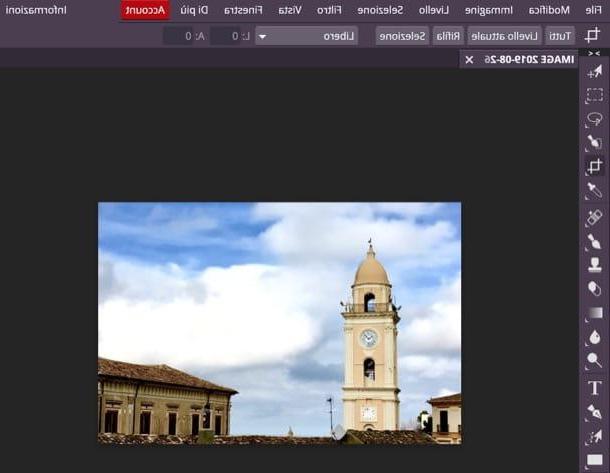
To use Photopea, go to its main page, click on (X) at the top right, to remove the welcome message, and possibly translate the service interface into British, by selecting the item cityno from the menu More > Language (in alto to destra).
Now, import the photo you intend to retouch into the service by selecting the item Apri ... from the menu Fillet (top left). Once this is done, click on the button Cut out placed on the toolbar and select it Crop tool give the menu check if you press.
Then draw the selection rectangle, place the cursor on one of the squares placed on the sides of the image and, when you see the circular arrows, rotates the selection so that the subjects are straight on the selection.
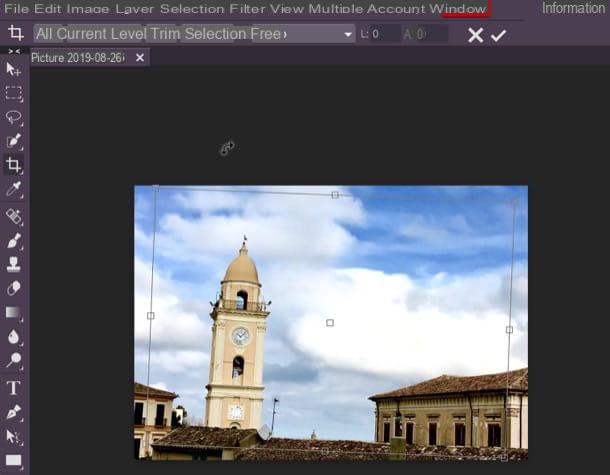
When you are ready to do this, click on the button (✓), located at the top right, to crop the photo. Finally, select the item Export as from the menu Fillet, choose the format where you want to export the photo and click on the button Save, to complete the operation.
How to straighten a photo in perspective
Do you want straighten a photo in perspective, why did you realize that it has rather marked prospective flaws? Well, in that case, you can take advantage of some ad hoc tools offered by some of the photo editing programs I told you about in the previous lines.
Photoshop, for example, it allows you to do this using a special function that can be called up from the menu Edit> Perspective Warp.
GIMP, on the other hand, it allows you to act on the perspective of the photos using the Perspective tool (l'icona del parallelepiped with arrows found in the toolbar on the left).
Since the operation in question turns out to be a little more complex than the simple job of straightening the photos, I suggest you take the time to examine the guide in which I explain in greater detail how to straighten the perspective of the photos.
App to straighten a photo
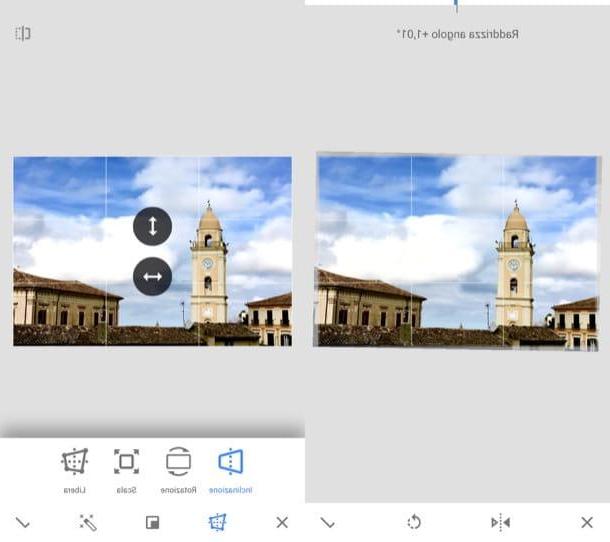
As I mentioned in the introduction, there are also some very useful ones app to straighten a photo, which allow you to improve your shots by acting directly from smartphone or tablet: below you will find listed some of the best on the square.
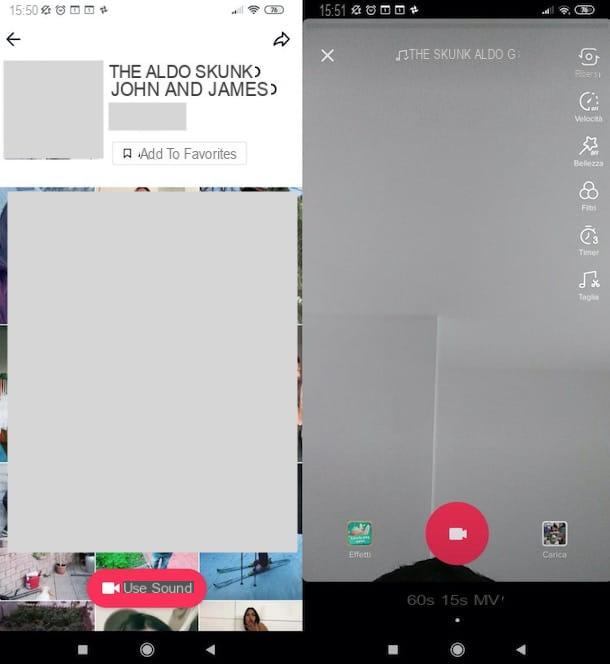
- Snapseed (Android / iOS) - this very popular photo editing app from Google offers some tools that are very useful both for straightening photos and for correcting their perspective.
- Pixelmator (iOS) - this app is only available on Apple devices. It offers advanced photo editing tools and some of them are useful for straightening your shots. It is paid and costs 5,99 euros.
If you want some more clarification on how to use these and other photo editing apps, read the guide I just linked to.
How to straighten a photo