You have successfully transferred photos taken with your smartphone or camera to your computer. Now, however, you need to go to a photocopy or similar shop to print them or you have to take them with you to a friend's house to show them. How can you do? Nothing simpler! Just use a portable storage system, such as a USB stick. How do you say? Are you lacking in technology and don't know how to do it? Don't worry, I'm here to help you.
In this guide, in fact, I'll show you how to transfer photos from PC to USB stick both on computers with Windows operating system and on those equipped with macOS. I will also give you some tips for transferring photos safely, without any problems occurring.
Can't wait to start reading the tips I have prepared for you in this guide of mine? If that's the way it is, sit down comfortably and give me a few minutes. I'm sure you will be able to transfer your photos to the USB stick without the slightest problem. Happy reading and good luck for everything!
- File Explorer
- Alternative method
- Safely remove the USB stick
Preliminary operation
Before showing you how to do the transfer photos from PC a USB pendrive, it is important to inform you about some preliminary operations necessary for the success of this operation.
Choice of USB stick
To transfer photos from a PC to a USB stick, it is important first to have one of the right capacity. If we are talking about some photos, even a few gigabyte USB stick may be sufficient. If, on the other hand, you have to transfer a large number of photos, the situation can change.
There are different types of USB key, based on both size of the storage space and both at the data transfer rate. First of all, it is important to check the necessary space that must have a USB stick on which you have to perform the photo transfer operation.
Navigate to the folder where the photos are and right click on it. In the context menu that is shown to you, select the item Property (its Windows) oppure Get information (on Mac). In the new screen you see, locate the wording Sizes and read the number corresponding to it. If the value is smaller than the size of the key you own, you will not need to buy a new one; if not, I indicate below some products that may be right for you.
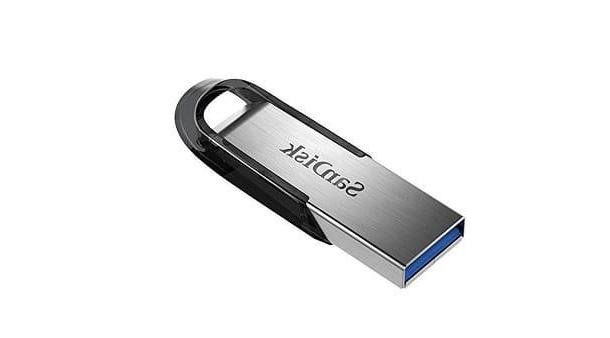
See offer on Amazon See offer on AmazonAnd if you need to transfer photos to smartphones and tablets as well, consider buying one USB stick with OTG support (if you have an Android device, which must be equipped with support for this technology) or, if you have an iPhone or iPad, a USB stick with Lightning connection. Below I propose some of them.
Vedi offers your AmazonYou can also check the size for some photos inside a folder. Just select them one by one, holding down the button Ctrl (your Windows) or cmd (on Mac) and left-clicking on each of them. By then right-clicking on the highlighted photos, you can access the context menu and follow the same procedure that I indicated in the previous lines, in order to view the total size that the photos occupy.
Another important element is the transfer speed. If you have USB 3.0 ports on your computer, they will support high data transfer speeds if you connect a USB stick that is also version 3.0. A computer USB 3.0 port is usually recognized by the blue color of the insert inside the port itself.
Changing the file system of the USB stick
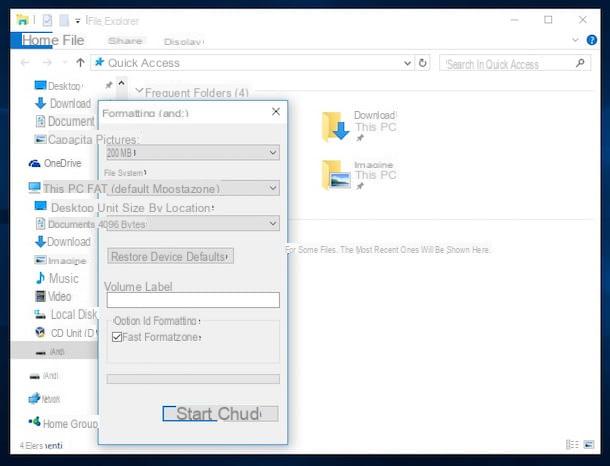
Before copying your photos to a USB stick, you need to check the file system used by the unit. Typically, USB sticks are configured in FAT32, but there are other file systems, such as NTFS, exFAT o APFS.
Before I get confused with all these acronyms, I tell you that the FAT32 it is the one that has extended compatibility with the various operating systems and devices on the market. The limitation, however, of this file system is that it does not allow the transfer of single files larger than 4GB. But since we are talking about photos, the problem should not exist, so the FAT32 file system is more than enough.
In light of what has just been said, I suggest you read my guide on how to format a USB stick, in which I explain how to check the file system of a USB stick and how to change it to the one that best suits your needs.
Transfer photos from Windows to USB stick
If you have a computer with an operating system Windows, there are two methods to transfer photos to USB stick, which I will tell you about in the next lines.
File Explorer
The first method is to use File Explorer Windows. First, plug the stick into one of the USB ports found on the front or back of the PC case. If you're using a laptop, USB ports are usually located on one or both sides of the device.
After inserting the key in the appropriate slot, the operating system will automatically install the drivers for the recognition of the device, in fact you will be shown a notification in the lower right corner to indicate the progress of the recognition process.
At the end of this operation, you may be asked if you want to open the main folder of the USB stick, by means of the notification window that is shown in the upper right corner. Then select the item Open folder to view files, to immediately access the main folder of the USB stick (called root in jargon).
Alternatively, launch File Explorer Windows by clicking on its icon with a symbol gialla poster, which you find at the bottom of the taskbar. You can also press the key combination Windows+E to open File Explorer.
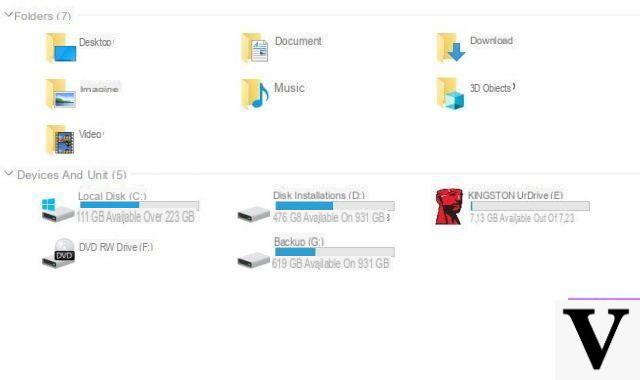
At this point, in the left sidebar, scroll through the list and select the drive corresponding to the USB stick. You can also press on the item What PC and select the storage device drive found among the icons shown on the screen, in the section Devices and units.
After logging into the root path of the USB stick, you need to open another screen of File Explorer, reaching the path where the photos to be transferred reside. Refer to the previous lines to open a new screen of File Explorer.
After reaching the location of the photos, you can decide whether to transfer the whole folder or just some photos. In the first case, just right-click on the folder icon and select the item Copy (if you want to keep a copy of the photos on your PC) or Size (if you want to transfer them by deleting them from the PC), in the context menu that is shown to you.
In the second case, however, you can select some photos by holding down the key Ctrl on the keyboard and selecting the photos one by one with the left mouse button. If you hold down the key instead Shift, when you left click on two photos, it will automatically select all the others that are between those two as well. You can also select them by holding down the left mouse button and dragging it until all those to be transferred are highlighted.
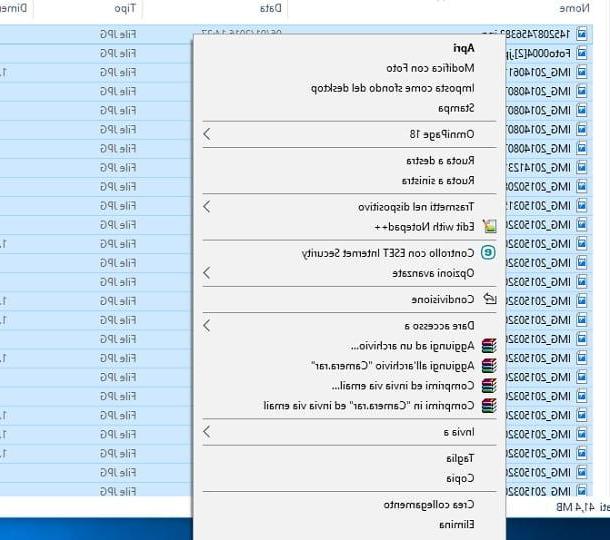
You can also press the combination Ctrl+A to select all photos at once. At this point, right-click on any of the highlighted photos and choose an item from Copy o Size give the menu answer.
Once this is done, go back to the session File Explorer which refers to the root path of the USB stick and right-click anywhere on the screen where there is no file. In the context menu you see, choose the item Paste to start transferring photos.
Alternative method
The second method that I propose to you is much faster. What you need to do is simply plug the USB stick into one of the USB ports on the PC. You do not need to access the main folder of the device directly, unlike as I indicated in the previous paragraph.
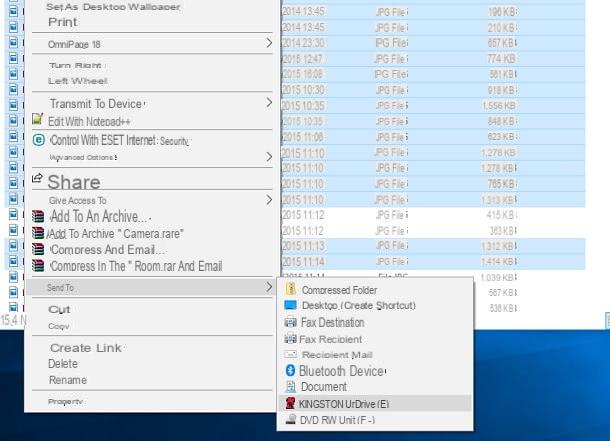
On the contrary, go to the folder where there is the archive of the photos you want to transfer and right click on it. In the context menu that is shown to you, choose the items Send to > [USB key name], to immediately begin transferring the folder to the root root of the device.
If you want to transfer only some photos, access the photos folder on your PC and select them according to the method I have already recommended to you in the previous paragraph. After selecting them, right-click on any highlighted photo and, in the context menu, select the items Send to > [USB key name]. In this way, all the selected photos will be transferred to the root folder of the USB stick.
Alternatively, you can simply drag and drop files from the source folder to the root folder of the USB stick, so that the file transfer starts immediately.
Safe removal of USB stick

After transferring the photos to the USB stick, using the methods I indicated in the previous paragraphs, you must remove the storage device from the USB port. To do this, use the functionality of Safely Remove Hardware of Windows.
What is the difference between using this feature and manually extracting the USB stick from the computer? Basically the difference is that the functionality Safely Remove Hardware Windows allows you to temporarily disable the device in order to avoid any loss of data during the transfer.
To use this feature, click on the symbol icon ^ that you find at the bottom right, near the clock. In the small screen that is shown to you, click on the icon with the symbol of a USB pendrive and select the item Eject [key name] that you find in the context menu.
Transfer photos from Mac to USB stick
If you have a Mac, you can transfer photos to a USB stick via Finder, the macOS file manager. First of all, then connect the key to the USB port of the Mac and wait for it to be recognized. You will be able to check this if the device icon appears on the desktop.
If you're using a recently made MacBook or MacBook Pro and don't have standard USB ports, just USB-C port, you must use a USB A to USB C adapter, such as the ones listed below.
Now start Finder, using its icon in the Dock, and navigate to the folder where the photos you want to transfer reside. If you want to transfer the entire folder, just right-click on its icon and choose the item Copy [folder name] give the menu answer.
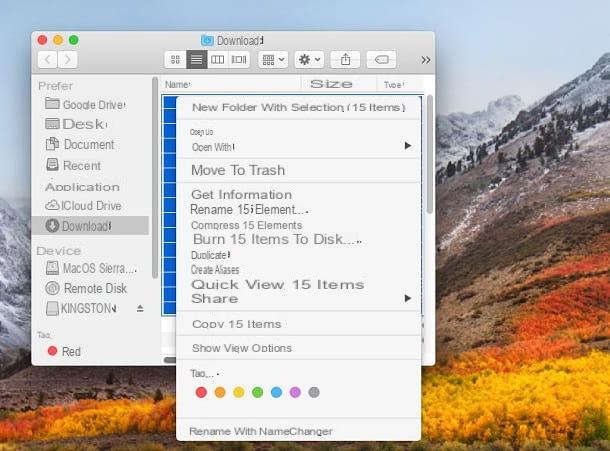
If, on the other hand, you want to select the photos one by one, access the folder and select them with the left mouse button, taking care to keep the button pressed. cmd (if the files to be selected are in no particular order) or the key shift (to highlight files between two selected items). Alternatively, you can select them by holding down the left mouse button and dragging it until all the ones you want to transfer are highlighted.
Once this is done, right-click on any highlighted file and choose the item Copy x elements, from the context menu you see. Now, go back to the desktop and double click on theusb stick icon, to access its main path. Then right-click on any point on the screen where there is no file and, in the context menu, choose the item Paste x elements and then wait for the transfer to take place.

To eject the USB stick, in the Finder, locate the left sidebar and click the icon with the symbol (I.e. that you find next to the name of the device, in the section devices.
Alternatively, right-click on theusb stick icon present on the desktop and choose the item Eject [key name], in the context menu that is shown to you, or drag it to the Trash can say macOS.
How to transfer photos from PC to USB stick