The friend you spent your last vacation with asked you to share the photos you took with your digital camera during the trip, so you thought of uploading all the files to a USB stick and giving it to him in person. Your idea is undoubtedly the best, since you have taken several shots and they are all in RAW format (therefore very "heavy"), but if you are here now and are reading this guide, it seems clear to me that you have some doubts about to do.
Let's guess: it is the first time that you have found yourself carrying out an operation of this kind and then you would like me to explain to you. how to upload photos to a USB stick, real? I would have bet on it. Then know that there is no problem, you can count on my help. Therefore, dedicate a few minutes of your precious free time to reading this guide dedicated to the topic in question and you will see that, in the end, you will have perfectly clear ideas on what to do.
Before offering you all the necessary information, however, it will be my concern to provide you with some useful tips relating to the calculation of the space required on the pendrive and how to identify and use the most suitable file system. Then we will see how to carry out the operation in question by acting from Windows, macOS and, on the mobile side, on Android and iOS. That said, I wish you happy reading and wish you a big good luck in everything.
Preliminary operation
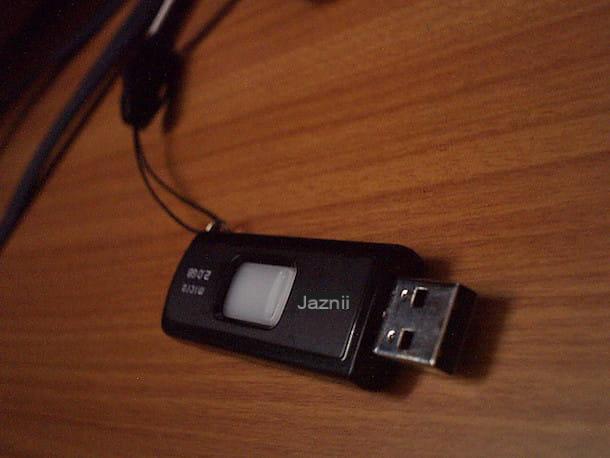
To succeed in upload your photos to a USB stick, you must first worry about getting a sufficiently large pendrive. Consequently, you have to carry out the space calculation necessary to meet your needs.
Secondly, you need to format the pendrive with a file system suitable, depending on the device to which the USB stick will be connected. To find out more, keep reading: you will find everything explained in detail below.
Calculation of space

If you want to upload your shots on a pendrive, you must first make sure that the latter is from right capacity. To be able to determine this, you must find out how much space do the photos take you want to transfer to the pendrive. Below you will find explained how to proceed both on Windows that of MacOS.
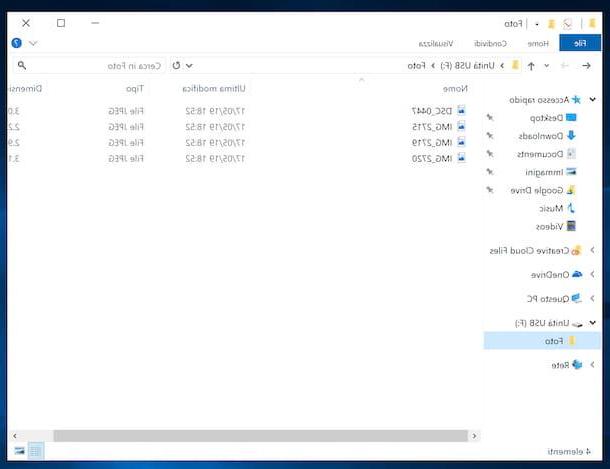
- Stai using Windows, you can get the information in question by moving all the photos of your interest into one empty folder, by right clicking on it and selecting the item Property from the context menu. Check, therefore, what is reported in correspondence with the item Sizes, in the window that opens on the desktop and that's it. If you want, you can also know the weight of the individual files, selecting the various photos from time to time and proceeding as I have just indicated.
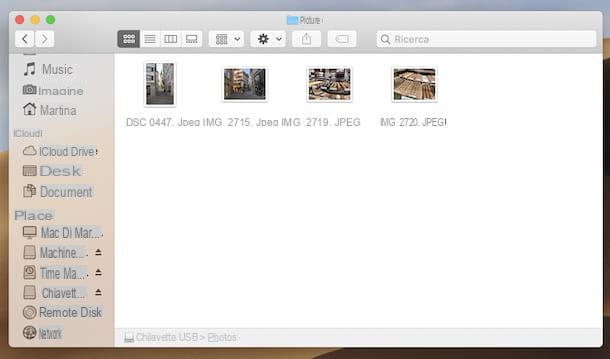
- If you are using macOS, to find out how much space your photos take up, move them all in one empty folder, then right-click on it, select the item Get information from the menu that appears and, in the window that opens, check what is reported in correspondence with the wording Sizes. If you want, you can also find out the weight of the individual photos, selecting them one at a time and proceeding in the same way as I have just explained to you.
In all cases, keep in mind that the weight of the photos essentially depends on theirs format and from them resolution. If necessary, it is possible to reduce it by using online services and ad hoc programs, such as the ones I reported to you in my guide focused on how to reduce the weight of a photo.
Once you find out how much space the photos take up, you can make sure that your key can fit them by checking the capacity of the same which, as a rule, is shown on the front or on the back of the pendrive. This statement, however, is not always 100% truthful. You can find out the exact capacity of your USB stick by following the steps below.
- If you are using Windows, connect the pendrive to the computer, click on gialla poster on the taskbar to open File Explorer, right click on the key name found in the left sidebar of the File Explorer and select the wording Property from the context menu. In the new window that will be shown to you, check what is reported in correspondence with the item Capacity.
- If you are using macOS, connect the pendrive to the computer and click on the icon with the smiley face which is located on the Dock bar, to open the Finder. In the pop-up window on the desktop, right-click on the name of the pendrive that you find in the left sidebar and select the item Get information from the context menu. In the further window displayed, check the value reported in correspondence with the item Capacity.
If the pendrive in your possession is not large enough or if you do not yet have a USB stick, you can immediately remedy the problem by buying one ad hoc, perhaps helping you in the choice by consulting my purchase guide dedicated specifically to this type of product .
Choice of file system
We come now to the speech file system. Most pendrives are set up with the named file system FAT32, which guarantees the highest degree of compatibility with practically any kind of device but, unfortunately, does not allow you to archive single files having a think greater than 4GB.
For photos there shouldn't be big problems (it is difficult for a single shot to exceed 4GB), but the situation could be different if the photos are collected in a single ZIP / RAR archive or if there is also some video among them, also in high resolution. You may therefore find yourself in the position of having to choose a different file system.
As an alternative to FAT32, you can opt for theNTFS Windows (which allows you to archive files larger than 4GB, but is less supported than FAT32 and on systems such as macOS and Linux it is accessible, by default, in read-only mode) or for theexFAT (which is an evolution of FAT32, allows you to store files larger than 4GB and is supported by most devices).
And if you intend to connect your pendrive only on Apple computers, you can choose the file systems HFS + o AFS, namely the default ones of macOS, which do not have particular limits in terms of maximum file size but, as you may have guessed, are compatible only with the operating systems of the "bitten apple" (unless you use external solutions).
To find out what file system your USB stick is currently using, connect it to your computer and proceed as follows.
- If you are using Windows, apr l 'File Explorer by clicking on gialla poster on taskbar, right click on the name of the pendrive that you find in the left sidebar and select the item Property from the context menu. In the new window that will open, check what is reported in correspondence with the wording File System.
- If you are using macOS, april il Finder by clicking on the icon with the smiley face which is located on the Dock bar and, in the window that opens, right-click on the name of the pendrive in the left sidebar. Then select the item Get information from the contextual menu and, in the further window that appears, check what is reported in correspondence with the item Size.
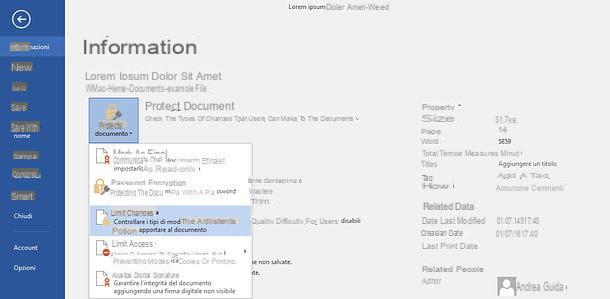
If the format of the USB key is not what you think is most suitable, to be able to change it you must proceed with the formatting of the device. To find out how to do this, follow the instructions on what to do that I gave you in my guide on how to format a USB stick.
How to upload photos to a PC USB stick
Having completed the preliminary steps above, let's get to the real heart of the matter and let's find out, together, what needs to be done to upload the photos on a USB stick by acting as Windows.
First, if you haven't already done so, fellow worker the pendrive to the computer on which the photos of your interest are saved by inserting the device in one of the USB ports that you find on the back or front of the case (for desktop computers) or on the sides of the body (for laptops).
Next, wait for thedriver installation necessary for the recognition of the device (if in the past you had already connected the pendrive to the computer, the operation in question has already been carried out). You can follow the progress of the procedure through the appropriate window that you will see appear in the bottom right part of the desktop.
Keep in mind that always through the aforementioned window you may also be asked if you intend to open the main folder of the pendrive. If so, please select the item Open folder to view files. If no warning appears, you open the main folder of the pendrive by starting File Explorer, after clicking on gialla poster you find on the taskbar, and selecting the key name that you find in the left sidebar in the window that appeared on the screen.
Now, open a new window of File Explorer, and go to the path where the photos you want to transfer to the stick are located. From there, indicate whether you want to transfer the entire folder containing the images or just certain photos.
In the first case, right click on theicon della cartella and, from the context menu, select the item Copy (to keep a copy of the photos on your computer) or that one Size (to delete the photos from the computer by transferring them to the pendrive).
In the second case, you have to select the photos of your interest one at a time by holding down the key Ctrl keyboard and clicking on the relevant files. Alternatively, you can draw a selection rectangle by left clicking and, continuing to hold down, including in it the images of your interest.
After completing the above steps, go to the File Explorer window relating to the USB stick, right-click anywhere on the stretch and choose the option Paste from the context menu, in order to start the procedure for transferring images. Through the additional window that will open on the screen you can follow the progress of the operation.
In addition to what I have just indicated, you can upload photos to the USB key by right-clicking on the individual files or on the folder that contains the images, selecting the item Send to from the displayed context menu and then the option USB drive.
Once you have completed the photo transfer process, remember to disconnect the USB stick from your computer by performing the safe removal, in order to prevent the data in it from being damaged. To do this, click on the symbol of up arrow that you find innotify area Windows, click onpendrive icon present in the box that opens and select the option Eject [USB key name] from the menu that appears. Afterward, physically disconnect the device from the computer.
How to upload photos to Mac USB stick
Possiedi a Mac and would you like to know how to upload photos to your USB stick? I'll explain immediately how to proceed.
In primo luogo, connect the pendrive to one of the USB sockets computer, if you have not already done so. If you are using a desktop Mac the sockets are on the back, while if you are using a portable Mac they are on the side. If you are using a newer MacBook and only have USB-C port, to connect the pendrive you must use a adattatore da USB A a USB C, as in the case of those listed below.
At this point, open the Finderby clicking on the icon smiley face which is located on the Dock bar, and navigate to the location where the photos you want to transfer to the pendrive are saved. Then decide whether to intervene on the entire folder that contains the images or on individual files.
In the first case, right click on theicon della cartella and, from the context menu, select the option Copy [folder name].
In the second case, press the key cmd on the Mac keyboard and left click on the photos you are interested in or select the files by pressing and continuing to hold down the left mouse button and understanding in the selection rectangle that you will trace all the photos of your interest. Next, right click on any of the selected files and choose the entry Copy give the menu to compare.
At this point, still working from the Finder window, select thependrive icon in the left sidebar, right click anywhere in the displayed window and choose the item Paste / Paste x elements from the context menu. You can then keep track of the progress of the procedure through the appropriate window that you will see will appear on the screen.
If you want to transfer the photos to the pendrive by deleting the source files, hold down the key alt on the keyboard after right clicking in the key window and selecting the item Move xx items here give the menu answer.
After uploading all the photos to the pendrive, eject in safe way the latter from the Mac by clicking on the symbol Eject that you display by placing the mouse pointer on the key name in the left sidebar of the Finder. Alternatively, you can drag thependrive icon from the desk to the Trash can located on the Dock bar. Afterward, also physically disconnect the device from the computer.
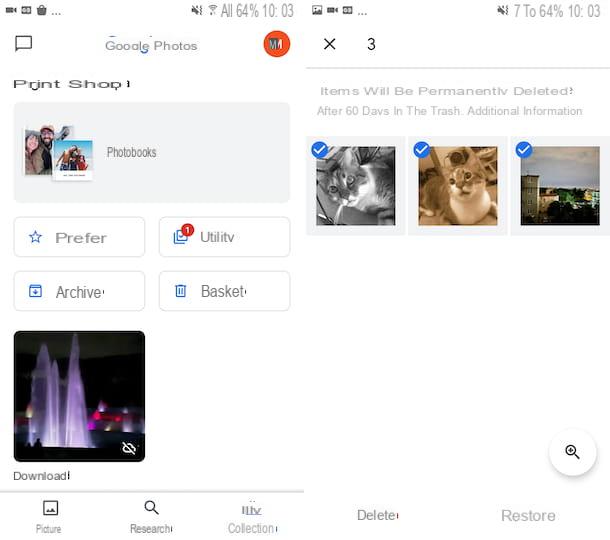
How to upload photos to Android USB stick
You would like to know if it is possible to upload photos to a USB stick also using a smartphone or tablet Android? The answer is yes. You can do this in two different ways, depending on the ports your mobile device has and depending on the model of pendrive used.
The first system consists in physically connecting the key to the smartphone or tablet and accessing it as if it were a common external memory, provided that the mobile device you own is equipped with a USB port.
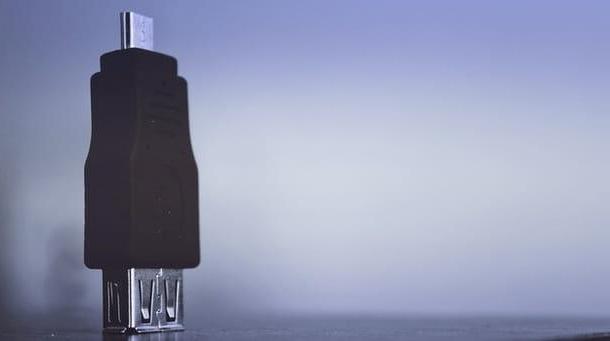
If not, you'll need to buy a adapter USB OTG. They are quite cheap and you can find them in all the most renowned computer stores and on various online stores, including Amazon. Below you will find some models.
See offer on Amazon See offer on Amazon See offer on AmazonThe second method, however, involves the purchase of one chiavetta USB OTG, which on the one hand has a micro-USB connector for connection to the Android smartphone or tablet and on the other hand has a classic USB type A connector, to be used for connection to the computer.
Once the connection between the mobile device and the pendrive has been established, the photos can be transferred using File Manager developed by third parties, as in the case of the excellent and free File Manager available on the Google Play Store, or directly from the manufacturers of USB sticks, as appropriate.
For further information, I invite you to refer to my guide specifically dedicated to how to transfer files from tablet to key, valid, at the expense of the title, also for smartphones and in which you will also find explained how to transfer files using the computer as an intermediary.
How to upload photos to iPhone and iPad USB stick
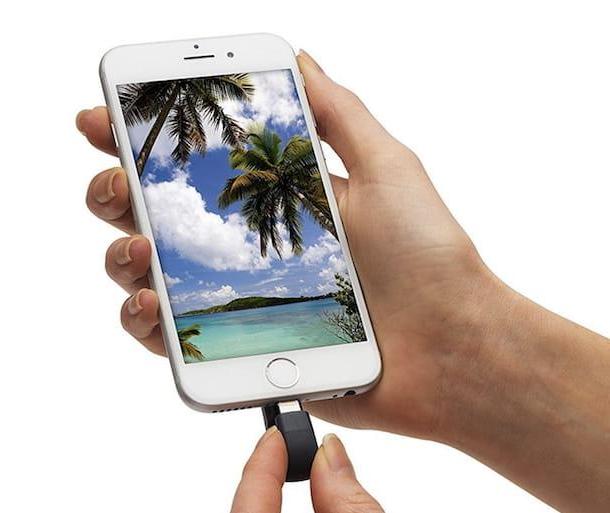
Be, invent, possiedi a iPhone or a iPad, you can upload photos to your pendrive from the devices in question using special keys equipped with Lightning connector (then create ad hoc for Apple devices) or a portable hub filewhich is a suitable Wi-Fi storage device for the purpose. The ones you find below are some of the best-in-class solutions available on Amazon.
Vedi offers your AmazonOnce the connection between the pendrive and the iPhone or iPad has been established, simply download the dedicated app from the App Store and follow the instructions provided on the screen to complete the transfer procedure.
Also in this case, for more details I refer you to the reading of my specific tutorial on how to transfer files from tablet to key, valid for both iPhone and iPad, in which you will also find explained how to make the transfer using PC and Mac as intermediaries.
How to upload photos to USB stick