A function of the Instagram stories allows you to shoot Selfie applying Snapchat-style filters. Do you want to add rabbit ears to your face? Or a crown? Maybe a pair of glasses? Now with the new Instagram selfie filters it will be possible. What is it about? An additional feature for your stories, only available from front camera for photos and videos, which, however, cannot be used by the photos you have already taken and therefore have available in the gallery.
There are only 8 selfie filters currently available but new ones will be added in the future with upcoming updates.
How to apply filters to Instagram selfies
To edit the photos you are taking in a nice and fun way by applying Instagram selfie filters, you have to do the following. Whether it's a live story or just wanting to save a photo, the steps are identical and the following.
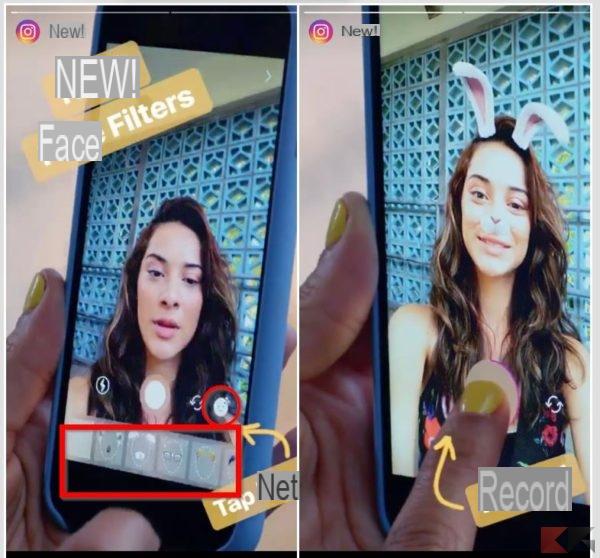
- Open Instagram and tap on the camera-shaped icon at the top left (next to the stories one).
- You will notice an icon depicting a sparkling emoticon at the bottom right.
- Pressing on it will pop up selfie filters you can add to your video or photo, choose the one you like best and create your story by holding down the button in the center, or tap once to take the photo and save the edited image by tapping on the item Save which appears at the bottom left.
Filters are currently not applicable during live streams.
Conclusions
The selfie filters function of Instagram is really simple to apply, surely with the progress of the updates, more and more themed filters will be introduced and more possibilities to customize our stories. For any doubt or question please leave a comment below.


