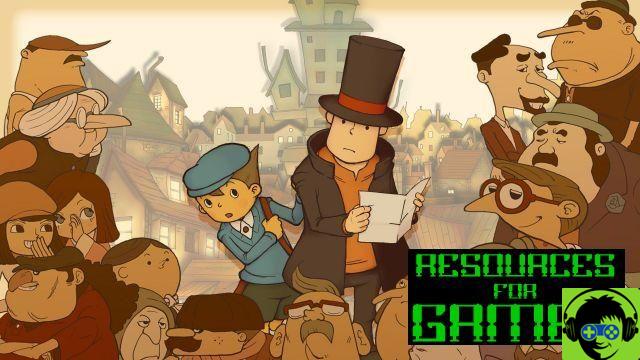
Almost ten years after its original release on Nintendo DS back in 2007, Professor Layton and the Curious Village also lands on mobile devices. The graphical adventure developed by Level-5 is in fact available for both iOS and Android, and will transport players back to the village of Saint-Mystére, whose secrets they will have to reveal and where, above all, they will have to solve a considerable amount of puzzles and puzzles. Like each of its illustrious predecessors, this new adventure of the most famous professor in the world of videogames presents a lot of puzzles that you will have to find the solution to. Precisely for this reason, in case you can't come up with any of the puzzles, consult our guide to solve them and continue with the game's plot.
Professor Layton and the Curious village a small introduction
The puzzles that you will encounter during the game will be of various "humanity" and of different nature. Among puzzles, logic puzzles, mathematics puzzles and so on, their difficulty will be measured in "Picarati" and, fortunately, there will be no time limit to find the solution. In case of difficulty, you will have three suggestions available, but they will each require a "help coin" to be obtained. These suggestion coins, however, are available in limited quantities. The moment you start your adventure, in fact, you will have ten available, but know that there will be others hidden inside the village. As soon as you find the answer to a riddle, enter it on the screen, or select it among those available.
In case you have given the correct answer, the "Picarats" will be added to the total score you obtained and, in some cases, you may even get some objects as a reward. If you give the wrong answer, however, you will be forced to repeat the puzzle in question. Don't worry, you can try your hand at puzzles an unlimited number of times, but after a certain number of attempts, its value in "Picarati" will always be lower and lower. For this very reason, then, know that you can always interrupt the puzzle on which you are stuck, without incurring any penalty, and try other puzzles. However, always remember that some puzzles are practically indispensable to advance in the game's storyline and, therefore, you'll be forced to solve them.
The completed puzzles can then be tackled again at any time; simply select them from the game menu.
Introduction
ENIGMA 001: Find the village
SOLUTION : all you have to do is circle the village on the top left in the map
As soon as the introduction is finished, talk to the man in front of the drawbridge.
The crank...
SOLUTION: crank number 1
Talk to the old lady.
ENIGMA 003: Top Hats
SOLUTION: Answer A
You will have to talk to Foltbaffen, the gentleman with the moustache you will find practically in front of the old lady, and follow his instructions. When you've done that, talk to Foltbaffen again, press on the shoe and move on.
Chapter 1: Villa Reinhold awaits
ENIGMA 005: The two hands
SOLUTION: 10
Talk to a guy named Percy.
Where's my house?
SOLUTION: To solve this puzzle, you will need to circle the house with the blue roof. Follow the signs: exit the house and go left while, at the next two crossroads, always go right. Percy's house will be the one with the entrance facing north.
Touch the shoe, walk towards it and talk to Marco.
ENIGMA 006: Feather weight
SOLUTION: Before we go into the solution, you should know one thing: every time you fail this puzzle, the weight will change. Your task will be to put 3 weights on one plate of the scale and 3 other weights on the other plate. If the weights are identical, remove all the weights you have placed on the scale and place the remaining two. If you place the two weights in question on the two scales, you will immediately notice that one of them is lighter than the other. If, however, the weights do not match, remove the heavier ones and move one of the three light weights to the other arm of the scale. After having done the operation, remove it but remember the weight and place the two remaining ones: if the weight is the same, it means that the correct answer is the weight that you have removed just before, otherwise it will be the one that is lighter on the scale.
After that, click on the shoe and go ahead and talk to Ramon.
ENIGMA 007: Beware of wolves
SOLUTION: In this case, you will have to carry three wolves and three chicks, on a raft, making them cross a river. To overcome the riddle, follow the directions below.
Gone: wolf, wolf
Return: wolf
Done: wolf, wolf.
Return: wolf
Out: chick, chick
Return: wolf, chick
Out: chick, chick
Return: wolf
Gone: wolf, wolf
Return: chick
Out: wolf, chick
Once this is done, click the bushes and proceed further.
ENIGMA 008: Field work
SOLUTION: 50
Click on the shoe, head to the villa and enter.
ENIGMA 009: Poor big dog.
SOLUTION: To overcome this enigma, all you have to do is arrange the matches to form the two "silhouettes" of a dog. You will have 12 matches available, and you will have to represent the head, abdomen, legs and tail of the animal. The head must be represented by a triangle (3 matches), the abdomen by a square (4 matches), while the legs and tail will be represented by a single match (for a total of 5).
Look at the 2 paintings on the right, go upstairs and talk to Lady Dahlia.
Chapter II: Escaped Feline
ENIGMA 0011: The dial
SOLUTION: The answer is 10
Talk to Gordon, the overweight man, and click the chandelier.
ENIGMA 110: The disappearing cube
SOLUTION: to obtain the solution to this riddle you simply remove the central match that you will find on the right side of the solid in front of you, going from four cubes to three.
After that, get out of the mansion and touch the cat. Then, reach the garden of the villa and click on the boat.
ENIGMA 013: Save who can
SOLUTION: 13
Talk to Ramon and then go to Via della Via to talk to Marco. Click on the door and then on the candle.
ENIGMA 015: The ten candles
SOLUTION: 3
Click on the chair.
ENIGMA 014: Which chair?
SOLUTION: E
Leave the emporium and go left (reaching the square); once there, touch the cat. Talk to Daniel, the tall man you'll find in front of the clock tower, look at the beige door, which is the entrance to the Enigmas Shop, but we can't access it now. Open the blue door and you'll find yourself at City Hall, where you'll have to talk to Rodney.
ENIGMA 016: Pen triangles
SOLUTION: 7
ENIGMA 118: Red and black
SOLUTION: 1000
Leave the town hall and go to the entrance of the town, so you can talk to Fotlbaffen.
ENIGMA 017: The five cards
SOLUTION: D
Open the blue door and enter the inn to talk to Beatrice. Give Layton the stool and click on the painting right above Beatrice.
ENIGMA 112: My love
SOLUTION: To overcome this puzzle, you will have to re-assemble a painting, divided into four sections, to bring out the silhouette of a woman wearing a hat. Rotate the section of the painting that includes the old man's lips 180 degrees, and do the same with the section that includes the back of the neck. Move the section where the eyes and nose of the old man appear to the right, and finally, move the two sections that are currently at the bottom up. Congratulations, you have solved the riddle.
Leave the inn and go to the drawbridge and once there, touch Layton's car.
ENIGMA 019: At the parking lot
SOLUTION: To overcome this puzzle, you'll have to move all the cars you'll find in the parking lot to clear the exit. Move the car to the top left horizontally until it reaches the right wall. Move the car in front of Layton's car up until it reaches the top wall, and do the same with the car next to the one you just moved. Move Layton's car forward; move up the vertical car that you will find attached to the right wall, in order to free space that will be readily occupied by the two cars placed horizontally right next to it.
At this point, bring down the car that is right above the space just cleared by the two cars moved earlier. Move the Professor's car back, and also move the car up (the one next to the two cars placed horizontally), which will actually block his way. Move the second car horizontally to the top right corner (the one closest to the exit, so to speak), and bring the car that blocked the road back up to Layton. At this point, move the car that was blocking the car park exit upwards, from which you will finally be able to get out without any further hindrance.
Go back to the square and go left, reaching Via del Parco. Once here, talk to Agnes, an old lady who, after solving the riddle, will reward you with a fishbone to give to the cat.
ENIGMA 022: Divide the pigsty
SOLUTION: To solve the riddle, you'll have to make sure you connect some stakes in the pigsty, so that each of the pigs is separated from the others. Don't worry, the solution is much simpler than you can imagine: take the two stakes placed at the ends that you will find at the top of the picture and connect them to those next to the pig you will find at the bottom, so as to form an "X". Once this is done, connect the two posts that you will find next to the pigs at the top and sides of the stage, so as to form a horizontal line. In this way, you will have passed the puzzle.
After that, talk to Pauly, the angry gentleman you'll find next.
ENIGMA 020: Good neighbourhood
SOLUTION: To solve this conundrum, you'll need to draw paths on the screen so that the four neighbors don't cross paths in the street, thus avoiding a fight. Follow the directions and connect the various letters present, thus overcoming the puzzle.
LETTER A:
- down
- right
- down
- down
- left
- left
- down
- down
- right
- right
- right
- right
- right
- Up
LETTER B:
- Up
- Up
- Up
LETTER C:
- right
- down
- down
- down
- left
- left
- left
- left
- left
LETTER D:
- left
- Up
- Up
- Up
- left
- left
- left
- left
- down
- down
- down
- right
When you've finished the puzzle, talk to Pauly again.
ENIGMA 021: Ten pills
SOLUTION : 8
Open the blue door and you will have access to the restaurant; then talk to the guy with glasses named Frick.
ENIGMA 025: Equilateral Triangle
SOLUTION: To solve this riddle, you simply "flip a triangle" made of nickels, creating one with the vertex facing down. The simple solution: simply move the three coins to the vertices in a clockwise direction and, with three simple moves, you will have obtained the required result.
After that, the next riddle will be given to you by Crostin, the man behind the counter.
ENIGMA 023: Dose the juice
SOLUTION: Follow our instructions to get the solution.
- Pour the 8l juice into the second container;
- Pour the 5l juice into the third container;
- Pour the 3l juice into the first container;
- Pour the 2l juice into the third container;
- Pour the 6l juice into the second container;
- Pour the 3l juice into the first container;
ENIGMA 028: Find the dot
SOLUTION: To overcome the puzzle in question, simply circle the dot at the bottom right.
ENIGMA 027: Litigious Brothers
SOLUTION : starting from the top and clockwise: 1 - 5 -2 - 4 - 6 - 3.