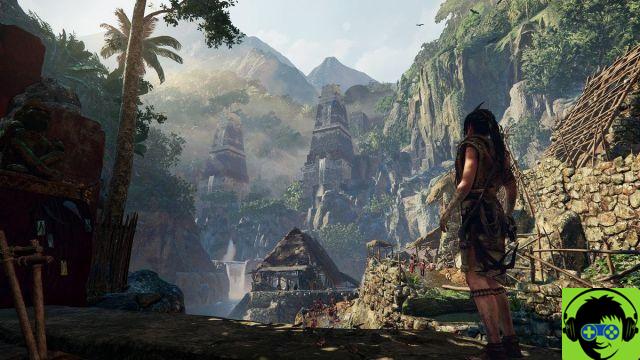
If there is an element of Shadow of the Tomb Raider that really takes us back in time are the many puzzles we'll have to solve, both in the main plot and in the various side quests. In the very first chapters of the saga, in fact, before the turning action, our beloved Lara Croft was often struggling with puzzles not even always easy to solve, which were a bit 'lost track in the reboot of the series. For this very reason, the SOTTR development team decided to reintroduce this element that made the franchise famous, making us face a whole series of puzzles more or less easy to solve. If you are looking for the solution of a particular puzzle of the main quest, consult our guide and everything will be clearer. We are currently working on a guide for puzzles in the Tombs and Crypts.
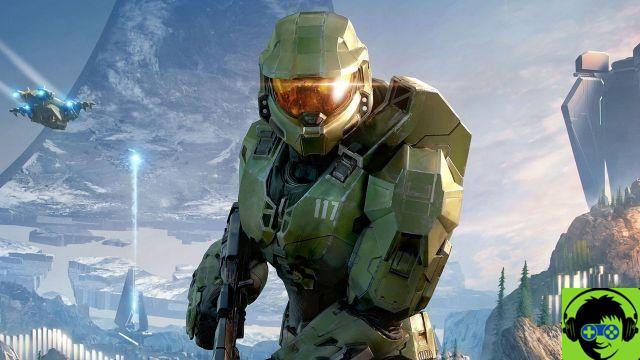
Shadow of the Tomb Raider : how to solve the riddles of the main plot
Let's start by saying that, depending on the level of difficulty you choose, the puzzles will be more or less easy to solve. At the lowest difficulty level, for example, the game will provide you with a whole host of clues that will make life a lot easier. However, if you're facing Shadow of the Tomb Raider the "Deadly Obsession" mode (the highest difficulty level in the game), forget about any help and advice. Precisely for this reason, if you're planning to platinum the game, if you're intent on taking the "Deadly Obsession" trophy and you're stuck on a certain puzzle in the main quest, below you'll find a list of all the puzzles in the storyline, as well as ways to easily solve them.
Enigma #1: Trolley and Bell blocked by rubble
Mission: Hunter's Moon
Objective: To reach the top of the Pyramid
Area: Cozumel
- Enter the area, walk to the cart on either side of the stage and push it towards the center of the area;
- Use the mechanism that you will find to rotate the platform on which you will have pushed the carriage until its main part is facing you. At this point, shoot an arrow with a rope so that you can connect the cart to the above mechanism (don't worry, shooting the arrow will automatically connect the cart);
- Use the mechanism to pull the carriage over the gears;
- At this point, cut the rope. In this way, you will make sure that the trolley is heading at full speed towards the rubble, sweeping it away, clearing the way and allowing you to continue;
Enigma #2: Enigma of the Bridge
Mission: Brusco Landing
Objective: Find Kuwaq Yaku
Area: Peruvian Jungle
- Use the wheel mechanism on top of the stone platform, right in front of the bridge;
- At this point, have Jonah help you to push the largest lever you will find a short distance away from the above wheel. In this way, you will operate a mechanism that will bring down, for a few seconds, a section of bridge that, as you will immediately notice, is equipped with an area that can be hooked to another using arrows and ropes. As soon as this part of the bridge descends, you must be quick to descend to the lower right side of the stairs and throw an arrow and a rope on the diametrically opposite end of the pier, making sure that the other end of the rope is tied to the hooking of the bridge section you have lowered by pushing the lever;
- If you succeed, the rope you throw in will ensure that half of the bridge is blocked, allowing you to move on;
Conundrum #3: Young Lara in the Croft Manor / Enigma of the Globe and the Chessboard
Mission: Brave Adventurer
Objective: Find the White Queen
Area: Croft Manor (when Lara will dream of herself as a young man)
Enigma #4: Room with lava and revolving pillars
Mission: Path of the Living
Objective: Explore Trinity Excavation
Area: Kuwaq Yaku
- As soon as you arrive in this area, you will find several closed doors and two revolving pillars, each with symbols depicted on each facade. The aim, of course, is to find the right combinations of symbols to open the four doors that block your way. Each door you succeed in opening will make a new rotating section of the pillars appear, with a new combination to be inserted. The various symbols that you will have to use will be portrayed on the walls of the room; however, if you don't want to waste too much time, you will simply have to report the combinations of symbols that you will find as you continue reading;
- Symbols to insert in the various rotating sections of the left pillar: EYES, EYES, EYES, EYES;
- Symbols to be inserted in the various rotating sections of the right pillar: 1 PALL, 3 PALL, 1 LINE, 2 POINTS WITH A LINE;
- Every single combination of symbols will open a door, allowing you to continue on your way more and more. The first to open will be the door on the left, then the one on the right and, finally, the central doors;
Enigma #5: The Spider Trial and the Eagle Trial
Mission: Road to the Hidden City
Objective: Complete the Spider Test and the Eagle Test.
Area: Eagle test
- The puzzle in question, rather than being a puzzle, resembles a real climb. Start your journey with the huge spider depicted on the wall: climb on your left legs, just before your head you will find a white line that will allow you to move to the right and, when you reach the edge of the wall, jump and cling to the wall with the stalactites. Once at the top, continue in the corridor, take the road on the right, continue on the pier until you find a crevasse. At this point, jump and, with your grappling hook, cling to the large rock on the ceiling; once you have done this, swing with the rope and reach the necessary thrust to reach the opening on the top of the above spider;
- As soon as you've solved the Spider Trial, you'll go outside and face the Eagle Trial. Use all the paths and overhangs to reach a huge structure of self-propelled beams. The purpose of this challenge is to get you to the top of a tower and rotate a mechanism through ropes that you tie to it. Head to the right and begin your climb, bearing in mind that the areas in question may be difficult to see due to the vegetation that has grown on it and some broken wooden beams that will not allow you to continue, forcing you to look for alternative routes. From now on, you will have to climb higher and higher until you reach the top. In case you are getting worried, know that you will find many check points on your way;
Conundrum #6: The Snake Trial
Mission: The Hidden City
Objective: Complete the Snake Trial
Area: Snake Head
- In the first room, use the lever that you will find right in the middle of the stage. At this point you will notice, on the left side of the room, a small wooden pillar, which can be hooked with an arrow and then pulled, to eradicate it from the wall. After this you will notice that a flammable oil will come out of the hole left open by the pillar. Use the incendiary arrows and set the oil on fire, so as to reduce the wooden fence that blocked the road to ashes and continue on;
- Once in the second room, you will notice two circular platforms that you have to rotate. As the more observant ones will surely have noticed, there are grooves on the floor, whose function is to let the flammable oil that we saw in the previous room flow. Our task, then, will be to match all the grooves. Before you start moving any of the circular platforms, you will do well to connect them together with arrows and rope, so that they rotate together. At this point, turn the larger platform counterclockwise (to the left) until you hear two "clicks", i.e. rotate it about 180 degrees. At this point, check that the grooves are at least aligned and then cut the rope. Return to the main platform and rotate it one click (about 90 degrees) clockwise (to the right). At this point, the grooves should all be perfectly connected. Go back to the beginning of the area, pull the lever that you will find on the head of the rock snake, use rope and arrows to pull the wooden pillar up, let the oil flow, set it on fire and, if you have done everything correctly, you will be able to burn the second barricade that prevented you from proceeding further;
Enigma #7: Water pipes (Part 1)
Mission: Eye of the Snake
Objective: Open the door
Area: Cenote
- Connect the second water conduit (the one in the middle, so to speak) to the wheel mechanism with bow and arrows, so that it rotates to the right and uses it as a bridge to access the upper area, where you will find another conduit;
- When you reach the first "snake tap", use your ice axe to remove the wooden beams that obstruct the hook. Be careful: the moment you do this, enemies will appear;
- Use arrows and rope to connect the pipeline on top of the rope mechanism, and rotate it until water flows into the pipeline just below (the one you previously used as a bridge, for example);
- At this point, connect the middle duct to the wheel mechanism and turn it to the left, so that the water flows on the lower "tap";
- Once this operation has been completed, connect the last pipe to the mechanism and turn it until the water ends up on the wheel you will see on the left. By doing so, you will be able to unlock the first part of the bridge. Once this is done, jump into the water and reach the place where you will have to face the second part of this puzzle;
Enigma #8: Water pipes (Part 2)
Mission: Eye of the Snake
Objective: Open the door
Area: Cenote
- Connect the first pipe to the mechanism and rotate it about 180 degrees so that the small pool you will see is filled with water;
- At this point, you will have to go to the pool, which will now be full of water, dive in and remove the rubble that prevents the second pipeline from rotating. Be careful: the moment you complete this action, many enemies will appear; prepare to fight;
- Kill all enemies, return to the wheel mechanism and rotate the first pipe until water flows over the second;
- At this point, connect the mechanism to the second pipeline and rotate it until the water flows on the wheel visible on the right side of the stage. In this way you will have opened the bridge for good, so you can proceed further;
Enigma #9: Find the secret entrance to the crypt in the church.
Mission: Via Veritas
Objective: Find the Secret Crypt
Area: San Juan Mission
To solve the riddle in question you will have to, as mentioned in the description, find the secret entrance to the Crypt inside the Church of San Juan. In order to achieve your goal, you will need to interact with three objects; continue reading to understand their location.
- On the ground floor of the building, more precisely on the right side of the structure, you will find a wall with several cracks. Use the ice axe to remove the bricks and thus reveal a hidden fresco. In case you don't find it right away, Jonah will also point out the point in question;
- Always on the ground floor of the structure, look for a golden fresco with a large heron and interact with it;
- At this point, go up to the upper floor and, practically in correspondence with the crumbling wall on the lower floor, you'll find another crumbling wall to interact with;
- After that, Lara will comment on two biblical quotations and a heron. Go again to look at the image of the heron you found downstairs and a movie will be taken. Go to the fresco on the opposite side of the room, which depicts a crucifixion. At this point, use the pickaxe to open the way and you will have found the secret entrance to the crypt;
Enigma #10: The Holy Cross and the Ray of Light
Mission: Way of the Cross
Objective: Follow the Stations of the Cross
Area: Mission of San Juan
This puzzle will be divided into two parts, depending on which side of the room you're going to interact with.
- Left side: Pull the cart to the left towards the beam of light (so the holy cross on the cart can reflect it). Then use the crank to shine the light on the central "window", the one that shows people on a staircase. Pull the central lever, this will unlock a second beam of light pointing to the right side of the stage;
- Right side: Pull the carriage on the right side towards the new light beam. Once again, use the crank and, this time, shine the light on the left "window", the one showing a crucifixion scene. Pull the left lever where you shine the light. At this point, a film will be triggered and the puzzle of the cross and the sunbeams will finally be finished;