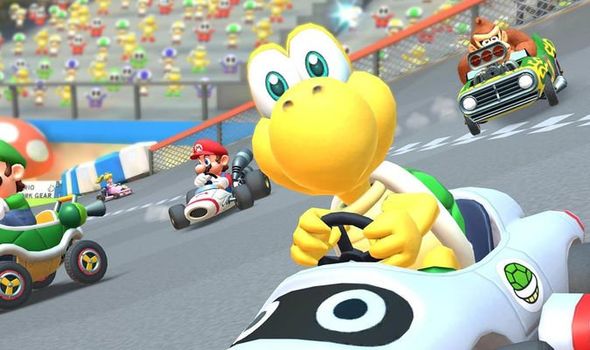
In each planetoid on which Mario will land there are two basic types of enemies to face, simple enemies and level bosses. Simple enemies are enemies on multiple planetoids and generally can be defeated or bypassed with ease, while bosses are the final enemies that unlock the galaxy's superstars - each galaxy can contain multiple superstars, but the others will be unlockable through specific challenges that Mario will have to endure, but we'll talk about this in a separate guide.
Below are descriptions and details on the bosses present on the various galaxies with also included the tactics to follow in order to beat him and then conquer the Superstars or Megastars that he hides.
BABYDINO PIRANHA - SUSPENDED ISLAND GALAXY (WORLD 01)
Babydino Piranha is the first of all the bosses that we will have to face and also the first one that will directly provide us with a star of course. This boss is nothing more than a huge Piranha plant with legs, so it will not be attached to the ground with a stem, but has the ability to run and move around his planet. In addition to the normal attack that will happen simply by touching us, Babydino also has a secondary attack easily avoidable, at some point in fact the enemy will stop and take the charge for a jump.
To defeat Babydino the tactic is one and only one: spank him. Although it may sound like a nice sentence, this is what we will actually have to do. You have to reach the back of the enemy and by performing pirouettes first destroy the shell of man who protects him and once destroyed this perform another pirouette to spank the enemy. Once the whole sequence has been performed for the first time, Babydino will run away and after a few seconds he will recreate his protective shell, so we will have to start from the beginning by turning right or left in order to reach the back of the enemy and here perform pirouettes to first destroy the shell and then spank Babydino's unprotected back - in this second phase our enemy will be much faster in his movements and his jump attack will present a second concatenated jump immediately after the first. Beat Babydino, the star will appear on top of the planet.
KING LAKITU - YOSHI ISLAND GALAXY (WORLD 01)
The second boss we meet is King Lakitu, and to beat him we'll use Yoshi's special skills. King Lakitu is a special creature halfway between an insect and an Octopus, and he'll travel in a storm cloud around the arena where we'll face him. The boss has mainly two attacks, the first one consists of Koopistrice throws on the arena, the second one consists of electric shocks that he will send on the ground using the cloud he controls.
Defeating King Lakitu is not at all complicated, in fact we will have to hit him three times with the Koopistrice that will launch us so as to send his cloud in tilt and make him suffer a healthy and healing electric shock. So let's wait for the King to throw the first Koopistrice and block him with Yoshi by making him lick it, then we'll take the enemy in the mouth, get in line with King Lakitu and make Yoshi spit out the unfortunate Koopistrice. As soon as we hit the King a couple of times, this will launch not a single Koopistrice, but four. Let's block them all quickly with a lick from Yoshi, then pick one up and throw it at Lakitu for the third and final time. After the boss is beaten, the star will appear in the center of the arena.
GADGET LAUNCHER - SPINNING TOP GALAXY (WORLD 01)
The first world is without a shadow of a doubt the one with the most bosses to beat. The third is located in the Trottolina Galaxy and is Lanciatrivella, a huge robot formed by two heavy stems from which will release small drills and a central body made of glass and iron inside which is stored our Superstar. Unlike the previous bosses, Lanciatrivella has a single attack - if you don't consider the possibility that it has to crush us under its huge legs - that is the release of the small drills that will go around the planet to reach us and hit us.
To beat Lanciatrivella requires patience and precision, in fact, the tactic is to retrieve the Trottolaplano and use it to pierce the planet from one point to another hitting with the drill the iron dome in which the Superstar is located. Carried out this attack a first time, our boss will find his legs in the air and release the small drills on the field. We wait for this one to catch up with us, then we jump on it to get it out of the way. We do the whole procedure three times in all - the more damage Lanciatrivella will suffer, the more small drills he'll throw into the field. Hit the glass dome for the third time, the robot will destroy itself completely and the star will be ours.
BUZZODRAGON - BOWSER JR. TOWER GALAXY. (WORLD 01)
Fourth and last boss of the first world, sent to us and kindly loaded by Bowser Jr. Buzzodrago, this is the name of our boss, is a very long and huge dragon with two main attacks, the first is the bite, after flying a little 'low altitude on the planet where we are, the enemy will launch on it with open jaws giving a couple of bites on the surface. The second attack is instead perforating and is directly linked to the previous one. In this second attack, Buzzodrago will break through the planet from head to head by creating a tunnel through which he will pass.
It 's in his second attack the moment when we can damage the boss of this galaxy, Buzzodrago in fact has six different red bumps in his body that we'll have to hit with pirouettes and the only time we can do it is when the dragon will break through the planet by passing inside his body, here you just need to reach the entry hole and perform pirouettes continuously to hit his six bulbs - usually in a single sequence however you can't hit more than three bulbs at a time. After the first hat-trick, Buzzodrago will move away from the planet, starting again the glide phase, the bite attack and finally the hole on the planet. So let's wait quietly for the dragon to do everything and as soon as we have the bulbs in range, let's hit them - sometimes, when Buzzodragon flies grazing, it will be possible to perform a concatenated jump to a spinning top so as to hit one or more bulbs of the dragon without having to wait for his attack. As soon as Buzzodrago is left with a single bulb, the boss's wrath phase will start in which the boss on duty will increase the power of his attack and his speed, let's not worry and repeat the same technique already implemented previously so as to finish him and get the star that will unlock the second world.
SCARABOOM - INTERLOCKING GALAXY (WORLD 02)
Scaraboom is the first of the second world bosses and is nothing more than a huge Scarafetor with a main and a secondary attack. Its main attack consists in the use of its claws and its physicality, Scaraboom in fact will go on a rampage from the beginning, not the third attack, as soon as we enter his field of vision and this will lead him to be faster and more dangerous for us. The second attack will be carried out by Scaraboom only after we have hit him for the first time and it consists in throwing bombs on the ground that will explode a few seconds after the launch.
Beating Scaraboom is no picnic at all, although the tactics are the same as any other Scarafetor, being able to perform the three crashes on the back of this boss is a very complicated thing. First of all we'll have to use the special power of the cloud flower to create three clouds above us that will allow us to level up and this height will be sufficient only for the first of the three crashes that we will have to perform. Executed the first everything will get complicated, our enemy in fact will stop walking on the ground, but will open its wings and start to rotate around the tree flying at an average height. So in order to reach our enemy's back, we'll not only have to activate the power of the cloud flower, but also use the clouds in the field as an intermediate platform to reach the right height - at the same time Scaraboom will activate its second bomb attack, which will definitely complicate our lives if we find ourselves on the ground. After the second of the three crashes, everything will get even more complicated, as Scaraboom will stop following a precise turn around the tree and will start to descend and climb continuously making the crash jump something much more complicated - in addition the height at which it will fly will be even greater, which will force us to climb more using new cloud platforms. Once the third shot is downloaded, Scaraboom will be beaten and we'll finally be able to pick up its star.
ROLLODILLO - GALAXY ROCK BALLS (WORLD 02)
Rollodillo is the second of the bosses of the second world and it is a sort of giant blue hedgehog and very particular, our opponent is completely protected by a hard pointed carapace except for the back which, when Rollodillo is not shaped like a ball, is completely at our mercy. Compared to the other bosses, Rollodillo has a single attack and is precisely linked to this carapace and the ability to turn into a ball, in these moments in fact the enemy will start to turn quickly around the small planet trying to put us under.
Defeating Rollodillo is not difficult, the tactic is almost identical to that used with the very first boss, Babydino Piranha. So we follow the movements of our enemy by turning right or left, accentuating our curve with respect to Rollodillo and after taking the rock bonus we run at full speed towards the back of the enemy as soon as he finishes rolling. As usual the shots we will have to score are three and as always, as soon as the enemy will suffer the second, his speed and ferocity will increase significantly. Beaten Rollodillo we will get our coveted star.
BOWSER - GALAXY LAVA KINGDOM OF BOWSER (WORLD 02)
And here we come to the first of the three clashes against Bowser, Mario's nemesis, Peach's kidnapper, Toad's scourge and whoever has more, the more you put. In this version Bowser will be gigantic thanks to the power obtained by the Megastella in his possession and the attacks with which he will try to crush us are two: a mega-fist that will break through even partially the planet on which we collide and a blaze that will launch from the mouth after suffering two attacks by Mario.
Beating Bowser is no picnic at all, especially for everything that actually revolves around this fight. Once the movie is finished, we will check the ground of the planetoid and make sure we stay well away from the three orange areas that mark the point where three large asteroids will hit the planet. As soon as the three asteroids have landed, Bowser will go on the attack by throwing a powerful punch towards the planet that if he hits Mario will eliminate him on the blow. We check the enemy's position and as soon as he starts the arm, we make a quick jump back. With his fist Bowser will lift the meteorite off the planetoid on which we're standing, so we quickly jump on one of them and here we make a crash jump so that the meteorite hits the enemy once more - we'll have to be very quick to do the full sequence, or Bowser will make it in time to free himself forcing us to start again from the beginning. Hit Bowser a first time, we repeat the entire procedure exactly until the counterattack to be executed after Mario's bitter enemy punches. Once the first two shots are scored, as mentioned before, Bowser will give vent to his second attack, the blaze. As with the meteorites, the area where the fire will take effect will be well marked, although unlike before, we will have much less time to escape from this area. As soon as he runs out of breath, Bowser will again look for Mario to throw his fist, let him do it and as soon as he gets stuck we repeat the sequence of momentum and crash on the meteorite to hit our enemy a third and a fourth time. Hit then Bowser for the fourth time, the Megastella in his possession will be able to break free, our enemy will return to its natural size but will be able to escape in time, we just have to take the Megastella and unlock the third of six worlds.
RED NOSE FROST - GALAXY BELLATONDA (WORLD 03)
Red Nose Brinello is the first of two bosses living in the third world. It's a huge pointed snowball rolling around a planetoid a little bigger than him. Our enemy has virtually no attacks, the only way he can hit us is to get underneath it as it rolls around the planet, but its large size will make it extremely easy for us to anticipate it.
Beating Brinello is not at all simple stuff, even if the enemy is not particularly aggressive in terms of attacks, his only weak point, his red nose, keeps him well sheltered most of the time, rotating around the planetoid Brinello's nose will be at the right height to be hit for just under a second in each turn. Let's take some time first to take the rhythm of our opponent's movement, then let's stay close to him and as soon as Brinello's nose touches the ground let's get closer and do the pirouette so that we can hit him. As usual, after scoring the second blow our enemy will be furious by increasing his running speed, so let's stop again a few seconds to take the new rhythm of the enemy and as soon as we understand when to attack, we hit Brinello for the third and last time. Once we beat the enemy, all we have to do is pick up the star.
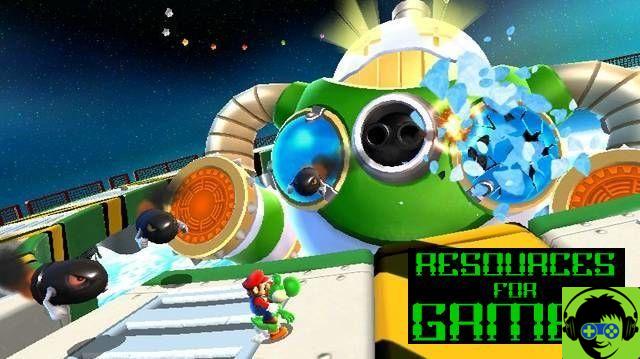
MEGAPICCHIOTTO - GALAXY NAVAL FLEET OF BOWSER JR. (WORLD 03)
New enemy put in the field directly by Bowser Jr. Megapicchiotto is a giant robot with instead of hands two huge hammers and in the center of the body a mega cannon from which will shoot a Banzai Bill and behind six small cannons from which will come out one by one the Bullet Bill. The attacks of the enemy are therefore sufficiently obvious, in addition to the Banzai and Bullet Bill, the giant robot will also use the two hammers to hit the platform and create shock waves that we must avoid in order not to lose Yoshi, necessary to fight against Megapicchiotto - you can still recover Yoshi through various eggs available on the ground.
Beating Megapicchiotto not only is not a simple thing, it also requires a lot of time and above all patience. The first targets are the two blue plates on the chest of the enemy, both to be destroyed with two shots each, shots that will have to be Bill Bullet collected and relaunched thanks to Yoshi's tongue. In the meantime we pay attention to all the other attacks coming from the enemy dodging the big Banzai and the smaller Bullet. Once the two plates are destroyed the enemy will also move his arms starting to hit the two hammers on the surface of the planetoid creating shock waves of a third blue plate to destroy, this time bigger than the previous ones while shock waves and Bullet Bill will continue to go around. Destroyed also the third plate - just like the previous two shots - Megapicchiotto will crash the hammers on the planetoid again causing the loss of the capsule on the head that will show Bowser Jr. As soon as this happens, let's get back on the move with Yoshi by jumping the shock waves and collecting the Bullet, we'll have to hit Megapicchiotto twice more, right on the capsule where Bowser's son is, to beat our opponent and collect the Megastella that takes us straight to the fourth world.
BELLDOZER QUEEN - UPSIDE DOWN GALAXY (WORLD 04)
Belldozer Regina, the first of the two bosses present in the fourth modno is a giant Belldozer and as such must be treated and managed. Unlike the basic Belldozer, however, Regina has a second fundamental attack, namely the ability to spit lava over the grids of the planetoid in which we find ourselves.
Beating Regina is not easy, but neither impossible, the main problem lies in fact in the excessive speed of our opponent that does not make us in any way easy to find the right grid to rotate to hit the Belldozer's abdomen. We quickly reach the opposite side of the planet and put ourselves under Regina's shadow trying to anticipate her with long jumps over the grid and as soon as she is in range, we perform a crash jump so as to hit the abdomen of the enemy for the first time. Carried out the attack Regina will spit lava at random on different grids making them unusable for a few seconds, so let's use this time to take us back to the opposite side of the planetoid without being seen by Regina and again put ourselves in pursuit of the shadow of the enemy hitting it with a crash jump as soon as it will be above a grid that we can use. Completed also the second of the attacks Regina, like all the other bosses, will go on a rampage exponentially increasing its speed, but not only that, in fact from time to time will stop spitting lava balls on random grids making our work even more complicated than before. Carried out the third and final attack, we will receive the star that will appear in the center of the planetoid.
BOWSER - GALAXY GRAVITATIONAL REALM OF BOWSER (WORLD 04)
And here we come to the second of the three clashes against Bowser who in the meantime has recovered a new Megastella thanks to which he has returned to the gigantic dimensions of the first encounter on the planet of Toad and the second encounter in the second world. Bowser's attacks are practically the same as before, the only difference is that now his fists will release on the planet a shock wave that we must avoid at all costs while the blaze that will launch from the mouth after suffering two attacks by Mario, is now more powerful and durable.
Once the film is finished, we will check the planetoid terrain as usual so as to stay away from asteroid falls and in the meantime, let's get ready to jump because as soon as the asteroids hit the planet a shock wave will be created that we must at all costs avoid by jumping - if the landing of the three spheres will be very close to each other, we will also perform a pirouette in order to increase the time in the air. Avoided the asteroids we begin to worry about Bowser who will not immediately perform the megapunch, first he will hit the ground on several occasions creating shock waves that we must avoid and only as a last punch will throw the powerful one that will anchor him for a few seconds to the ground. With his fist Bowser will lift the meteorites out of the planetoid, so we quickly jump on one of them and here we make a crash jump so that the meteorite hits the enemy and hits them for the first time - we have to be very quick in executing the complete sequence, or Bowser will make it in time to free himself forcing us to start again from the beginning. Hit Bowser a first time, we repeat the entire procedure exactly until the counterattack to be executed after Mario's bitter enemy punches. Sent to score the first two shots Bowser will give vent to his second attack, the blaze that compared to the previous fight, as we mentioned, is much more powerful and durable, so we run around the planet and wait for Bowser to stop spitting fire. As soon as he runs out of breath, Bowser will once again set out in search of Mario to throw first his fists with the shock waves and then the megapunch, let him do it by jumping the first and use the blockade derived from the second to hit Bowser a third and a fourth time - the tactic is always the same, jump the shock waves, avoid the blows and take advantage of a meteorite by performing a crash jump to launch it on the enemy. Hit Bowser for the fourth time, the Megastle in his possession will be able to break free, our enemy will return to its natural size but, as before, will be able to escape in time, so we just have to take the Megastle and unlock the penultimate of the worlds in which we will have to travel.
SAND SAND LIZARD - GALAXY RENA SDRUCCIOLA (WORLD 05)
Sabbiocertola is certainly not the simplest of creatures in this world, it is a creature halfway between a hen and a lizard that keeps out of the sand only the head, arms and half of the torso. The enemy has two types of attacks, one deriving from the planetoid on which we are standing and the other connected to throwing objects. The first attack we can define it as a sort of quicksand, the whole planet is in fact an upturned cone with sand that continuously slips towards Sabbiocertola and few if they are the land platforms on which we can rely. The second attack instead will begin to be used after having suffered the attack and consists in throwing thorny eggs first from his hands and then from a couple of cannons that will sprout at the sides of the enemy.
The fight with Sabbiocertola, once we get the rhythm, is not very complicated, what we will have to do in fact is to quickly collect the fire flower and exploit the power that this flower gives us to launch no less than three fireballs inside the open mouth of Sabbiocertola. In doing so the enemy will suffer the first blow by closing the mouth to avoid more damage and going to counterattack with the launch of red and yellow eggs, both pointed, but the first explosive and the second charge instead of coins. Once its counterattack is completed, Sabbiocertola will open its mouth again giving us the chance to pick another fire flower and fill its mouth with fireballs again. Immediately two attacks, like any good boss, Sabbiocertola will go on a rampage by making two cannons that will launch eggs. We avoid the usual attacks of the boss, we wait for the boss to open his mouth again and resume with our attack. Damaged the enemy for the third time the boss will disappear giving us the chance to collect the star.
PRINCE PIKANTE - HOT THRILL GALAXY (WORLD 05)
Prince Pikante is a huge Octopus on board of a huge tank with three cannons from which he is able to throw flaming coconuts that will turn the ice rink into an ice rink with patches of lava here and there. In addition to this attack the boss is able to hail the burning coconuts, but this only after he goes on a rampage.
Beating Pikante is not complicated at all, it's just a matter of being calm, among all the coconuts that Pikante will throw, there will be every now and then a green walnut that we will have to reach to throw it, thanks to a pirouette, on Pikante's head. We repeat the launch a second time taking care never to fall into a pool of lava and after the usual second attack Pikante will give vent to the second of his attacks, the rain of burning coconuts. Let's do the usual lava puddle and wait patiently for our green coconut and as soon as we have it in range, we perform a pirouette and beat Pikante getting our star as a reward.
TORRATTACCO - GALAXY BUNKER BOWSER JR. (WORLD 05)
Here we are again face to face with little Bowser and his ultra-technological contraptions. After Buzzodrago and Megapicchiotto, it's the turn of Torrattacco a very long tower armed with three rotating rows of fireballs and cannons capable of firing electric balls - to this is added that after the second attack the tower will increase in height and will be able to move on the planetoid.
Though impressive and perhaps even a little scary, little Bowser's Torrattacco is by no means a complicated enemy to beat, it's gotten worse. The vulnerable point of the tower is the dome at the top where Bowser Jr. is located and to be attacked you have to use the special power of Mario Nuvola to climb to the top and reach the target. Once the movie is finished, we quickly reach the mushroom cloud and then activate the power over one of the big fans to make the cloud level up and reach a good height. From here we then perform reaching the dome and once at the top we perform a crash jump in order to crack the dome for the first time. Executed the first attack we return to the ground and wait here, jumping the rows of fireballs, for the little Bowser to finish sending electricity on the dome of the tower. As soon as we will see the dome free again and not as if it was lit for the holidays, we collect the mushroom cloud and as we did before, we use the fans and the cloud to climb to the top paying attention to the electric cannons able to dissolve the clouds. After the second attack, Bowser Jr. will release his tower from the planetoid, bringing to light the crawler at the base able to move the tower. Finished the movie there will be nothing particularly different to do than before, you just have to climb much higher, so we use the fan just passed by the tower to reach the height before sufficient and from here the power of the mushroom cloud to climb even more avoiding the electric cannons. Once we reach a good height and the right distance from the tower, we jump and perform the third and last crash on the dome of the tower to destroy it and get the Megastella that will unlock the sixth and last world.
KING WOMP - GALAXY FORTRESS NOSTALGIA (WORLD 06)
King Womp is nothing but a giant Womp, the biggest one ever seen. The enemy has only one attack and it's the same that all the Womp have, which is the fall to the ground in the hope that Mario will stay under.
Although he's the second-to-last boss of the story, King Womp is decidedly easy to beat, we'll simply have to trick him into attacking us, move quickly away from his landing zone and perform a side somersault or use his feet to reach his back where there's a circular zone on which to perform a crash jump to damage the enemy - the exact same system you'd have to adopt to beat a normal Womp. Performed the attack successfully twice, Womp like any self-respecting boss will be furious by exponentially increasing his run and recovery time after a face down. Hit for the third and final time the King Womp button will be beaten and we can collect our star.
BOWSER - GALAXY ELECTRIC BOWSER GENERATOR (WORLD 06)
We arrived at the final clash, the third against Bowser, the one that closes the adventures of Super Mario Galaxy 2 . Meanwhile the usual Bowser has recovered yet another Megastella thanks to which he has returned to the gigantic dimensions of the previous matches. Bowser's attacks in this last clash are faster, more powerful and long-lasting than before, moreover his fists won't release a single shock wave on the planet anymore, but six lasers that will move along the whole planet until they meet on the opposite side of the planet compared to the point he hit.
The third clash with the king of the Koopa is definitely the longest and most complex of this game, but it will start in the same way as the previous ones, so stay away from asteroid falls and in the meantime get ready to jump because as soon as the asteroids hit the planet will create the shock wave that we must at all costs avoid jumping - if the landing of the three spheres will be very close to each other, we also perform a pirouette in order to increase the time in the air. Avoided the asteroids we begin to worry about Bowser who will not immediately perform the mega-fist, but as before will hit the ground on several occasions creating six different lasers that as we have mentioned will run along the entire area of the plant. Once the laser race is over, Bowser will set his mega-fist that will put in the air the asteroids fallen on the planet, so we quickly jump on one of these and here we perform a crash jump so as to send the meteorite on the enemy hitting him once. As usual we will have to be very quick in executing the complete sequence, faster than all the previous encounters, or Bowser will make it in time to free himself forcing us to start again from the beginning. Hit Bowser a first time, we repeat exactly the entire procedure until the counterattack to be executed after the punch of Mario's bitter enemy. Sent to score the first two shots Bowser will give vent to his second attack, the blaze that will be even more powerful and lasting than the previous fights, so we run around the planet and wait for Bowser to stop spitting fire. As soon as he runs out of breath, Bowser will once again set out in search of Mario to throw first his fists with shock waves and then the megapunch, let him do it by jumping the first and use the blockage from the second blow to launch the meteorite on Bowser a third and a fourth time - the tactic is always the same, jump lasers, avoid the blows and exploit the meteorite by performing a crash jump to launch it on the enemy. Hit Bowser for the fourth time our task will not be finished yet, Bowser will throw us into open space and always remaining behind us will hunt us while we must jump from one asteroid to another using the crash jump to launch it on Bowser. The thing will not be simple at all, we will have to wait for the ideal moment or the blow will go to waste, we wait therefore that the enemy approaches ready to launch its megapunch and in this instant we execute our attack.
Hit Bowser twice more with this technique, the King of the Koopa will be beaten and the sixth and last Megastella will be ours with Peach finally safe and the whole group aboard the spaceship Mario to celebrate yet another victory over Bowser.