Episode 10 of the section "HOW TO TAKE BETTER PHOTOS WITH IPHONE" where I tell you about tricks and tips on photography with the iPhone. In today's episode I wanted to create a very fast video where I reveal a very useful trick to take pictures from top to bottom with your iPhone.
In this article we want to summarize some key points of this shooting mode that you must always keep in mind to improve your shots. Let's start:
A very simple trick!
What I'm showing you is a trick that I thought many of you knew, and that I have actually already shown you in some past videos in this photography course with iPhone. However I found that not many of you know it and so I want to show it to you again in a new light. In fact, we will use it to take photos from top to bottom with our iPhone. Let's get started right away!
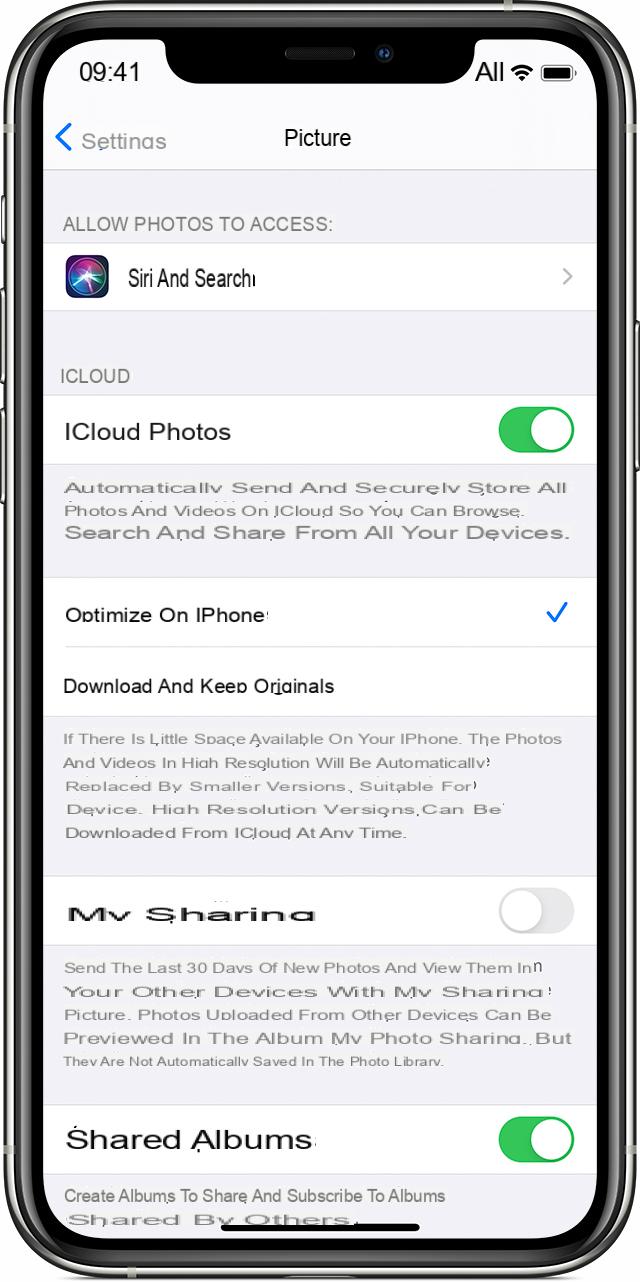
The idea is to take a perfectly balanced and horizontal photo of a plate, a dish or more generally of a subject that we want to shoot perpendicularly. To take advantage of the trick you have to activate the grid into the camera: to do so, go to Settings -> Camera and check the box "Grid”As I showed you in the video.
 1")
And now take a good look at the camera
By activating the grid, it will be there a small detail - the trick I was talking about - which is almost imperceptible to the less attentive, but which allows you to take photos from above with your iPhone.
In addition to the usefulness of the grid itself, it will appear in the center a small yellow cross with which the iPhone shows you just when we are in the optimal position to shoot.
 2")
I don't know if you can see it in the photo above; certainly in the video it is clearer, but in any case in the center of the screen - only when you position yourself perfectly vertical compared to the shooting plane - a small yellow cross will appear suggesting us the perfect time to shoot.
Et voilà, that's it! Now take a little hand and you will be able to take really perpendicular and therefore precise photos. Of course I also recommend that you do a minimum of post processing to calibrate shadows, contrasts, light, saturation and much more to make the photo more “palatable”.
Other useful tricks
Once you have mastered this mode, you can also add a few more tricks that we have seen in the other episodes. For example, you can use the Burst mode, that is, hold down the shutter button to take many more photos and then choose the best one.
Another trick is to change the exposure: once you have focused on a point of the photo, with your finger swipe on the screen in order to increase / decrease the brightness level of the photo, so as to enhance lights or shadows. Finally, don't forget to always carry a comfortable bag with you tripod like these:
Doubts or problems? We help you
Remember to subscribe to our Youtube channel for videos and other reviews. If you want to stay up to date, subscribe to our Telegram channel and follow us on Instagram. If you want to receive support for any questions or problems, join our Facebook community or contact us on Instagram. Don't forget that we have also created a search engine full of exclusive coupons and the best promotions from the web!