Hi, I'm a new iPhone user. I want to transfer videos from my iPhone 7 to Mac. Please give me some advice to do this. I don't see any option on iTunes that allows me to transfer videos from iPhone to computer. Thanks!
Now the iPhone has become a mini camera thanks to which it is easy to record videos whenever you want. However, the high-resolution videos recorded on the iPhone take up a lot of space. If you want to free up space or make changes to the video on your computer, it is imperative to transfer various video files from iPhone to computer. This article explains how to transfer videos from iPhone to PC and Mac.
Solution 1: How to Copy Recorded Videos from iPhone to PC
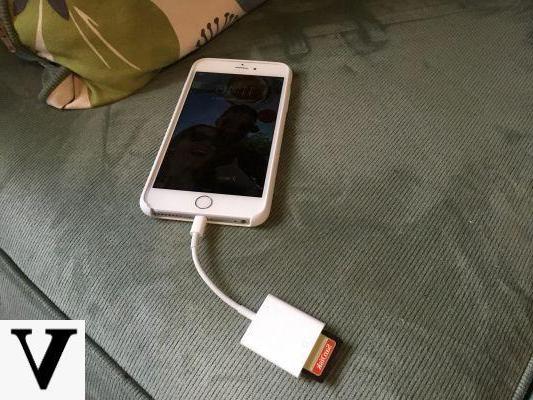
Step 1. Enter the passcode (if any) on your iPhone to unlock it. Then connect the iOS device to the computer via a USB cable.
Step 2. On the iPhone a pop will ask you to enable the computer or not. Click on 'trust'.
Step 3. Double click to open 'Computer' or 'My Computer'. From there you will be able to see your iPhone as a disk. Click on it to open it. The videos you have captured will be in the folder that also contains the photos. Select the videos and copy and paste them to a folder on your computer.
Solution 2: How to Transfer Recorded Videos from iPhone to Mac
There are several pre-installed applications on Mac that are capable of transferring videos from iPhone to Mac. They are Preview, iPhoto, and Image Capture (or Image Capture). The steps to transfer videos from iPhone to Mac are the same with each application. Here we take as an example "Image capture”And let's see the steps to follow to move videos from iPhone 12/11 / X / 8/7 / 6s / 6 / 5s / 5 / 4s / 3GS to Mac.
Step 1. Connect iPhone to Mac via USB cable. Click the 'trust' button on your iPhone to enable the mac to read the device.
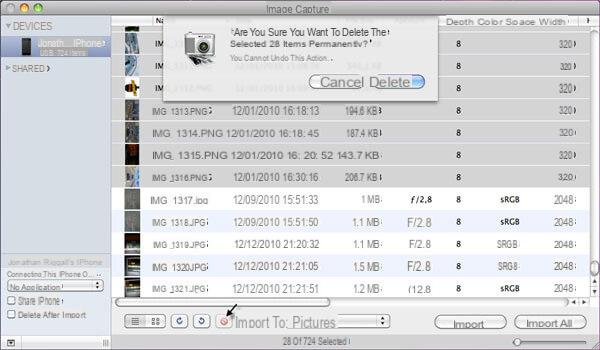
Step 2. Launch the Image Capture app. It will detect your iPhone automatically and show the captured videos and photos. If you don't know where the Image Capture app is, type 'Image Capture' in Spotlight to find and open it.
Step 3. Click to choose the video and click 'Import' to transfer the videos from iPhone to Mac.
Solution 3: How to transfer ANY video from iPhone to PC / Mac with dr.fone iOS
The two solutions described above are feasible ONLY for those videos recorded with your iPhone. However, if you have downloaded some videos directly to your iPhone or synced videos to your device, you need to follow the steps below to transfer videos from iPhone to PC and Mac.
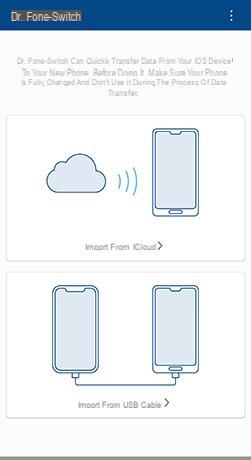
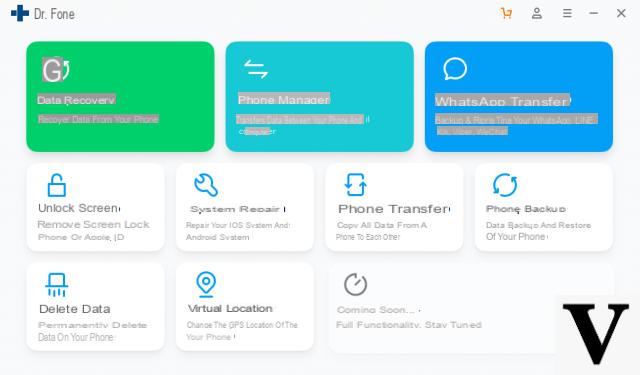
1 Phase. Download and install Dr.Fone per iOS on the computer. It is recommended to download the correct version according to your computer's operating system. Here are the download links for the demo version:


Home screen:
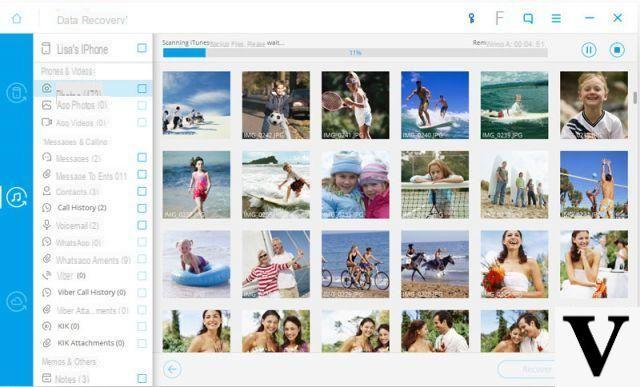
Phase 2. Connect iPhone to computer via USB cable. Click 'Trust' on your iPhone and launch dr.fone for iOS. From the main screen of the program, access the function DATA RECOVERY and start scanning the iPhone. The scanning process can take a few minutes.
Phase 3. In the result window click on the “Video app” on the left and you will see all the videos in the right window. Select the desired videos and click on 'Recover'to save them directly to your computer.
The solution just described works for all iPhone models and versions: iPhone 12/11 / X / 8/7 / 6s / 6, 6 Plus, iPhone 5s, iPhone 5, iPhone 4s and iPhone 4. It works on both Windows PC and Mac OS X.
Transfer Videos from iPhone to PC and Mac -