Are you taking your first steps in the world of Photoshop and would you like some clarification about the use of patterns? No problem, but first let's try to understand what a pattern is. A pattern is a kind of drawing, often based on geometric shapes, which repeats itself over and over again to fill the area of an image (an area that can be related to a layer, an object or a user-defined selection) .
Patterns can be created using the geometric shapes and drawing tools included in Photoshop, they can be obtained by selecting parts of existing images or they can be downloaded from the Internet (in order to have them ready to use). In short, as you have surely already understood the only limit to their use is the imagination!
If you want to know more, take five minutes of free time and read on. We are going to find out together how to create Photoshop patterns and how to use them to create impressive photos or drawings. I made the tutorial using Photoshop CC 2022, but the directions in it should be valid for all the latest versions of Adobe software (both on Windows and on Mac OS X). Have fun!
Create Photoshop patterns from scratch
Let's start by seeing how to create Photoshop patterns starting from scratch. The first step you need to take is to select the item New from the menu Fillet (located at the top left) and create a new image of square form with transparent background and a resolution of at least 72 pixels / inch. The image size can be whatever you like, for example 20 × 20 pixels for a very small pattern, 90 × 90 pixels for a medium-sized pattern or 250 × 250 pixels for a large pattern but, again, it all depends on your tastes and needs.
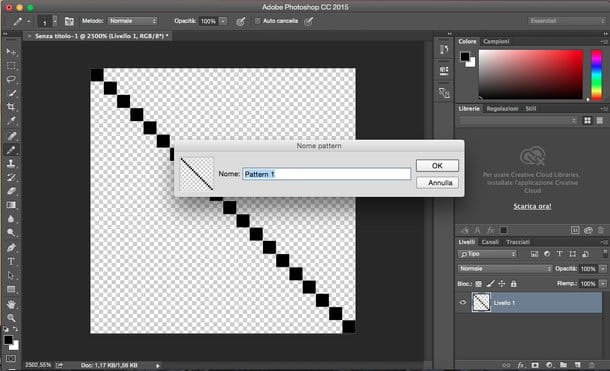
Once you've created your image, use the drawing tools and geometric shapes Photoshop to bring your custom pattern to life. You can create a simple diagonal line using the line tool (which you can call up by right clicking on the rectangle tool icon located at the bottom of the toolbar); you can use the pencil to draw more complex shapes (the pencil appears by right clicking on the brush icon) or you can select the other geometric shapes available in Photoshop to create more or less complex drawings. You can set the colors freely, although usually black or white is used to create effects that stand out more on the final image.
When you are satisfied with the result, go to the menu Layer> Rasterize> All Layers Photoshop to rasterize the image and save your pattern by selecting the item Define Pattern from the menu Modification. In the window that opens, then type the name you want to assign to the "drawing" and click on the button OK to complete the operation.
To increase the precision of the drawing within your pattern, increase the zoom level of the image using the key combination Ctrl + (your Windows) or cmd + (on Mac) and turn on the grid selecting the appropriate item from the menu View> Show in Photoshop.
Create Photoshop patterns starting from an already existing image
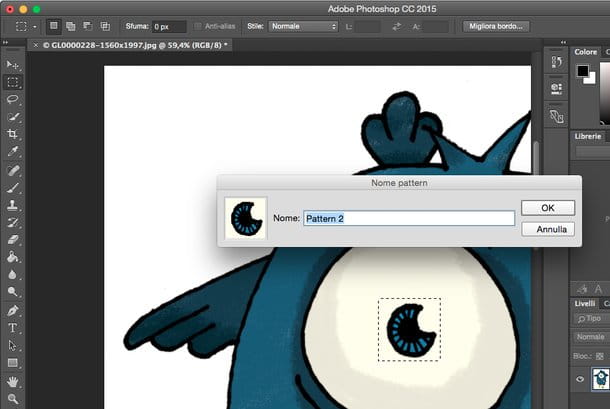
Would you like to create a pattern starting from an already existing image? Nothing easier. After opening the image of your interest in Photoshop (by dragging it into the program window or by selecting the item apri from the menu Fillet), turn it on rectangular selection tool from the toolbar (top left) and create a square-shaped selection around the portion of the image you want to transform into a pattern. Try to be precise in your selection, help yourself with the suggestions for the measures that appear next to the mouse pointer.
Once your selection is complete, go to the menu Edit> Define Pattern Photoshop, type the name you want to assign to the pattern in the window that opens and click on the button OK to save the portion of the image you have selected as a pattern. That's all!
Download Photoshop Patterns from the Internet
As mentioned above, you can also download patterns from the Internet and import them into Photoshop. To do this, look for a site that allows you to download patterns, such as Brusheezy, locate the "drawing" you like best and download it to your PC by clicking on the Download.
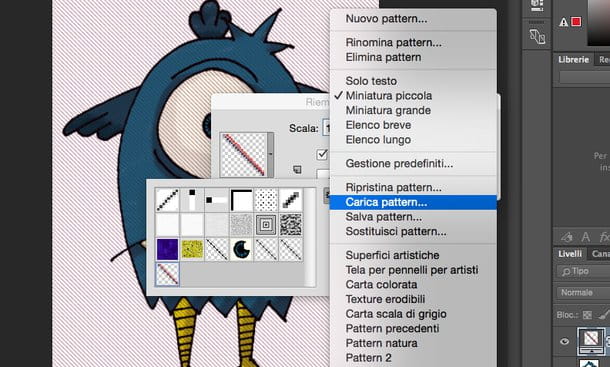
Then open Photoshop, select any of the tools that allow you to use patterns (eg. bucket, patch, corrective brush, fill), click on thegear located next to the pattern selection menu and choose the item Load pattern. Finally, select the file .pat that you previously downloaded from the Internet and that's it: the pattern will be added to the Photoshop library and will always remain there, ready to use for any eventuality.
Caution: before using a pattern downloaded from the Internet on your images, carefully consult its terms of use. Not all patterns can be used in works intended for the public, and even fewer are those that can be used for free in projects with commercial purposes.
How to use Photoshop pattern
After you have created or downloaded from the Internet the patterns of your interest you have to apply them to your images, right? So let's see how it's done, there are many ways to do it.
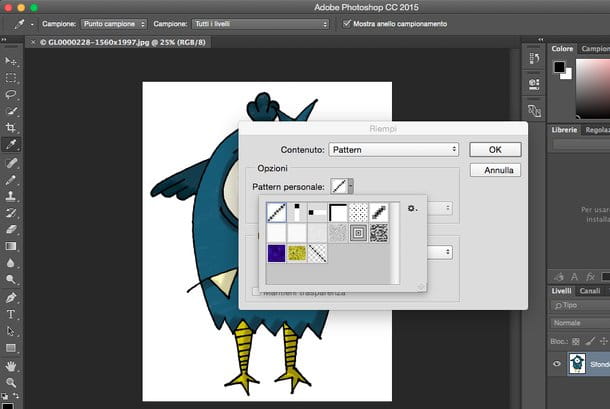
If you want to fill a pattern image, select the voice Fill from the menu Modification Photoshop; set the value pattern in the drop-down menu Content and choose the "drawing" to fill the image with via the menu Personal pattern. Then set the level of opacity and method to apply the pattern to the image and click on the button OK to complete the operation.
Alternatively you can go to the menu Layer> New Fill Layer> Pattern and "cover" the original image with a pattern. In the window that opens you can choose not only the "drawing" to apply to the image but also its size level (via the menu Ladder).
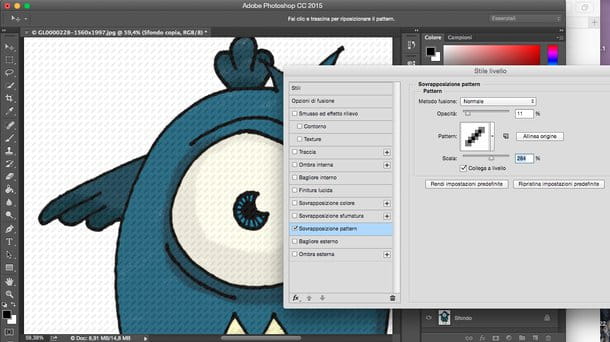
If you want to apply patterns to only one layer of the image, right click on it in the layer management panel (bottom right) and select the item Blending options from the Photoshop context menu. In the window that opens, put the check mark next to the item Pattern overlay and select the "drawing" to apply to the image using the appropriate drop-down menu.
At this point, adjust level of opacity, The dimensions (ladder) And the blending method of the pattern and click on the button OK per salvare i Cambiomenti.
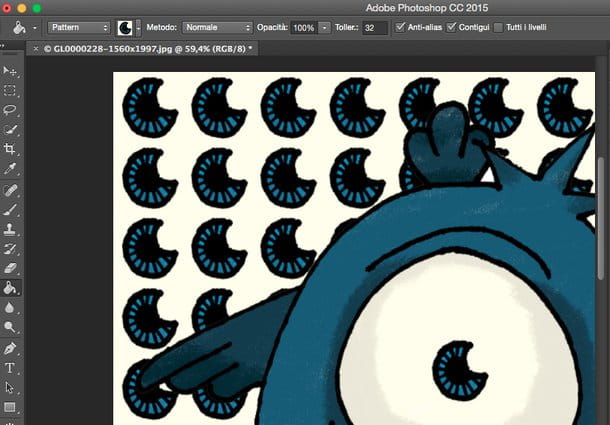
If you want to use patterns only in a certain area of the image, create a selection around the area you want to "fill", select the tool bucket from the Photoshop toolbar and set the item pattern in the drop-down menu located at the top left (next to the bucket icon).
Then select the "drawing" to use on your image from the menu that appears next to the item pattern (always top left) and use the paint bucket to fill the image area of your interest.
What we have seen are just some of the ways in which patterns can be exploited in Photoshop. Other tools that support these very important "drawings" are the corrective brush and patch tool, which you can find both in the Photoshop toolbar (by right clicking on the patch icon).
To activate the use of patterns you must select the instrument of your interest and click on the button pattern which appears at the top. Easier than that?