


Would you like to transfer the photos you took with your new iPhone to your PC but Windows doesn't recognize the phone? Would you like to automatically sync photos between iPhone and computer, without having to connect your phone to PC from time to time, but you don't know how to do it? Don't worry, I'm here today to help you out.
To discover how to import photos from iPhone to PC, take five minutes of free time and follow the directions I am about to give you. These are small and simple steps that will allow you to recognize the "iPhone by" the computer and download all the images and videos on the smartphone memory to it. In reality, there are two paths that you can take: a traditional one that involves the physical connection of the iPhone to the PC and one that involves, instead, the use of cloud systems.
So, without hesitating one more second, make yourself comfortable and carefully read everything I have to explain to you on the subject: I'm sure that, at the end of reading this guide, you will have understood the steps to take to succeed in your small business. Having said that, there is nothing left for me to do, except wish you good reading and have fun!
How to import photos from iPhone to computer
To import iPhone photos to your computer, you have several ways to follow: if you have a computer with a Windows operating system, the presence of iTunes, Apple's official multimedia software; on Macs, on the other hand, it is not necessary to install anything, as everything is already “standard” on the computer. Find everything explained, in detail below.
How to import photos from iPhone to PC with iTunes
If you own a computer animated by Windows 10 and you haven't installed yet iTunes, linked to this page of the Microsoft Store, click on the buttons Get e Open Microsoft Store and then finalize the setup by clicking on the button Ottieni / Installa. If necessary, sign in to your Microsoft account.
If, on the other hand, you have an older version of Windows, connect to the Apple website and click on the link first Windows (below) and then up Download iTunes for Windows (64-bit) now or on Are you looking for the 32-bit Windows version? Download the app from here, depending on the version of the operating system installed on your PC. Once the download is complete, launch theexecutable obtained and follow the instructions on the screen to complete the setup. For more information on this, please take a look at my guide on how to download iTunes.
Once you have installed everything you need, you can proceed with importing the photos on the "iPhone by": connect it to the PC via cable, wait for the iTunes and wait a few moments for the operating system to recognize the smartphone. If necessary, approve the connection between the two devices by pressing the button autorizzazione that appears on both screens and, when prompted, by entering the unlock code your iPhone.
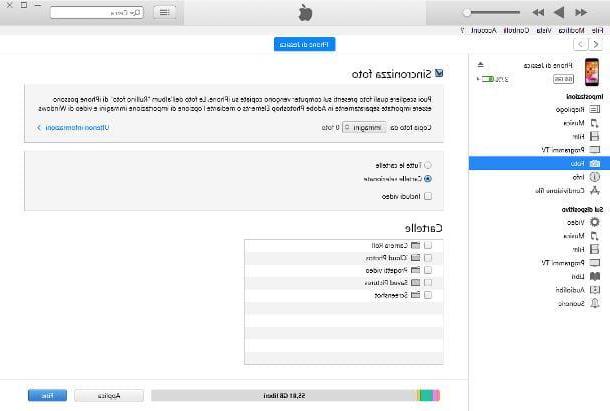
At this point, to activate photo synchronization via iTunes (making sure that the images in the photo folder of the computer coincide with those in the memory of the "iPhone by"), click on the item Gallery located in the left sidebar of iTunes, put the check mark next to the item Synchronize photos and, using the drop-down menu Copy photos from, choose the folder on your computer to enable synchronization. If you are interested in copying only the photos from iPhone to computer and not doing the reverse, I recommend starting from an empty folder, created specifically for the purpose.
Finally, select the cartelle of the iPhone to be synchronized, placing the check mark next to the relevant names, and click on the button end to start synchronizing items (which may take some time to complete). Following this operation, the photos present in the iPhone memory will be copied to the chosen folder: if, within the same, other images are already present, they will be transferred in turn to the iPhone memory.
Please note: if you have enabled photo sync on iCloud, you will not be able to proceed through iTunes. In this case, you can use the Windows import procedures, which I am going to talk about in the immediately following section, or proceed directly through iCloud, as I am about to explain later.
How to Import Photos from iPhone to Windows PC

import photos from iPhone to a Windows PC, you can follow at least three different paths: using the application Windows 10 photo; making use of the import wizard procedure Windows or using the most classic of copy and paste. Regardless of the strategy you choose, it is still essential that iTunes has been previously installed on the computer and authorized to communicate with iPhone (as explained above).
If, therefore, you employ Windows 10, start the application Gallery recalling it from Start menu (the one accessed by pressing the flag icon located at the bottom left) and, after having unlocked the iPhone screenclick on your button Import resident in the upper right. Finally, select the item From a USB device give the menu that you come purpose.
After a few seconds (the time may vary depending on the amount of photos present), you should see a new window containing the images found: at this point, to copy all the images, set the drop-down menu located at the top on the option All the elements and click on the button Import XX elements of XX elements. If, on the other hand, you prefer to copy only some images, put the check mark next to the relative ones previews and finish it all by pressing the button Import XX elements of YY elements.
Following this operation, the photos will be automatically copied to the System Pictures folder; if you prefer to change the import folder, click on the button Import settings located in the image selection screen and that's it.

Alternatively, you can achieve the same result using theWindows Image Import Wizard: to use it, start theFile Explorer / Windows Explorer Windows, by clicking on gialla poster located in the taskbar; click on the item What PC located in the left sidebar, then right click on theiPhone and select the item Import images and videos give the menu answer.
Now, if you want to import all the photos and videos in the phone's memory without distinction, put the check mark next to the item Import all new items now and click on the button Import, to start image transfer.
If, on the other hand, you prefer to manually select the photos to import, put the check mark next to the wording Review, organize and group the items to import, click here NEXT and choose whether to customize the names of the groups of photos that are shown to you (otherwise they will have dates as name), if you assign them gods tag and whether to exclude certain images from importing by removing the check mark from their previews.
To adjust the time interval between one group of photos and the next, use the bar Adjust groups, located at the bottom right. Having made your choice, press the button Import and wait for the photo transfer to complete.
When the operation is completed you will find the photos (and videos) of the iPhone in the folder Images Windows, organized in sub-folders. If you want to change the destination path of the images, click on the item Other options located at the bottom left and specify the folders you want to use for photos and videos using the appropriate drop-down menus.

Finally, I would like to point out that by opening theFile Explorer Windows, by going to What PC and clicking on theiPhone, you can copy the photos saved on the "iPhone by" and paste them on the PC as if they were common files on a USB key or an external hard drive.
All you have to do is reach for the folder Internal Storage > DCIM > 100APPLE iPhone and select the images (and videos) of your interest.
How to Import Photos from iPhone to Mac
If you have a Mac, you will be pleased to know that the procedure for importing images from the memory of the "iPhone by" is extremely simple. To begin with, connect the latter to your computer via cable and, if necessary, allow communication between the devices by pressing the button autorizzazione that appears on the screen and typing, when necessary, the unlock code your iPhone.
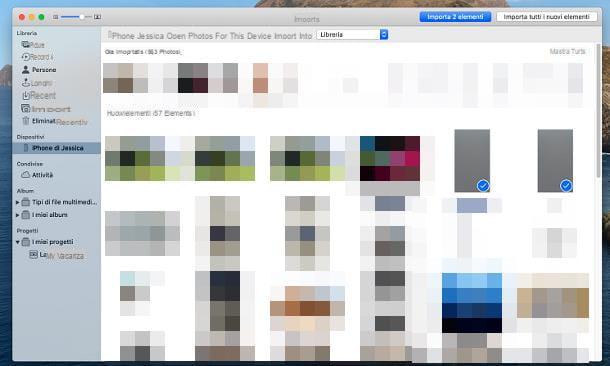
Once this is done, start the application Gallery of macOS (the icon depicting a colorful flower located on the bar Dock), Click on iPhone name resident in the left sidebar of the program, under the heading devices and, to import all the photos and videos stored in memory, click on the button Import all new items, located at the top right. If, on the other hand, you prefer to copy only some images or videos, click on the relative previews to select them and press the button Import XX items. That's all!
If you prefer to import iPhone photos as separate files (and, therefore, not within the Photos collection), you can take advantage of alternative solutions such as Image capture o AirDrop, of which I told you, in detail, in my guide on how to transfer photos from iPhone to Mac.
How to import photos from iPhone to PC with iCloud
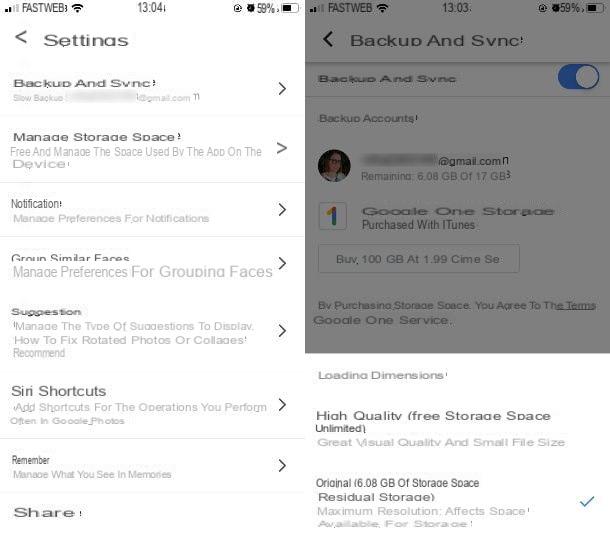
You are a faithful user of the iCloud Photos service and, after purchasing additional space to store your files and enabling the saving of photos to the cloud (if you are not sure you have done so, go to the menu Settings> [your name]> iCloud> Photos and make sure the lever ICloud Photos is set to ON, otherwise do it yourself), would you like to understand how to get a copy of the images on your computer via the Internet?
Then know that you can act through the iCloud client for Windows, which allows you to automatically transfer the images belonging to the iCloud photo collection to your computer: to get it, if you use Windows 10, linked to this page of the Microsoft Store and press the buttons Get, Open Microsoft Store e Ottieni / Installa.
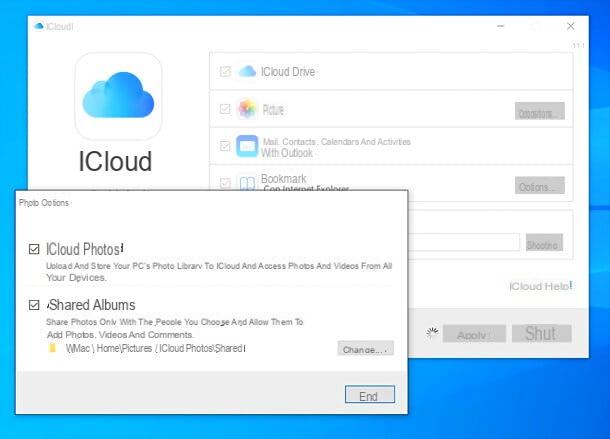
If, on the other hand, you are using an older version of Windows, connected to the Apple website, click on the link you can download iCloud for Windows from Apple's website and wait for the client setup file to download to your computer. When the download is complete, launch the file obtained, put the check mark next to the item I accept the terms of the license agreement and press the buttons Install, Yes e end, to conclude the setup. If prompted, restart your computer to complete setup.
The next time you log in, you should see the iCloud home screen: enter your details Apple ID in the appropriate fields, choose whether or not to send the usage data to Apple, by responding to the warning message that is proposed to you, and then select the items to synchronize by placing the check mark next to their names.

Specifically, check the box next to the entry Gallery and click on the button options corresponding to the same, if you want to adjust its settings.
If all went well, the iCloud photo transfer should start automatically, in optimized format: this means that images are downloaded in low quality and shown in original quality only when opened from the iCloud present in the folder Images of Windows.
Please note: as of this writing, it appears the iCloud client is having trouble syncing photos to windows. If you also find problems, proceed through the iCloud website, as explained a few lines below.
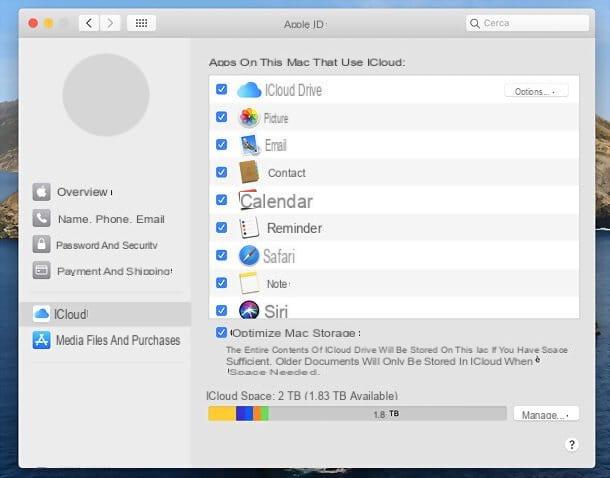
Su MacOSinstead, you just need to make sure you have connected your Mac to iCloud in System preference and to have activated the check mark relative to Gallery both in section Apple ID / iCloud of System Preferences than in the section Preferences> iCloud Photos application.
If you prefer, you can get access to the photos stored on iCloud from any computer, simply by using the browser, thanks to the service iCloud Web. To be able to do this, connected to the main page of iCloud.com, log in with your Apple ID and click on the icon Gallery, located in the control area.
To download the photos, select them with a click (using the keys Ctrl o cmd, in case of multiple selection) and click on the icon nuvola located at the top right.
Other methods to import photos from iPhone to PC
What I have just shown you are the most conventional ways to import photos from iPhone to PC, but they are not the only ones. If you want, you can also rely on other cloud services and other apps that allow you to transfer photos from iPhone to computer (and other portable devices) wirelessly.
- Google Photos - is the cloud storage service offered by Google for photos and videos, which I told you about in depth in this guide. To use it just install the service app on the iPhone, while to synchronize the contents on the PC just install the Google Drive client or connect to the web version of Google Drive.
- Dropbox - another very famous cloud storage service that, through its iPhone app, offers the possibility to store photos and videos online. It offers only 2GB of space that can be expanded for free by inviting other users to subscribe or for a fee, by subscribing to the 9,99 euro / month plan (which includes 1TB of storage). To learn more, read my guide on how Dropbox works.
- Send Anywhere - this is a free app that allows you to exchange files between computers, smartphones and tablets using very simple numerical codes. It works over the Internet. It does not offer automatic photo synchronization like cloud storage services, but can be used for occasional switching of photos and videos from one device to another. On Mac, however, it is preferable to use AirDrop.


