Would you like to create a slideshow with your photos enriching it with visual effects, transitions and background music but you don't have the slightest intention of using one of those complicated - and expensive - video editing software? Don't worry, I know some solutions that are right for you.
I am referring to online services and computer software that allow you to create photo slideshows starting from beautiful preset themes. In short, all you have to do is select the images to use in the video, choose the graphic style you like best and wait for the video to be generated.
How do you say? Does it sound too good to be true? Not at all! Choose one of the solutions I'm about to recommend and follow this guide on how to make video with photos, you will immediately realize that I am not telling you any lies!
WeVideo (Online)
The first solution I recommend you to consider is WeVideo, an online service that allows you to easily create photo slideshows full of animations and background music. It works on all major navigation programs and, through its free plan, offers the possibility of making videos in HD resolution (720p) lasting up to 5 minutes.
To create your first “photographic” video with WeVideo, connect to its home page and press the buttons TRY IT FOR FREE e GET STARTED. Then choose whether to register on the site with your email address (by filling out the form that is proposed to you) or whether to log in using your Facebook, Google o Yahoo!.
Once inside, watch the introductory video of the service and start creating your own by pressing the button Create new video. Then put the check mark next to the items Personnel e none click her cousin Home and then Start editing to access the WeVideo editor.
Now you need to upload all the photos to use as the basis for your video. To do this, click on the button Upload media, choose the images to include in your slideshow and drag them all into the gray box that appears in the center of the screen.
At the end of the upload, close the file selection screen (by pressing the x located at the top right) and drag your photos into the timeline of WeVideo following the order you prefer. A window will appear in which you can specify how many seconds to display each image (the default is 5 seconds) and you can choose whether or not to use the famous Ken Burns effect (an animation through which images are zoomed from the outside towards the center).
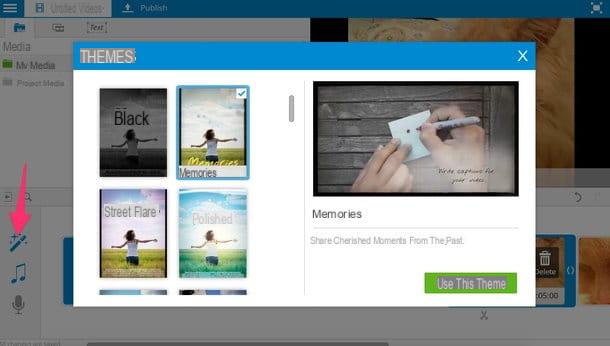
Once you have set your preferences, press the icon of Magic wand located at the bottom left, select one of the themes available in the WeVideo gallery (eg. Memories) and click on your button Use this theme to instantly apply beautiful transition effects and background music to your photos.
If you are not satisfied with the result or want to further customize your video, you can double click on the rectangles that are between one photo and another in the timeline to change the transition effects; you can change the background music of the video by pressing the icon of music note (bottom left) and you can set start and end titles for the movie by clicking on the icon Text which is located at the top left.
Also, if you position the mouse pointer over the photos in the timeline and click on the buttons Effects ed Edit, you can customize each image with captions and visual effects of various kinds.
When you're done working on your slideshow, press the button Publish located at the top left, type the title you want to assign the video and click on the button Set. Then put the check mark next to the item 720p HD and click on Publish to start creating your movie. Alternatively, if you prefer, you can also select the icon of one of the online services supported by WeVideo (eg. YouTube o dropbox) and export your video directly to it.
Within a few minutes, your slideshow will be ready and you can download it to your PC by accessing the section Exports of WeVideo and clicking on the button Download located at the bottom left. Easier than that?
WeVideo is also available for Android smartphones and tablets and for iPhone / iPad. Take a look at it and I'm convinced you won't regret it!
Windows Movie Maker (Windows)
It was preferred make video with photos remaining offline, you can resort to the immortalized Windows Movie Maker which combines incredible ease of use with a series of high quality effects and animations: all for free.
To download Windows Movie Maker on your PC, connect to the Internet site of the Windows Essentials suite (which in addition to Movie Maker also includes other multimedia applications) and click on the button Download now.
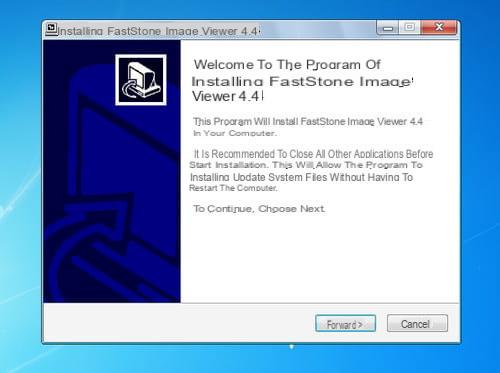
When the download is complete, open the installation package named wlsetup-web.exe and click on the button first Yes and then on the voice Select the programs to install. Then put the check mark only next to the item Photo Collection and Movie Maker and presses the button Install but I will complete the setup.
When finished, start Movie Maker and drag all the photos you want to use for your slideshow into the program window. Therefore, arrange the images in the way you prefer and move to the tab Animations to choose transactions and the effects of zoom and detail to be applied to each shot (by selecting each photo with the mouse).
If you also want to apply some visual effects to the images, select the appropriate Movie Maker tab and proceed as just seen for the transitions and zoom effects.
As for background music, you can use any MP3 you have saved on your PC as the soundtrack of your video. All you have to do is go to the tab Home of Movie Maker, press the button Add music and select the song to insert in the video.
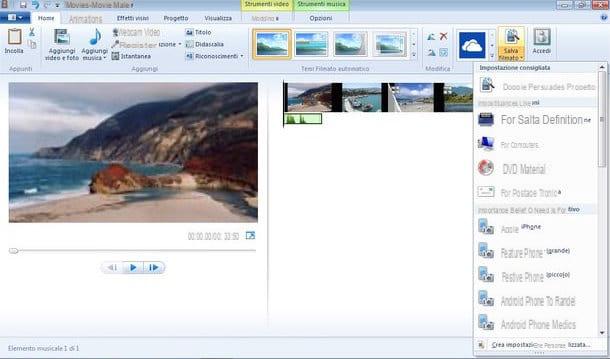
When you are satisfied with the result, click on the button Save movie located at the top right and choose the option For computer from the menu that opens to save your “photo” video on your PC.
Photo (Mac)
Do you have a Mac? Then you can make video with photos via the application Gallery included “standard” in OS X (from version 10.10.3 onwards): its ease of use is almost unbelievable!
All you have to do is select the item Create presentation from the menu Fillet, name the project and select all the images you want to include in the movie.
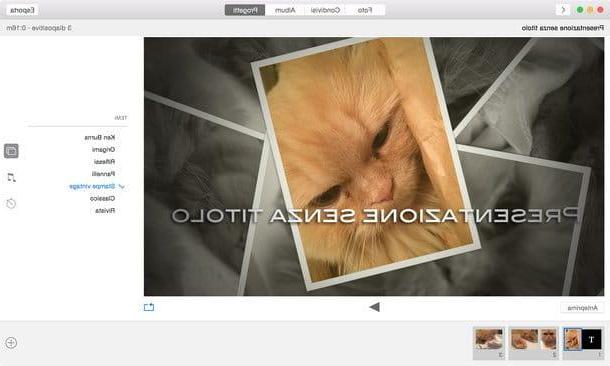
Ad operazione completa, pigia sul bottone Add located at the top right and select the graphic theme you want to use for the presentation by clicking on the icon two rectangles located on the right.
After this step too, click on the icon music note to choose whether to keep the theme's default music as background music or use songs from your iTunes library, select theclock to adjust the image display times and Export the final video by clicking on the appropriate button located at the top right.
How to make video with photos


