


Your wedding anniversary is approaching and this year you would like to give your spouse something different from the “usual” bouquet of flowers; in short, a slightly more romantic gift: a picture containing the photo of your wedding day on which a more recent shot of yours is superimposed. Unfortunately, however, you are not very familiar with the PC and, consequently, you do not feel able to perform this operation.
Cheer up: after all it's not as difficult as you think. If you give me a few minutes of your free time, I can explain to you how to overlay images using some programs pre-installed on almost all computers and some third party solutions. And if you want to overlay images directly from your smartphone or tablet, at the end of the tutorial you will also find a list of apps that might be right for you.
So, what do you think? Let's begin? Perfect! Make yourself comfortable, take all the time you need to focus on reading the next paragraphs and try the solutions listed below. I promise you that at the end of this reading you will have no problem overlapping images. Happy reading and, above all, have fun!
Paint (Windows)
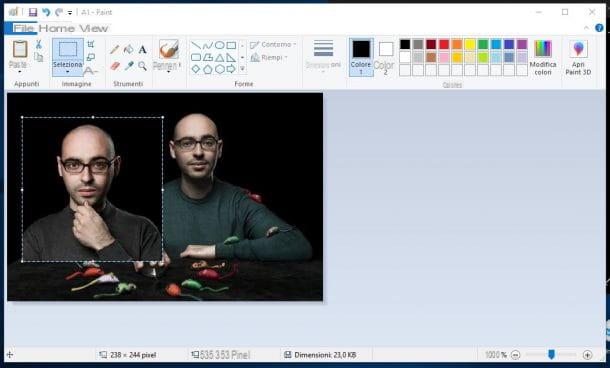
Su Windows can overlay images us Paint, very famous graphics software present "standard" on all PCs equipped with the Microsoft operating system.
To overlay images with Paint, first open the image to be used as a "background" (ie the one on which you will "paste" the second image) by clicking on its preview with the right key mouse button and then selecting the items Open with e Paint from the context menu. Then open the second photo you want to superimpose on the first by double clicking on its preview (so do not open it with Paint, but with the default Windows reader), click with the right key mouse over it and select the item Copy give the menu to compare.
At this point, go to the Paint window opened a little while ago (which contains the "background" image) and press the key combination Ctrl + V to superimpose it on the latter. If you wish, move the overlaid photo with the help of the mouse and possibly rotate it using the Paint tools and, when finished, save the final image by clicking on the button Fillet and selecting the voice Save give the menu to compare.
Paint 3D (Windows 10)
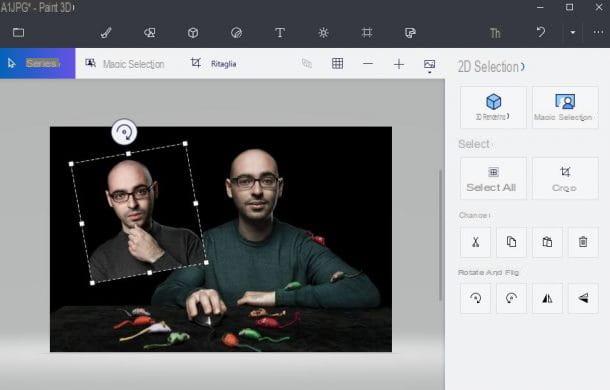
Does Paint seem too "rudimentary" as a program to superimpose images? If you have a PC running Windows 10, the latest version of Microsoft's operating system, don't rush to install third-party software, but try Paint 3D, the "enhanced" version of the "classic" Paint.
To overlay images with Paint 3D, open the image to use as a “background” by clicking the right key mouse over its preview and selecting items Open with e Paint 3D from the menu that appears. Next, drag the second image into the Paint 3D box where the image you opened earlier is located and there you have it: you have superimposed the two images in a flash.
Now, move and resize the image as you like and, as soon as you are satisfied with the result, click on the folder (located at the top left) and then click on the item Save give the menu to compare.
Preview (macOS)
Also on Mac it is possible to overlay images using solutions included “standard” in the operating system. To go into more detail, you can use it for that purpose Preview, the photo and PDF file reader installed on all the computers of the “bitten apple”.
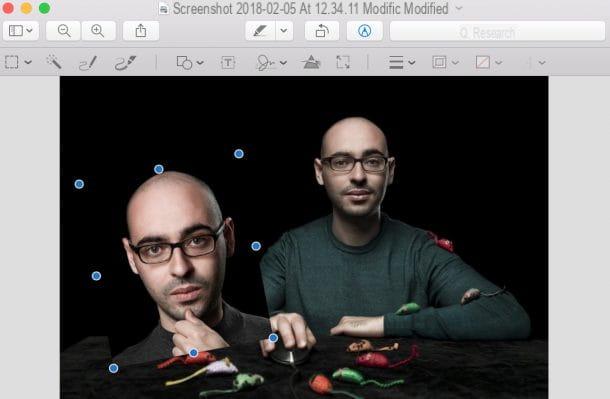
Overlaying images with Preview is as easy as drinking a glass of water. All you have to do is open with this program the images you intend to superimpose by double clicking on them. If by chance Preview is not the default player on your Mac, right click on each image and then click on the items Open with> Preview on the menu if you press.
At this point, select the portion of the image you want to "paste" onto the second using the Preview selection tool: then click on the pencil located at the top, click on the symbol dashed box in the submenu that appears and choose the selection tool you prefer (eg. Rectangular selection, Elliptical selection, Etc.).
As soon as you have selected the first image you want to overlay on the second, press the key combination cmd + c to copy it, open the second image and, at this point, press the key combination cmd + v to glue it. Et-voila! The image you selected and copied will be superimposed on the second one.
Now, if you wish, you can move and resize the image using the blue dots placed around it and then save everything by clicking on the option Save from the menu Fillet (top left).
Merge (Windows)
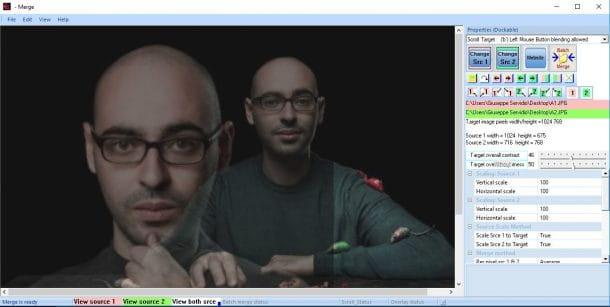
If the solutions I have indicated so far have not convinced you, try Go, a free program that allows you to superimpose two images in an extremely fast and easy way, which can also be used by those who - a bit like you - do not feel up to using professional graphics programs.
To download Merge on your PC, connect to the program's website and click on the button Download Vx.x here located at the top right. Then start the executable you just downloaded (mergexx.exe), click on your button Yes e complete the setup following the guided procedure: then click on the button Next, accept the terms of use of the program by placing the check mark next to the item I accept the agreement, click the button again Next for three consecutive times and finish everything by pressing on the buttons install e Finish.
Now, start Go through the link that was created on the desktop and, in the window that opens, select the first image to add to your work (the one that will act as a "background) by clicking on the button Load Image. Then click on the button again Load Image to select the second image to superimpose on the first.
If you wish, you can also move the images used: just select them from the drop-down menu located in the upper right part of the window (Scroll Source 1 for the first photo or Scroll Source 2 for the second photo) and drawing lines with the right key mouse in the direction you want to move them.
You can also apply edits to photos using the tools on the right side of the window. You can change, for example, the size of the first and second photos by modifying the values present, respectively, under the items Scaling Source 1 e Scaling Source 2 or you can adjust the contrast and brightness of the images by moving the slider next to the items Target overall contrast e Target overall brightness. As soon as you are satisfied with your work, save the output image by selecting the item Save As from the menu Fillet.
Photo Efficiency (Online)
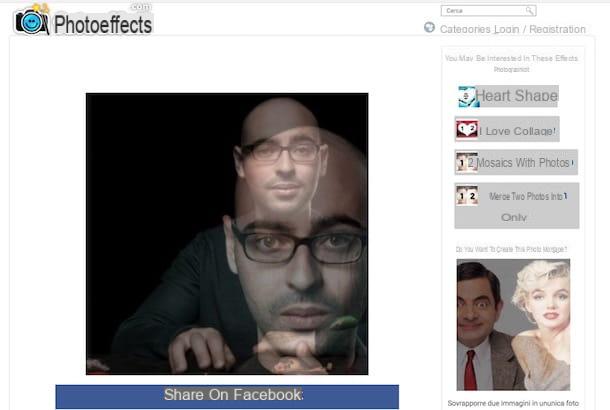
Using online services could also be another great way to overlay images. Maybe you could use it for that purpose Photo effects, a service usually used to create photomontages, but which also allows you to perform simpler operations, such as that relating to the superimposition of images.
To overlay images with Photo Effects, click here in order to connect to the service, click on the red button Upload my photos, click on your bottone Frontal and upload the first image to use in your composition. Then click on the orange button Choose photos and upload the second image, that is the one that will be superimposed on the first.
If you wish, you can also check the boxes below to adapt the images uploaded automatically, add filters, add text and remove the watermark automatically imprinted by Photo Effects (you can do this on up to three jobs per day).
At this point, click on the button The next, crop the images using the editor on the page, adjust the transparency of the front image in order to obtain the desired effect and, as soon as you have finished making these changes, click on the green button Finish.
On the page that opens in your browser, click on the button image Download (located at the bottom) and download the output image to your computer or, if you prefer, share it with other users by clicking on one of the sharing options available.
Other useful solutions
Haven't the solutions I proposed to you in the previous paragraphs particularly convinced you? Don't throw in the towel right now! Maybe you just need to find an online program or service that is best suited to your needs. Check out the solutions listed below - I'm sure you'll find what's right for you.
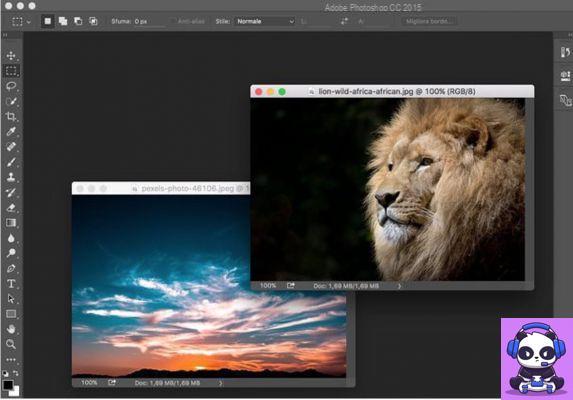
- Photoshop (Windows / macOS) - it is impossible not to know this program, since it is the most famous photo editing software in the world, as well as the best ever. Photoshop offers some advanced tools that not only allow you to create excellent quality photomontages, but also to overlay photos quickly and easily. If you remember correctly, I gave you a practical demonstration in the tutorial where I explain how to overlay images with Photoshop. I remind you that you can download the trial version of Photoshop and use the program for free for 7 days, after which, to continue using the software, you need to subscribe to an Adobe Creative Cloud subscription plan (which starts from 12,19 euros per month ).
- GIMP (Windows / macOS / Linux) - Considered by many to be the main free counterpart to Photoshop, GIMP allows you to overlay photos quickly and easily. For more details on how to use GIMP and how to overlay photos with this open source software, read the tutorials dedicated to the topic.
- canva (Online) - this well-known online service, also available as an app for Android and iOS, allows you to overlay photos directly from the browser. Canva can be used after free registration via your email or your Google or Facebook account.
App to overlay images
Would you like to overlay images using your mobile device? Perfect! Then I'm sure you'll be thrilled to try the app to overlay images listed below: download them all and then use the ones you think are best suited to your needs.
- Join Due Photo In Una (Android) - if you are looking for an app that allows you to overlay photos by creating rather suggestive photomontages, you cannot fail to try Merge Two Photos In One. It is a 100% free application and, as if that were not enough, also easy to use.
- Photo Layers (Android) - this is a completely free app thanks to which you can overlay images using up to 11 layers. In addition to this, it allows you to correct images using some very useful editing tools. If you want to have some more information on how to use Photo Layers, read the tutorial in which I talk about apps to overlay photos.
- Superimpose (iOS) - Superimpose also allows you to overlay images and correct them, but unlike the solutions listed in the previous lines, not all the photo editing tools included in it are free. To access the full set of its functions, you need to purchase the full version of the app at a cost of € 2,29.


