


You are one of those people who would spend an entire evening with the nose up, contemplating the spectacle of the starry sky. You have also often tried to take some photos of the firmament, but unfortunately always with disappointing results, since you only have a smartphone at your disposal, even if it is equipped with one cameras and not dedicated equipment. Do not give up! Know that, with a bit of commitment, it is possible to photograph the stars even with the smartphone: the results are not of a professional nature but, if the cameras on the device are of a good standard, some appreciable shots can be taken out, you I guarantee.
In the following chapters I will therefore reveal the secrets about like photographing the stars with your phone in the best way. All you have to do is follow the advice on when, where and how to bring you in the best conditions to shoot; then you can take advantage of dedicated smartphone apps, to download for the occasion, or learn how to optimize the resources offered by the Camera app that you find installed “as standard” on your phone.
If you are curious and can't wait to get to work, take a few minutes of free time, then settle down in comfort and read what I have to say: so, after the next evening picnic, you can share spectacular photos with your friends of the starry sky, shot exclusively with your smartphone. I wish you good reading and have fun!
Preliminary information
As mentioned above, photograph the stars with your phone it's not impossible. However, there are some precautions to be had and information about it that is good to know before taking action.
First of all, it might seem obvious but I always recommend that you take a look at the weather: as you well know, the overcast sky does not allow you to see the firmament, just as hazy conditions can affect the sharpness of the shots. So, avoid humid and foggy evenings in favor of those with calm and clear weather.
If you can, then move away from the inhabited center and go take your photos with your phone in the countryside. L'light pollution due to the lights of the cities it does not allow you to see the night sky with the right contrasts. So, don't stay near artificial lights, go to a somewhat isolated place (without putting yourself in danger, this seems clear to me).
Keep in mind that the light will be very dim at night and that you will need as much as possible to get satisfactory results increase exposure times through phone settings, or by means of specific apps. Freehand shooting is a guarantee of blur: for this you need a tripod for smartphones. If you don't have it you can buy it online, you can find many at very cheap prices.
Vedi offers your AmazonIt is not essential, but if you want to invest just a few euros to improve your photos, you can think about buying one too additional lens for smartphone, preferably of the telescopic type.
See offer on Amazon See offer on AmazonFinally, if you are about to change your smartphone and have a passion for photos of the stars, know that there are smartphones with already integrated functions for theastrophotography or with enhanced functions for shooting with long exposition, the ones that then make the difference when shooting in low light.
In this regard, I suggest you take a look at my buying guide dedicated to the best camera phones, i.e. smartphones equipped with the best cameras, available in various price ranges.
See offer on Amazon See offer on AmazonThat said, what I always advise against doing is to use magnification digital zoom available on all photo apps on smartphones. This function would make the image lose a lot of quality, in all respects.
It also avoids setting other modes that could slow down exposure times, such as theHDR (acronym for High Dynamic Range) which overlays images with different exposures in a single shot, in order to get the best out of each one. The procedure seems fast, in reality it slows down the speed of execution a lot.
It is also intuitive to understand that the use of the flash integrated on the phone is useless with subjects or scenarios that are far away, such as the sky.
Now that you know how to get started, you'll find out how to make the most of your phone to photograph the stars. You can do this both using the native settings of the smartphone, or with some additional apps, which I will recommend to you in the following chapters.
And if your interest in astronomy goes further, I suggest you also read my guide on the best apps for the stars: inside, in addition to other tips for photographing them, you will also find systems to identify the constellations.
How to photograph the stars with shooting settings
For starters, you can try to rely on the “factory” installed Camera app on all smartphones. Although they are not the same or have the same potential from one device to another, here it is like photographing the stars with shooting settings present on them.
Android
Let's start with Android. The following procedure for photographing stars with shooting settings will refer to a smartphone Huawei: If what you have is another model with an Android operating system, it may vary slightly, while remaining broadly the same.
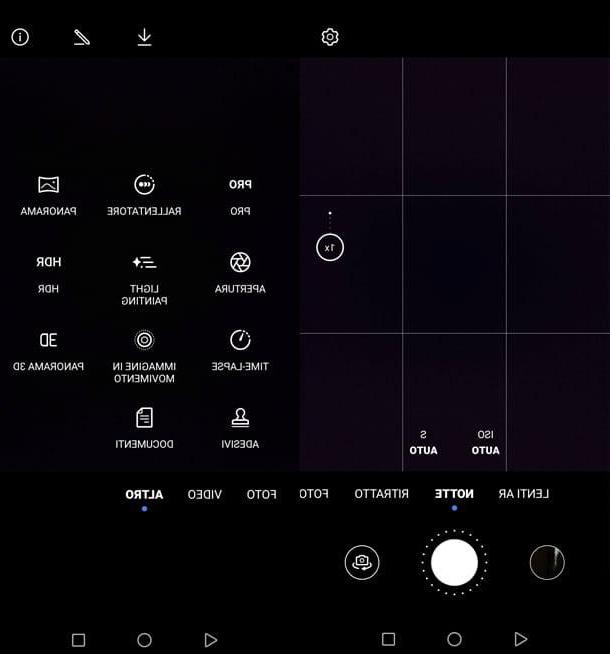
First, securely fasten your phone to a tripod for smartphones, then open the app Camera (the one with the goal icon) and, in the screen that will appear, scroll through the items in the lower part of the display.
Therefore, identify the voice Other and select it: in the screen that opens, tap on the option For. You will then see different shooting options below, which you will have to select one by one to customize them and get ideal shots for the stars.
More specifically, the symbol M is that of the exposure metering: tap on it and choose the first icon, the one for detecting values over wide landscapes. You should recognize it because it is the only one with no dots in the center.
In Seguito, fai tap sulla voce ISO (the ISO value indicates the sensitivity of the sensor to light; the higher it is, the greater the "effort" that the sensor will make to capture as much light as possible) and scroll the cursor to the right: the ideal would be not to go up to the maximum ISO sensitivity and in any case stay below the ISO 3.200 value. However, you may need to take some test shots and, if too dark, increase the setting.
After deciding on the ISO value, touch the symbol S (that is, Speed, shutter speed) and move the cursor to the right. Again you will have to do some tests, taking some photos and observing the result. Since you should have a tripod for the phone, you can go as high as 30, but if you can keep around 1/20 o 1/10 it will reduce the risk of getting blurry.
As for the icon EV, at the moment you could skip it, leaving the value set to 0. If there is a beautiful full moon in the sky, then it would be convenient to set negative values, to balance the exposure, taken out of balance by the prevailing lunar brightness. By the way: if you want, read my guide on how to photograph the Moon with your mobile phone, to learn more about this technique too.
Come to the rumor AF (the one related to autofocus), tap it, then tap on the option MF and drag the cursor to the right, where you will notice the symbol of the landscape. At the moment, don't touch anything related to the icon WB (i.e. White Balance).
Very good: with these settings you are ready to tap the shutter button and observe the result. If you are not satisfied, try to change the settings described so far, always in the Pro section of the Camera app.
Note: In the bottom menu of the Camera app you may find an icon to activate the mode Night. It's a quicker alternative to the manual settings I just described to you, but less accurate. However, if you want to try it, once selected, you can tap on the items ISO e S (Speed) to change these parameters according to the external conditions until the shot is correct. Again, use a holder to hold the smartphone in place.
ProCam X Lite (Android)
If you're not comfortable with the basic Camera app's shooting settings, you can try using the app ProCam X Lite, downloadable for free from the Google Play Store (or from an alternative store, if your device does not have Google services). Therefore, fix the smartphone on a support and proceed.
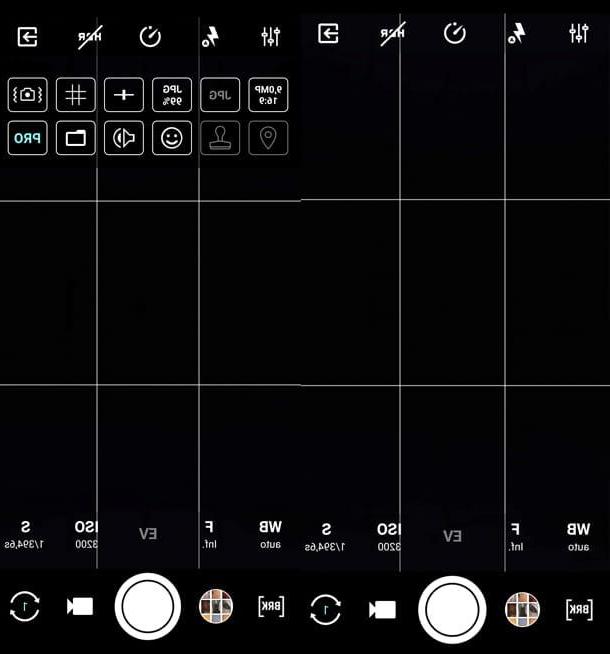
After installing on the phone ProCam X Lite, you have to open it, allow it to access your camera and choose some settings. By touching the first icon at the top, in the left corner of the display, you can set the resolution quality of the format and choose whether to activate one grid on the display, useful for taking straight pictures.
But that's not all: lo is present to avoid vibrations stabilizer, as well as many other customizations. For example the geolocation, photo stamp, face detection (which in the case of photos of the starry sky is not needed), and it is possible to decide whether to activate a shutter sound folder to save photos or whether to switch to the Pro version of the app, for a fee (€ 5,39). You find all the icons related to these options in a row, in the top menu.
After configuring the settings described above, go to the lower menu, select the letter symbol F (which stands for Focus) and choose thelandscape icon, for focusing at infinity. Then choose a value ISO as I have also explained to you before and then, touching the letter S (Speed), sets the shutter speed (always based on what was explained above). You can keep the other settings as you find them. Finally, press the central white button And that's it!
If you're interested, this app contains other customizations: by tapping on theicon in the lower left corner of the display, also allows you to take pictures burst shots, to use theintervalometer (this is the famous effect time lapse for which, by deciding how often to trigger the camera over a specific time, it is possible to combine the frames in order to obtain a sort of movie) and the bracketing (a series of shots all with slightly different exposure).
iPhone
You stai chiedendo how to photograph the stars with iPhone? In this case, the possibilities of customizing the shot given by the default Camera application are quite limited. The app Camera found on iPhones, in fact, only allows you to vary the exposure, increasing or decreasing it by moving your finger on the display or by pressing in sequence on the arrow ^ placed at the top, then on the icon +- that appears at the bottom and, finally, using the adjustment bar that appears at the bottom.
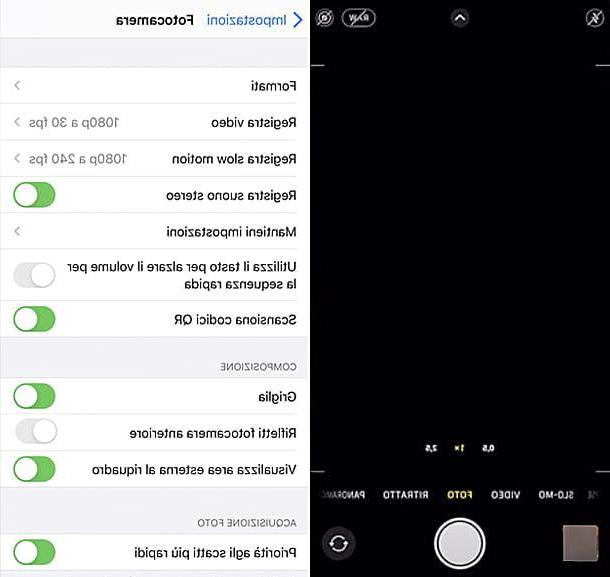
To find gods manual checks, without going into the Settings of the camera, you have to opt for shooting in Night mode available in iPhone 11 and later. Once thePhoto app, and fixed the phone on a special support, you have to choose one type of shot at will (in the specific case we are talking about, you can simply select Gallery): if the light is poor, it will activate automatically night mode. You will notice it from the little one yellow button which will appear at the top left of the display. Inside it will also be shown the seconds required to shoot, optimizing the result in a way automatic.
By touching the pulsating giallo, you can use a cursor for increase the exposure time and choose the item Max. Make, therefore, some shooting tests and see if you can get appreciable results.
Halide Mark II Photocamera Pro (iOS)
To have granular settings for all shooting parameters on iPhone too, you need to download an alternative Camera app that allows you to easily manage even long exposures. Among the best that I can suggest there is certainly Halide Mark II Photocamera Pro, available on the App Store. It can be used free for up to 7 days, after which to continue to use it requires the payment of a subscription (1,99 euros / month or 13,49 euros / year) or the one-off purchase for 43,99 euros.
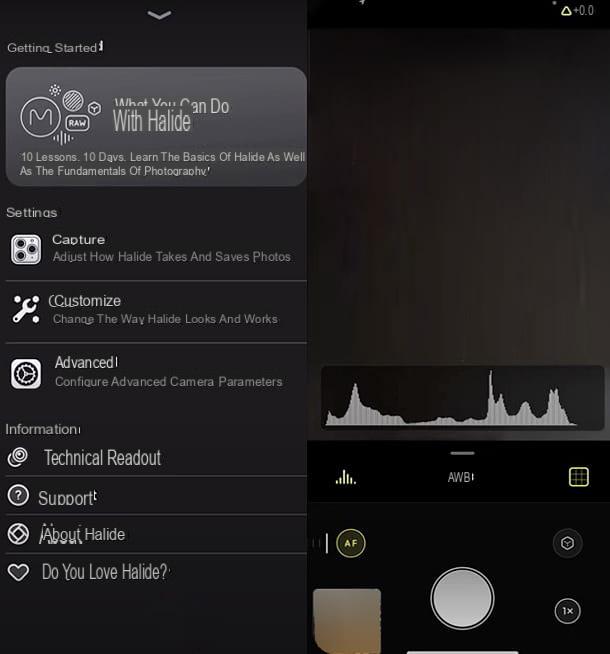
Very good: after fixing the smartphone on a stable support and installing the app Halide on your device, you just have to start it and view the information on its use, tap and then go to allow it to access your camera.
Now, go straight to the shooting mode and drag the arrow located in the lower central part of the display. The so-called will open Quick bar, a bar within which to decide the image format (if you find it already set, leave the entry Raw for higher quality images) and the white balance, displayed with the icon WB (Here too you can go further, without changing the standard setting).
From the wheel icon settings, disable the Advanced photographic features, which can create slowdowns, such as HDR e Deep Fusion.
Then go back to the shooting screen real and tap on the icon AF, to set the focus distance as high as possible, towards theinfinite.
Then, touch the symbol of little triangle at the top left of the display and in the drop-down menu choose the icon with a M (manual shooting) and then by dragging your finger across the display vertically, you can change the values related to shutter speed, while moving your finger horizontally, you will manage the sensitivity ISO.
Adjust the values so that the image is correctly exposed, do some shooting tests: if you can, stay under the 3.200 ISO and adjust the shutter speed accordingly. At this point, take your shot of the starry night sky by pressing the shutter button White.
App to photograph the stars with your phone
It may be that the solutions I have provided you so far do not entirely satisfy you, or you are simply curious to experiment with other apps to photograph the stars with your phone. Here, then, are the ones I can suggest to you.
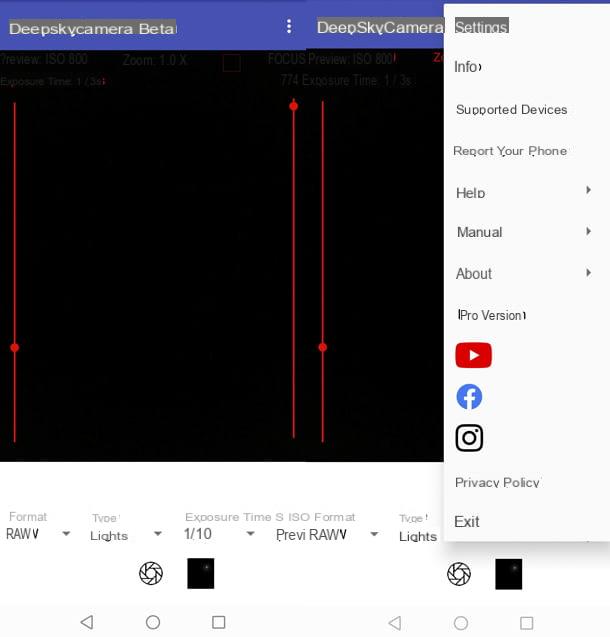
- DeepSkyCamera (Android) - is an app released in Beta version, that is, still in the testing phase, but very interesting. The interface shows two side bands: by moving the associated slider up or down, the exposure time and focus distance can be varied very quickly. By scrolling to the left the menu at the bottom, many other customizable values are selectable, including the format, the aperture and you can decide whether to start a sequence of shots.
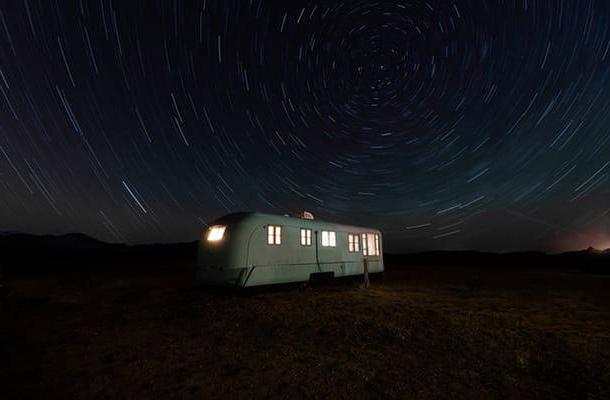
- Star Trails (Android) - app that takes its name from the photographic technique of the star trail, which is based on the long exposure and movement of the planet Earth, which ends up, however, to make it seem that the firmament itself is in rotation. The result of the star trail visually translates into a sky furrowed by light trails, literally “the tail of the stars”. The app reproduces the effect by superimposing a series of shots taken in sequence, of the starry sky, also selecting them simply from the image gallery of the basic Camera app, present on Android devices, and a tripod for smartphones.
- Night Camera (iOS / iPadOS) - represents a great alternative to Halide. It allows you to manually manage all the parameters related to exposure, ISO and luminance optimization.


