


Browsing through the photo albums you have posted on Facebook, did you realize that you have mistakenly set some shots as public allowing them to be viewed even by those who are not your friends on the social network? Don't worry, it can be remedied very quickly and easily by adjusting the privacy settings.
All you need to do is follow the directions on how to privatize photos on Facebook that you find below and put them into practice: in a few simple steps you will be able to hide all the photos you want to keep private, or partially private, from the eyes of strangers. You can act from your smartphone and tablet or from your computer: the choice is yours, depending on the device you think is most comfortable to use.
How do you say? Are you afraid of having to take a long time to hide the photos one by one? Don't worry, you can set entire albums and all the photos you have posted in the past on the social network as private, with a simple tap or click. If you want to know more, keep reading, you will find all the information you need right below!
Preliminary information
Before getting to the heart of this guide and explaining, in practice, how to privatize photos on Facebook, I believe it is right to clarify a fundamental aspect regarding the privacy issue.
As you will soon discover, with the exception of profile and cover images, Facebook allows you to limit the audience of each post, photo and album in several ways: you can, for example, choose to show a certain photo only to the people present in the 'list of yours friends, or you can make the photo visible only to a specific list of people; again, you can define a circle of friends who cannot access the image.
In short, Facebook leaves the user free choice regarding the public for each of their posts, but, beware, it has no power over what can happen outside. In order to understand each other, all users authorized to view a given image are potentially able to download it to their devices, disseminate it and show it to others, without the rightful owner knowing anything about it.
In short, my advice is always to publish on the social network only images that cannot harm your person and that do not contain "secrets to hide": beyond the settings defined by you, someone may be able to see, even by hand of third parties, what it shouldn't. Never forget it. That said, let's take action!
How to privatize photos on Facebook from smartphones and tablets
If you use theFacebook app for Android smartphones and tablets (also available on devices without Play Store) or iPhone and iPad, you can make the images contained in your posts private by acting directly from your profile. So, first of all, open the app in question, tap the ☰ button located at the top right (on Android) or at the bottom right (on iPhone and iPad) and tap on you don't know, visible at the top of the menu that appears.
Now, scroll down your profile until you find the entry box for a new post, tap the button Gallery that appears immediately below and press on the tab Uploads, to view the photos you've uploaded to your posts.
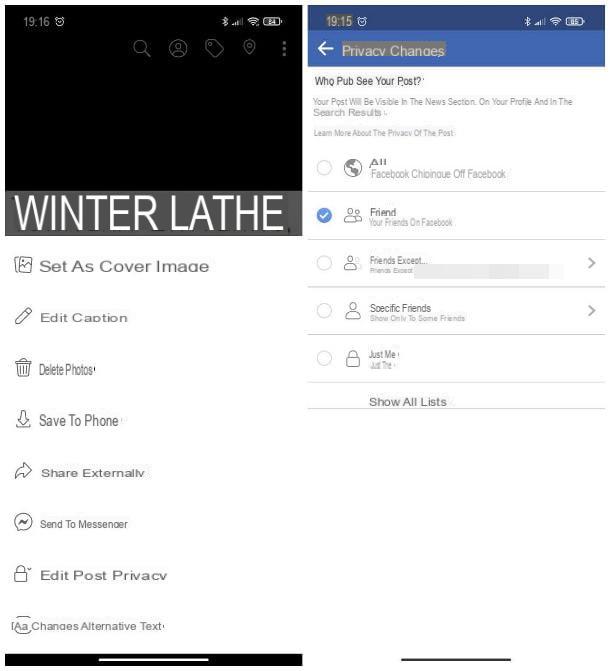
Once you have located the image to be privatized, tap on it, tap the button (⋮) (on Android) or (...) (on iPhone / iPad) located at the top right, select the item Edit privacy / Edit post privacy from the menu that appears and choose the privacy option that suits you best: Friends, to restrict the display of the image to friends only; Friends except ..., to make the image invisible to some contacts / lists; Specific friends, to ensure that the photo can only be viewed by some contacts; Only me, in order to make the image visible only to you; or Show all lists, to restrict the audience only to members who are part of the list of your choice. Please note that the last three options mentioned are accessible by pressing on the item Other….
Similarly, you can change the privacy of any image in Facebook albums: to do this, go back to the list of your photos, tap the tab Album and, after opening the album that contains the image of your interest, tap on the preview of the latter and modify its privacy as seen previously.
Furthermore, if you wish, you can restrict the audience to entire albums and extend the modification to the photos present within them: to do this, open thealbum you intend to privatize, tap the button (...) visible at the top right and select the item Modification from the menu that is proposed to you. Finally, tap on the item indicating the current privacy setting (eg. All) and put the check mark next to the option you prefer (Friends, Friends except… Or Other, to access the options Specific friends, Only me and at personalized friend lists).
The privacy change for the whole album is not applicable on those automatically generated by Facebook (Profile pictures, Cover pictures, Instagram Photos, Video and so on): you can, however, intervene on all the images inside them, except for the profile image and the cover image currently in use (which are always public), following the procedure I indicated a little while ago.
Would you privatize all photos that you loaded in one shot? In this case, know that there is a Facebook feature that allows you to restrict all past posts to a certain audience. Acting in this sense, however, not only the images will be privatized, but all status updates that you have posted in the diary, including those that do not contain photos.
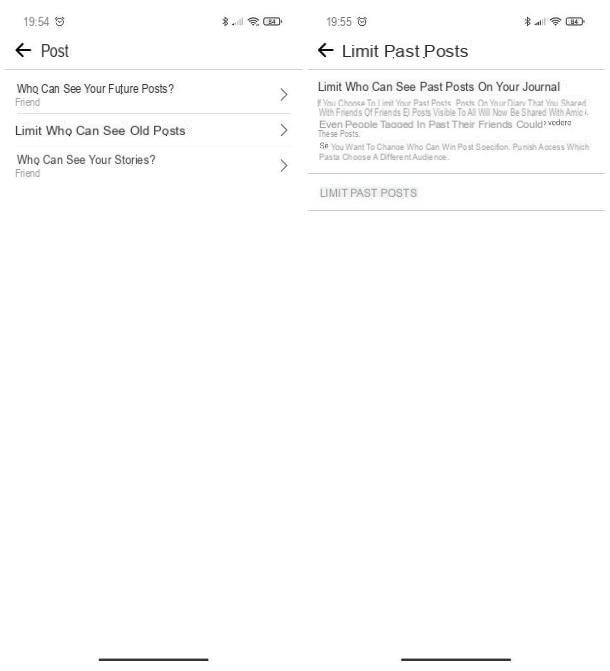
How do you say? Despite this, do you want to proceed anyway? Then proceed like this: after opening the Facebook app, tap the symbol of cottage to view your diary, tap the ☰ button located on the right (at the top on Android, at the bottom on iPhone / iPad), tap on the item Settings and privacy located in the panel that appears and then press the button Settings.
Now, tap on the option Post located in the box Audience and visibility (on Android) or Privacy Settings (on iPhone and iPad), tap on the item Limit past posts / Limit who can see old posts and, to ensure that all status updates (including those containing images) are restricted to the public only Friends, tap on the item Limit past posts twice in a row and that's it.
Note: it is not possible to privatize the images published by others, in which you are tagged. However, you can always detach yourself from the photo, so that it is no longer visible on your profile: I explained how to do it in the guide reported a little while ago.
How to privatize photos on Facebook from PC
The steps to follow to succeed in privatize photos on Facebook from a PC they are more or less the same already seen for smartphones and tablets: in this case, the position of the menus, options and buttons to use changes.
To be more precise, first connect to the Facebook home page and, if necessary, enter the your account credentials in the appropriate text fields (if you have forgotten your password, you can retrieve it by following the instructions I have given you in this guide) and click on the button Log in, to enter your profile.
Once logged in, click on you don't know located at the top right, or top left, click on the link See all photos located in the box containing the images in your profile and select the card Your Photos, visible above.
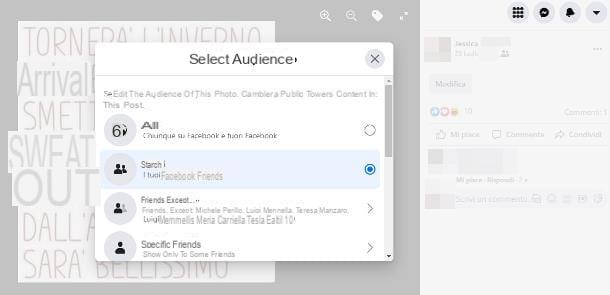
Now, click on the image to be privatized, click on privacy symbol placed immediately next to the publication date (e.g. the globe or i two men) and, using the screen that appears immediately after, indicate the audience for which to allow viewing of the photo, by placing a check mark next to one of the available options: Friends, Friends except ..., Specific friends, Only me or one of yours custom lists.
You can also do the same for the photos contained in a specific one album: in this case, you have to click on the tab Album visible on the page Gallery of your profile, select the photographic collection that contains the image on which to intervene and follow the same instructions that I have given you previously.
Also in this case, if you want, you can change the privacy of an entire album: therefore open the photo collection as I explained earlier, click on the privacy symbol placed next to the number of elements contained in the album, usually visible under the title (e.g. the symbol of men or of the globe) and choose the privacy option you prefer, among those proposed.
Please note that it is not possible to fully privatize the default Facebook albums (eg. Cover pictures, Uploads from mobile and so on), but you can restrict the audience for the photos within them, unless they are set as profile or cover pictures.
To act on all the photos published in the past and set them all with "Friends" privacy in one go, you can take advantage of the function of limiting old Facebook posts: keep in mind, however, that the change will also affect the status updates that they do not contain images.
Having made this necessary clarification, let's see how to do this: after connecting to your Facebook profile, click on freccetta verse il basso located at the top right, select the items Settings and privacy> Settings e clicca sull'opzione Privacy, located in the sidebar.
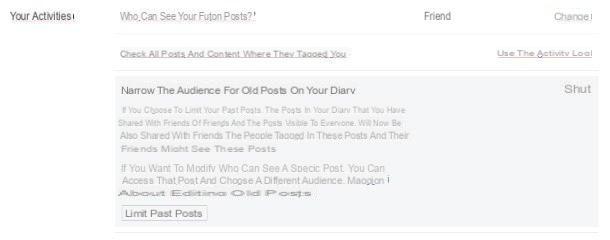
At this point, click on the link Limit past posts located in the box Your activities and press pulsating Limit past posts for two consecutive times, in order to modify the privacy of all posts in Friends.
How to privatize Facebook profile photos

Would you privatize Facebook profile photos so that this isn't visible to people outside of your friends list? Well, in this case, there is a necessary clarification: Facebook provides that the profile photo and the active cover image always have "Public" privacy, therefore it is not possible - at least not at the time of writing - to restrict the audience able to see your profile picture, unless you block a person on Facebook (who will no longer be able to find you on the social network, nor to see any information about you).
What you can do, however, is to make them private profile pictures and cover pictures previously used, archived in the albums of the same name, following the same instructions I gave you in the previous chapters of this guide.
How to privatize photos on Facebook


