


Tell me, don't you think it would be great to fill the photos you took today in the park of your friends with colorful writing? You could enter their name or some - let's say - bizarre phrase on their account and then share it all on social media. Not to mention the other photos you've taken in the past: you could write on them, for example, where and when they were taken, who you were with and… much more. How do you say? You find it a great idea but you don't have the slightest idea how to do it? No problem, I can provide you with all the information you need. How? But with this article of mine dedicated to the subject, of course.
If you allow me a few minutes of your precious time and a minimum of your attention I can in fact show you, in a simple way but at the same time detailed sex, how to put the writing on the photos, an operation that, contrary to appearances and beyond what you may think, can be carried out without having any knowledge in terms of photo editing. It is enough just to resort to the use of some special tools that can be used without problems by anyone and it's done. These are computer programs, online services and even apps for smartphones and tablets, all free (except for some resources that also offer paid functions) and perfectly usable on any operating system.
Then? How about putting the chatter aside and finally taking action? Yup? Very good. Therefore, position yourself very comfortably in front of your PC or, if you prefer to act as a mobile and if the tool you intend to use allows it, grab your smartphone or tablet and read all the instructions on what to do that you find right below. I am sure that in the end you will be able to tell yourself very happy and satisfied with what you have learned. Happy reading and have fun!
PicFont (Online)
The first tool I want to suggest you try to put the writings on the photos is called PicFont. It works on any web browser (as well as any operating system), is free of charge and is extremely simple to use. It allows you to add texts to images of various kinds and with a large margin of customization and to make various other changes to the uploaded photos, all thanks to the appropriate on-screen tools.
You ask me how to use it? I'll explain it to you right away. To start with, go to the PicFont website and click on the button Or select Picture from computer… and select the photo you want to work on. If you prefer, you can also upload the image of your interest by drag and drop, simply by dragging it into the browser window. Just keep in mind that the images to be uploaded can have a maximum weight of 5 MB.
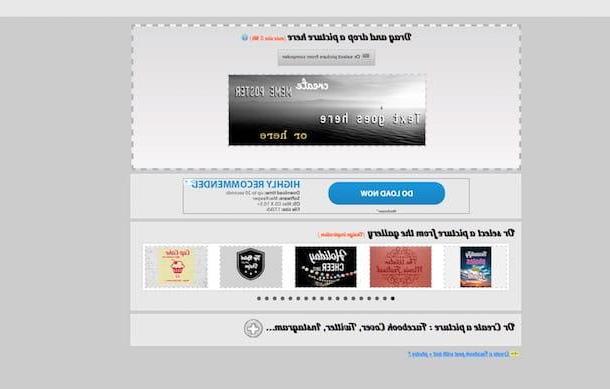
Once upload is complete, you will find yourself in the presence of the editor of the service through which you can add texts to your photo and make various other changes. Then select the test text automatically added on the photo and type what you want in the appropriate field Enter e text here which is on the left. If you want to add more texts, just type what you want to write in the field in question and then click on the button "+" which stands on the side. To delete an inscription, you must instead select it and click on the relative "X".
Then adjust the size of the selected text by moving the cursor next to the wording Size. Through the menu below you can instead select the type of font to use among the many available in the list.
By clicking on the colored square next to the item Text color you can then choose the color of your text, using the menu on the right you can select a possible option regarding borders and shadows, while you can choose the relative color using the other menu with which is always on the right.
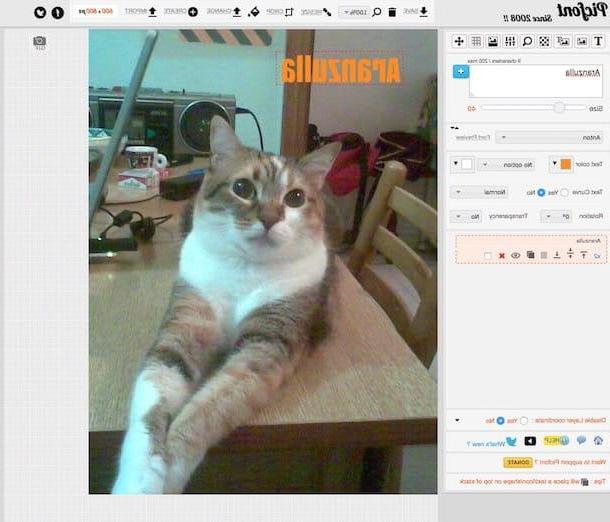
Now decide whether or not to bend the text by ticking the appropriate option next to the wording Text Curve and select any type of curvature from the menu next to it. If you want, also adjust the degree of rotation and transparency through the menus below and then use the other tools below to determine the position and orientation of the text.
The buttons in the upper left part of the editor allow you to take images from the gallery and select them with preset writings, to define a background color, to add clipart, to set filters and much more. Those on the top right are used to modify the image by resizing it, cutting it, etc.
When you are satisfied with the result, click on the button Save at the top, select the format in which to download the image from those available (JPG, PNG or PDF) listed in the drop-down menu that you see appear and the download on your computer will start immediately. If you prefer, you can also choose to save the image to Google Drive (if you have an account) by choosing the relevant item from the menu.
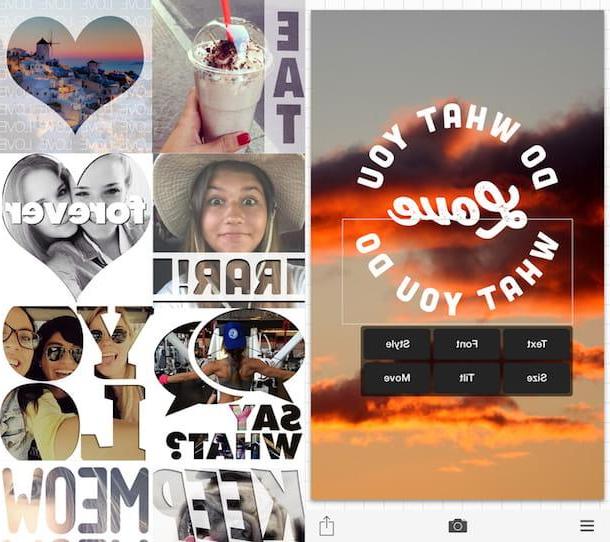
Canva (Online)
Another nice Web service that in my opinion you should try to put the writing on the photos is canva. Haven't you ever heard of it? Strange, it is very famous and appreciated. However there is no problem, let's fix it right away. It is a free online tool that can be used after registration, which allows you to create images with writings but also other interested graphic projects, returning simple but at the same time elegant results. Try it now and you will see that you will not regret it.
To use Canva, first connect to its main page and click on one of the options located in the box First time on Canva? Subscribe! then indicate the reason why you intend to use the service. Then register with your e-mail address, your Facebook or Google account by clicking on the corresponding button and then providing the data requested.

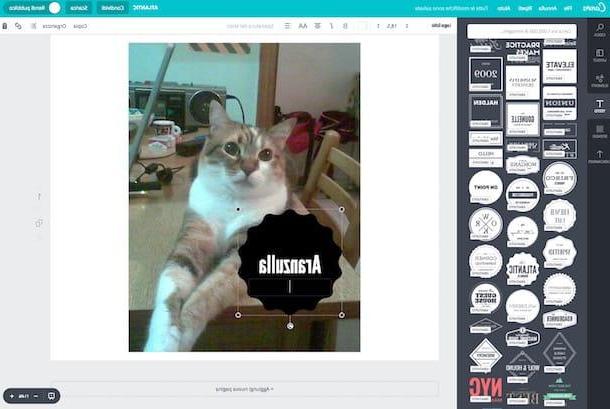
Then select the type of ready-made you want to create by pressing on the one you are interested in from the various proposals on the screen (if you can't find the one that's right for you, click on Other types of projects in order to view more) then select the layout you prefer from the left sidebar and click on the item Uploads that you always find on the left.
Now drag the image you want to write on in the browser window or click on the button Upload your images to select the image manually and then click on its preview that shortly after will always be shown in the left part of the service editor. If you want, you can also use the photos on Facebook by simply clicking on the appropriate button and connecting your account to the service (if you have not already done so during registration).
Then use the button Text which is in the left sidebar of the editor to add the text of your choice to the image. Through the options that you will see appear on the left you can select the type you prefer. You will then see sample text appear on your photo as previously selected. Double click on it and write what you want.
Then use the tools at the top to select font, size, color, alignment, formatting and spacing. If, on the other hand, you want to place the text in a different point of the image, click on it and, continuing to hold down, drag it to the point you think is most appropriate. The button with the arrow that you see appear at the bottom, after the selection, instead allows you to rotate the box with the text.
If you then want to delete an inscription, just select it, click on the button with the basket that stands up and choose Delete item give the menu that appears.
Then I point out that if you want you can also use the other buttons on the left side of the editor to add stickers, lines and other elements (Elements) and to select a background (Background).
Once you have the desired final result you can download the photo with the inscription on your computer by clicking on the button Download located at the top right and choosing the format in which to save the image (JPG, PNG or PDF).
PhotoScape X (Windows/Mac)
Instead of recreating an online service, do you prefer to put the writing on the photos through a "classic" computer program? Then try PhotoScape X and you will not regret it. It is a very easy-to-use graphics software for Windows 10 and macOS that allows you to edit digital images by applying automatic corrections, special effects of various kinds and much more, including texts. The program can be downloaded and used for free but offers in-app purchases to switch to the paid variant with more features.
To download PhotoScape X on your computer, the first thing you need to do is to connect to the website and click on the button for the download for free corresponding to the operating system you are using. Then wait for the connection to the app store on your computer to be made, click on the button to start the button again download for free and l 'installation of the software and wait a few moments for the procedure to be started and completed.
Once installation is complete, open the program by calling it from Start menu on Windows 10 and since Launchpad on macOS then drag the photo on which you want to add text into the window displayed on the screen, click on the button Insertion, then press on Text, select the field for entering the text attached to the box for managing the tool that has opened on the screen and type what you want.
Then use the other editor commands to adjust the rotation level of the text, the type of font used, the opacity, the spacing and so on. Instead, by placing the cursor on the text that has been added on the photo, by clicking and continuing to hold down on one of the selection corners you can quickly zoom in and out of what you shoot. The indicator at the top allows you to rotate the writing while the "X" placed sideways allows you to delete the typed text.
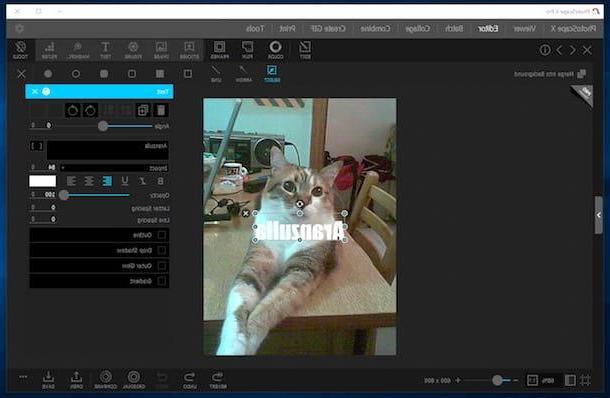
If you then want to change the position in which the text has been placed on the photo click on it and, continuing to hold down, drag it to the point you prefer.
If you are interested in this, I would like to point out that using the other buttons at the top of the editor you can make further changes to the image by changing the colors, adding filters and so on. Click on it to view and apply the various options available.
When you are satisfied with the result, save the image by clicking on the button first Save located at the bottom right and then on the one attached to the window that will subsequently open.
Please note: If you are using a PC with an older version of Windows 10 installed, you can download the older version of PhotoScape.
App to put writings on photos
As anticipated at the beginning of the article, you can put writing on the photos even from mobile, using some applications for Android, iOS and Windows Mobile specifically used for the purpose. You ask me which ones? Well, take a look at the following list and you'll find out right away. In fact, below you will find listed those that in my opinion represent some of the best resources in the category. Have fun!
- Photor (Android / iOS / Windows Phone) - This is a very famous and appreciated application that allows you to add various types of writings to images and that also offers several other useful functions for image editing. It is free to download.
- LetterFX (Android / iOS) - Very good application to put writings on photos as well as to modify images in a more generic way by inserting masks of shapes, letters and numbers. It is free to download.
- Phonto (Android / iOS) - Another fairly well-known app for adding text to photos and images in general. It allows you to choose from hundreds of different fonts and also offers various formatting tools. It is free to download.
- Font Studio (Android) - Application that allows you to add beautiful typographic styles to photos by combining them with sophisticated filters, frames and graphic effects of various kinds. It charges for free.
- ImageQuote (iOS) - The name leaves no room for many doubts: it is an app that allows you to add quotes and funny writings to images. It is mostly designed to decorate photos to post on Instagram but can also be used for other occasions. It is free to download.


