


You've been experiencing an annoying problem on your trusted computer for days that you just can't solve. To try to give you a hand, a friend asked you to take screen photos and send him the screenshot obtained by e-mail. Great idea, no doubt about it. How? Do you think in this way too but you don't have the faintest idea how to take screen photos? Well, in that case don't worry… I can help you.
In fact, in the following lines I will go and explain everything you need to know to take screen shots and what tools to use to succeed in the enterprise. Before you can scare yourself and think about the worst, however, I want to specify right away that contrary to appearances taking screen photos is actually a real breeze, whether the one in your possession is a PC Windows whether it is a Mac.
But now stop the chatter and continue. If you want to understand how to take screen shots, sit comfortably in front of your computer, take a few minutes of free time and concentrate on reading this tutorial. I am sure that in the end you will have succeeded in your intent and that you will also be ready to say that actually taking screen shots was a real breeze.
Take screen shots on Windows PC
If you have a PC with the Windows operating system installed and if you want to understand how to take screen shots, know that you can use both the special tool available as standard on your computer and third-party tools. Keep in mind that the result is almost the same, it is therefore only up to you to choose the solution that you think may be more congenial to your needs.
Snipping tool
If you need to take screen shots on a Windows PC and you are not interested in using third-party resources, I suggest you take advantage of it Snipping tool. This is the special tool integrated in Windows starting from Windows 7 thanks to which it is possible to capture screenshots quickly and easily.
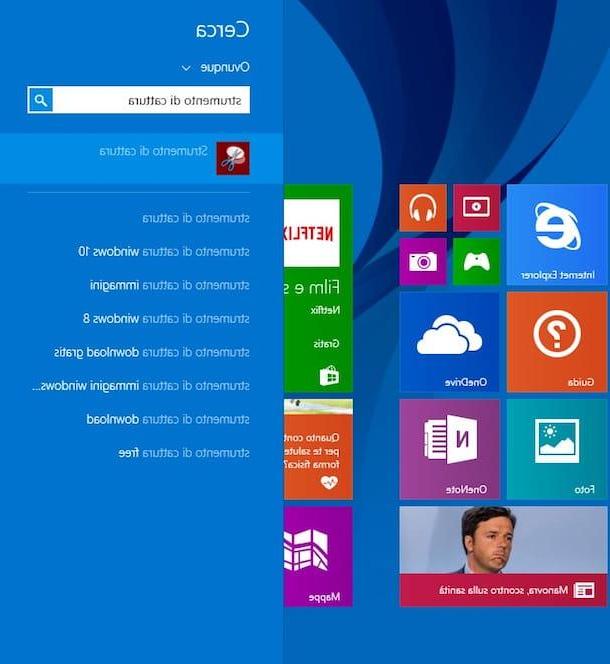
To take a screenshot using the Snipping Tool, the first thing you need to do is press the button Home or access the Start Screen, type in the search field that appears snipping tool and click on the available result to start the tool.
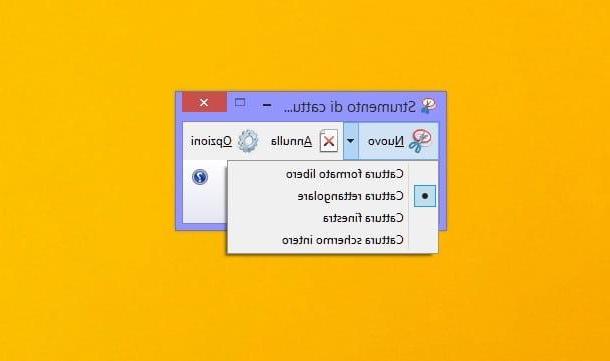
After starting the Snipping Tool you should see a small window with several buttons directly on your desktop. To take a photo screen then presses the button New and then draw with the mouse, holding down the left button of the same, a rectangle including the area of the screen that you want to "photograph".
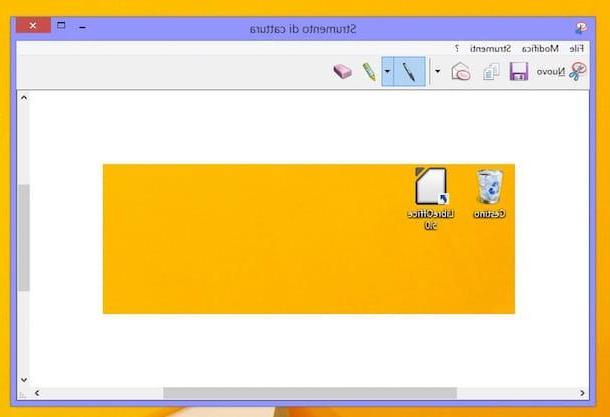
When the operation is completed, the capture tool editor will open, through which you can edit the screenshot made using the various tools available on the screen (for example the pen or the highlighter) and save it as a GIF, JPG or PNG image by clicking on the 'icon depicting a floppy disc located at the top left and then indicating the format you prefer to use for saving the file from the menu Save eat: available in the new window that will open.
In addition to this, as I have just indicated, you should know that you can also take screen shots by capturing the entire screen you are viewing or a single window. To do this, click on the arrow located next to the button New in the bar displayed on the desktop when the Snipping Tool tool starts and choose, according to your needs, the item Capture window or Capture full screen from the drop-down menu that is shown to you. If you wish you can also use a free format for screen capture instead of the classic rectangle. To do this, always presses the arrow located next to the button New and then choose the item Free format capture from the menu you see.
Regardless of the capture format you choose, always use the mouse cursor holding down the left of the mouse to make the screen on the PC.
To reset the capture format to the default active one, press the arrow next to the button New and then select the item Rectangular capture give the menu visualizzato.
Snapcrab
If you use a computer with a version of Windows installed prior to Windows 7 and therefore you do not have the possibility to use Snipping Tool or if you prefer to use third-party tools I suggest you take screen shots using Snapcrab. It is a free program for Windows operating systems that allows you to capture snapshots of the PC desktop, single portions of the latter or single windows in an extremely easy and fast way. The resulting images can be saved on your computer or shared online.
If this tool is of interest and you therefore want to find out how to take screen shots on your PC, download SnacpCrab to begin with. To do this click here in order to connect immediately to the main web page of the program. Then press the button Download SnapCrab for Windows and wait for the download of the program to be started and completed.
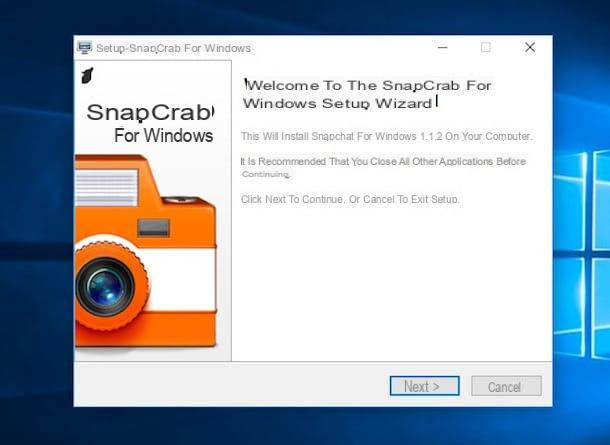
When the download is complete, double-click on it and open the file you have just downloaded and in the window that opens first click on Run, Then Yes and subsequently on Next. Then accept the conditions of use of the program by placing the check mark next to the item I accept the agreement and proceed by clicking on first Next three consecutive times and then on install e Finish to complete the installation process and start the program.
After installation, to take screen shots on your PC, use the small gray toolbar that appeared on the screen. Then click on one of the first three buttons in the toolbar (the first button is used to photograph the selected window, the second button is used to obtain a snapshot of the window in the foreground, the third button is instead used to capture the entire desktop), select if necessary the window to be captured and then keep the mouse pointer still for three seconds, until the countdown displayed in the lower right pane ends.
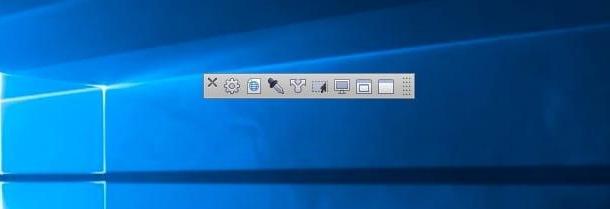
To capture custom screen areas you need to click on the fourth button, the one with the black arrow, on the SnapGrab toolbar and use the mouse to draw a rectangle around the screen area to be captured.
All the screenshots made are automatically saved on the PC but it is also possible to post them on online services, for example on Twitter and Evernote by clicking on the fifth button on the toolbar, the one with the double white arrow.
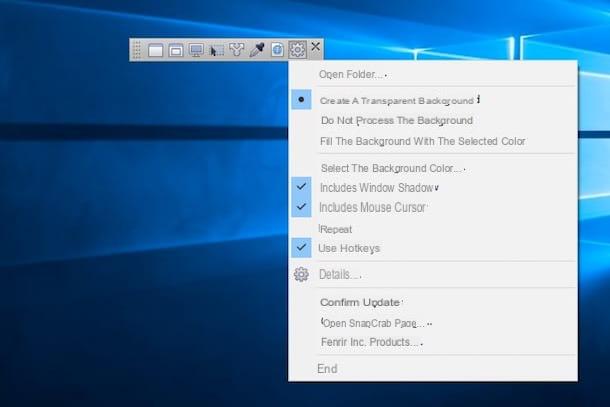
By default, all SnapCrab screenshots are saved to the desktop in PNG format. If you want to change this you have to click on the gear icon in the program toolbar and select the item Details from the menu that appears. In the window that opens, select the file format in which to save the snapshots from the drop-down menu Image format and the folder in which to save the latter by placing the check mark next to one of the items placed under the heading Save a capture in.
Take screen shots on Mac OS X
If you have a Mac and you need to take screen shots, know that, like Windows PCs, you can use both the special tool available as standard and that of third-party tools. Choose the most suitable solution based on your needs and preferences.
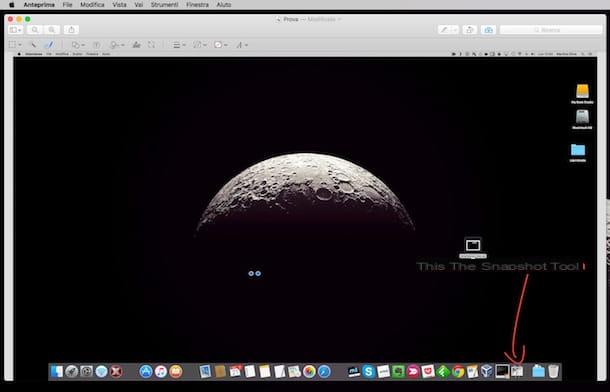
Snapshot
If you need to take screen shots on Mac you can resort to using Snapshot. This is the pre-installed application on OS X thanks to which it is possible to take screenshots quickly and easily.
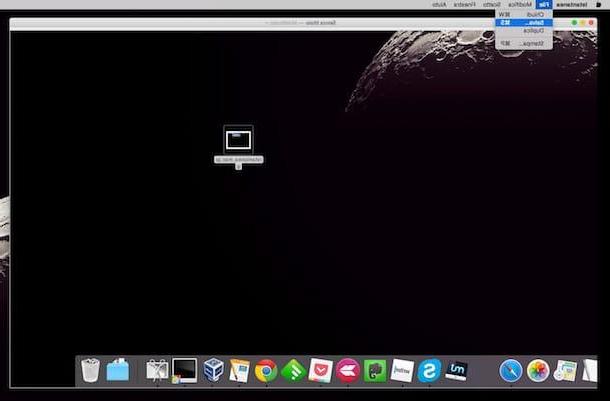
To take screenshot on Mac with Snapshot, the first thing you need to do is start the application. To do this, access the Launchpad and then to the folder Other and select the Snapshot icon. Alternatively, log in to Spotlight pressing on the magnifying glass located in the upper right part of the menu bar, type snapshot in the search field displayed on the screen and then double-click on the first result that is shown to you.
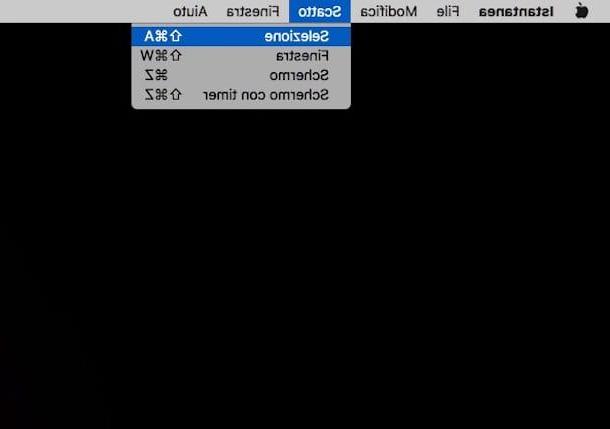
Now that you have started snapshot to take screenshot on Mac bring the cursor to the menu bar, click on the item Shoot and choose, from the menu that is shown to you, the screen capture mode you want to use. Based on what your needs are you can select Selection (to take screen shots of an exact area determined by you), Window (to get the screenshot of a single window on the desktop), Screen (to get a screenshot of the entire screen) or Screen with timer (to get a screenshot of the whole screen by setting a timer).
Once you have selected the mode you intend to use to take screen shots, follow the simple instructions in the new window that will open. For example, in case you have chosen the mode Select to take a photo screen you will have to trace a precise area to be photographed using the cursor by pressing and continuing to hold down the mouse. If, on the other hand, you have chosen the mode Screen just click the mouse anywhere on the desktop.
Once you have the screenshot, a new Snapshot window will open that will allow you to view what you have photographed. Then save the screenshot obtained by pressing on the item Fillet attached to the menu bar, choose Save from the drop-down menu that is shown to you and indicates the location and name in which you want to save the image. By default the screen photo is saved on the desktop in TIFF format.
You can then edit the screenshot using Preview, the standard application available on OS X to view and edit photos and images, and you can edit and / or save the resulting image. To edit the screenshots made with Preview, just double-click on the one you want to act on and wait for the Preview window to be visible. Then use all the main editing tools present in the program toolbar and in the menu bar. For example, you can adjust the size of the images by selecting the item Adjust size from the menu Instruments or insert lines, squares and writings in the screenshots by first clicking on the icon carrying case (top right) and then on the desired tool in the toolbar that appears in the software window.
When you are satisfied with the result, you can export your edited screenshot as a PNG, JPG or PDF file by selecting the item Export ... from the menu Fillet. Note that if you are using a version of OS X equal to or later than Lion you can count on the autosave function that records all changes made to an image directly on the original file.
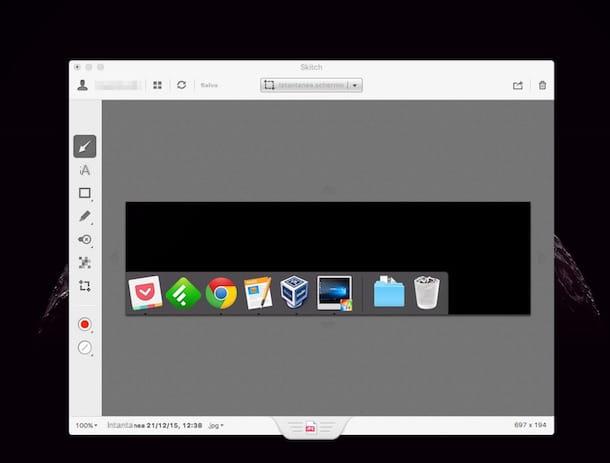
Skitch
If the Mac screen capture tool available as standard is not to your liking I suggest you take a look at Skitch. This is a free application produced by Evernote that allows you to take screenshots in an extremely easy and fast way. Once the snapshots have been captured they can then be customized and modified by adding arrows, highlights and much more.
So if you want to find out how to take screen shots on Mac with Skitch, the first operation you need to do is click here in order to connect to the program download page. Once the web page is displayed, presses the green button Download per Mac that you see in the center of the screen and wait for the program file download procedure to be started first and then completed. When the download is complete, click on the Skitch application icon in the folder Download, then press on apri and wait for the program window to be visible.

After displaying the Mac screen photo program window, just press the key combination Cmd+Shift+5 on the computer keyboard and select the portion of the screen to capture with the mouse. To take a snapshot of the entire desktop, you can use the key combination instead Cmd+Shift+6.
Alternatively, you can take screen shots using Skitch also by pressing on the voice Screenshot that you display in the program window and then selecting with the mouse cursor and with the left button of the latter pressed the portion of the screen you want to capture. If, on the other hand, you want to make a screenshot of the entire desktop, press the arrow that you see next to the instant screen option and select the item Full screen give the menu visualizzato.
If you wish, after taking photo screens you can also customize and edit the images obtained using Skitch's built-in editor. The editor on the left has a handy toolbar with arrows, geometric shapes, writing tools and so on. To customize a captured screenshot, just click on the tool you want to use and make the changes you want to the screen photograph you just made.
Once you have finished making changes to save the final image, drag the bar located in the lower part of the window to the folder where you want to export the screenshot or directly to the OS X desktop. You can save the screenshot you just made by pressing on the item Fillet present in the upper left part of the menu bar, by choosing the item Export ... from the menu that is shown to you, indicating a name for the file you are about to create in the field Export as:, the format in which you want to save the image by choosing from PNG, BMP, JPG, PDF or TIFF from the menu Export format:, indicating the location where you want to save the file and then pressing the button Save.
If instead of saving the screenshot you just made, you prefer to share it immediately via the social networks you usually use, press on the item Share located at the top left of the menu bar and choose the service you want to use from the drop-down menu that is shown to you.
How to take screen shots


