


A friend, desperate, has just asked you for a hand: he would like to superimpose some photos he took during his last vacation but, not being very familiar with the PC, he doesn't even know where to start. As usual, you weren't able to say no to him, but then you remembered a "little" detail: not even you know how to overlay two photos. It doesn't matter, because luckily you've come to the right place at the right time!
In the next paragraphs, in fact, I will point out to you how simple it is to overlay photos using some programs included "standard" on practically any computer and, as if this were not enough, I will also show you some third-party solutions - including some free software and a online service that can be used directly from the browser - which could always be useful. And if you need to overlay photos from your mobile device, you can try one of the solutions listed in the last part of the post.
In short, you should have understood: at the end of this reading you will no longer have any doubts about how to overlay photos and you will be able to give concrete help to your friend in difficulty. So, are you ready to get started? Yup? Perfect! Try the solutions listed below following my "tips" and you will see that you will not face any problems. Happy reading and, above all, have fun!
Paint (Windows)
If you use a PC Windows you can overlay two photos using Paint, the versatile graphics program installed on virtually any distribution of Microsoft's operating system. If you remember, I already told you how to overlay photos with Paint in a previous tutorial, but let me refresh your memory.
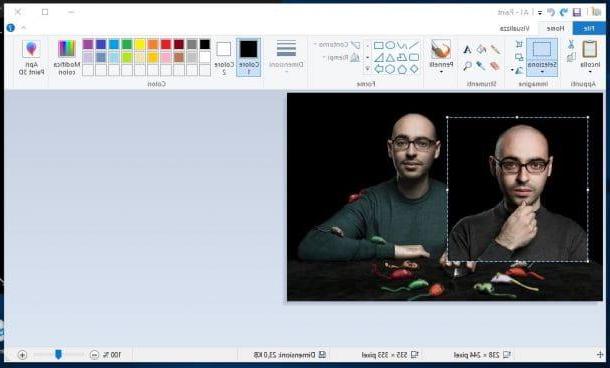
To overlay two photos with Paint, open the photo you want to use as a “background” (just click the right key mouse on its preview and, from the menu that opens, click on the item Open with and then Paint). Then open the second photo you want to overlay the first by double clicking on its preview (so as not to open it with Paint but with the app Gallery present on Windows 10 or with the program Photo collection, if you are using an older version of Windows), then click the right key mouse over it and select the item Copy give the menu check if you press.
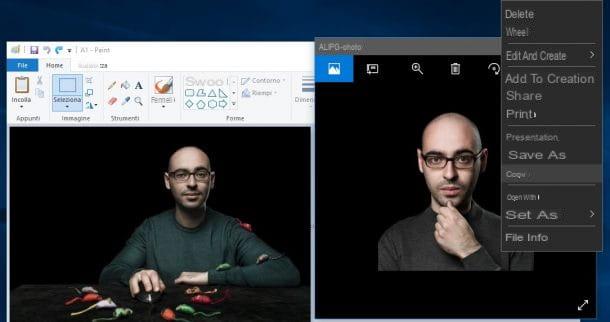
Now, go to the Paint window where there is the first image you opened just now and press the key combination Ctrl + V to glue it and overlap it. Of course you can move the photo you have overlaid by dragging it with the mouse where you want it and you can change its appearance using the Paint tools to rotate it, skew it and so on. As soon as you are happy with your work, save it by clicking the button Fillet and then on the voice Save. Have you seen how easy it was to use Paint to overlay your photos?
Paint 3D (Windows 10)
Su Windows 10 is present Paint 3D, a sort of "revised and corrected version" of the program I told you about in the previous paragraph. In this case, superimposing two photos is even easier and more intuitive.
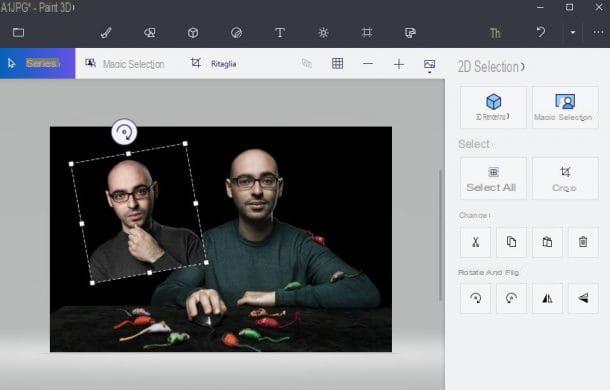
To overlay two photos with Paint 3D, open with this program the photo you want to use as a "background" (to be clear, the one in which you want to overlay your second photo) by clicking with the right key mouse on the image in question and, from the menu that opens, clicking on the items Open with e Paint 3D.
After that drag the second photo (that is the one you actually want to superimpose on the first one) in the Paint 3D box containing the first image you opened just now and that's it. Now you can move the overlay image where you want it most and use the Paint 3D tools to change its size, rotate it and so on. As soon as you are satisfied with the result, click on the symbol of folder located at the top left and, in the menu that opens, click on the item Save to save the project. Easier than that ?!
Preview (macOS)
I use a Mac? Even on “made in Cupertino” computers it is possible to superimpose two photos without resorting to third-party solutions. In this case, I am referring to Preview, the default image and PDF file reader on macOS.
To use it, Preview the photo you want to overlay by double-clicking on it. If you've changed some macOS settings and Preview isn't the default image reader on your Mac, click the right key mouse on each photo, click on the item Open with from the context menu and then select the item Preview.
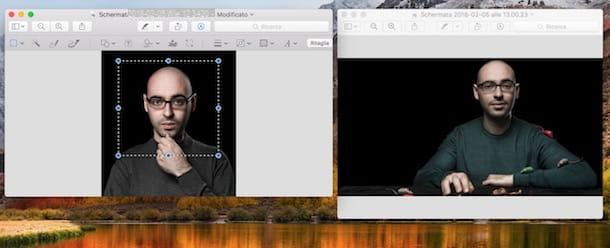
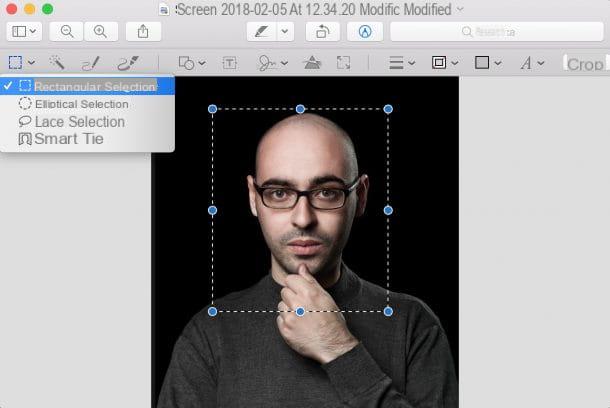
Well, now that you've opened the images you want to overlay with Preview, it's time to explain how to overlay them. First, select the portion of the image you want to superimpose on the second photo using the selection tool. Then click on the symbol of pencil located at the top and, in the menu that appears, click on the symbol of dashed box and choose the selection tool you prefer the most: Rectangular selection, to make a rectangle-shaped selection; Elliptical selection, to make an ellipse-shaped selection; Lace selection, to select a specific area of the image more precisely e Smart lace selection, to use the “intelligent” selection tool, especially useful for cutting out one of the subjects portrayed.
After selecting the area of the first photo that you want to overlap on the second, press the key combination cmd + c to copy the selection you just made. After that open the preview of the second photo and press the key combination cmd + v in such a way as to glue it.
As if by "magic", the first photo (ie the one you selected and copied) will be superimposed on the second. Now all you have to do is move it and resize it to your liking using the blue dots located around the perimeter of the overlay image. When finished, click on the option Save from the menu Fillet to save the edited image.
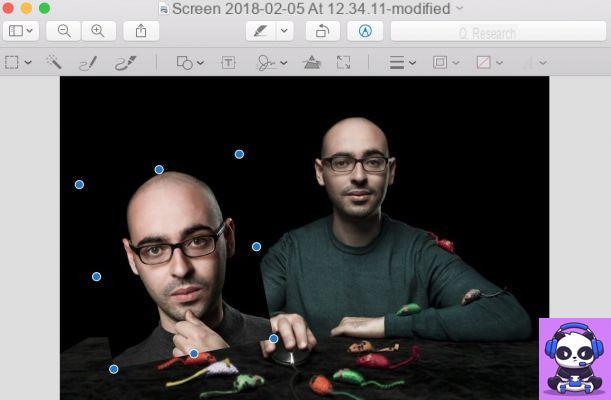
Image Inc. (Windows)
The solutions that I have indicated above have not particularly convinced you and now you would like to try some third-party programs? Well then I recommend you try Image Inc., a free software that allows you to superimpose two photos in a few clicks, even for those who, like you, do not consider themselves a photomontage expert.
To download Image Inc. first connect to the program's website and click on the green button Download located on the right side of the page. When the download is complete, double-click on it, open the file you just downloaded (ImageInc-Setup.exe) and, in the window that opens, click on the button Next.
Accetta quindi the conditions of use of the program, meeting the segno di spunta accanto alla voce I accept the agreement, and click your cousin Next for four consecutive times and then on install e Finish to finish the installation process and start Image Inc..
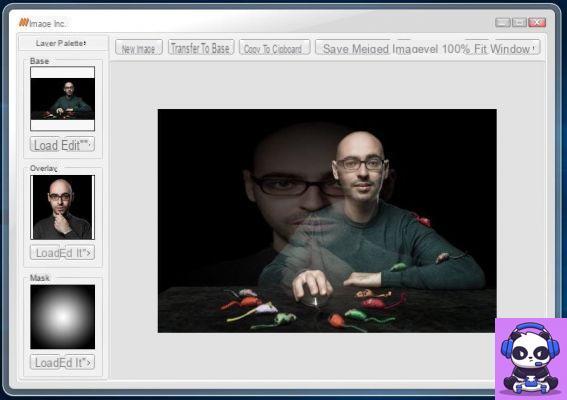
In the window that opens, click on the button first Load placed under the heading Base to load the base image to use in your overlay and then on the button Load placed under the heading Overlay to upload the photo to be superimposed on the first one. You can edit the images uploaded to Image Inc.by clicking on the two buttons Edit placed under the previews of the latter (on the left).
Then use the buttons in the box that appears to rotate the photos (Rotate 90, flip Horizontal e Filp Vertical), remove its color (Convert To Grayscale) or invert their colors (Invert Image). You can also select the type of photo overlay, using the menu Layer Blend Mode and the level of opacity of the latter, using the scroll bar Layer Opacity.
To add a third photo to your overlay and use it as a "mask" through which to view the other two, click on the button Load placed under the heading Mask and select the image you want to use as a template. Then click on the button Edit and use the drop-down menu in the box that appears to select the type of gradient to apply to the "mask".
When you are satisfied with the result, you can save your overlaid photos by clicking on the button Save Merged Image (located at the top, in the program toolbar). In the window that opens, then indicate the folder in which to save the image, type the name you want to assign to the output file and click on the button Save but I will complete the operation.
Photoshop (Windows / macOS)
Photoshop, the very famous photo editing program included in the Adobe CC suite, is another valid alternative that you could consider, especially if you are looking for a solution a little more professional than the ones I mentioned earlier.
As you probably already know, Photoshop is not a free program, as it can be used by subscribing to an Adobe Creative Cloud subscription plan, which starts from 12,19 per month. However, you can download the free trial version of the program for free from the Adobe website and use it for 7 days.
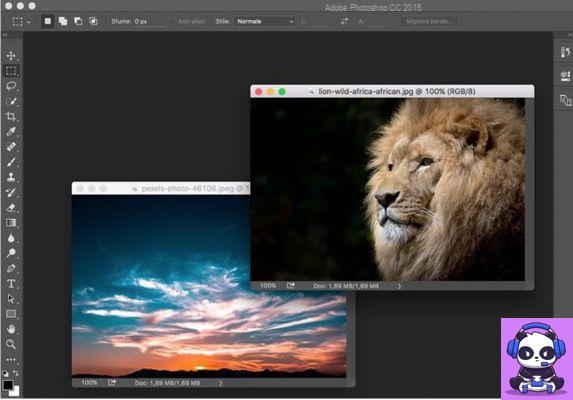
To download the Photoshop trial on your PC or Mac, connected to the Adobe website, click on the button Free trial version located at the top right (if you are unable to view it, click on the item first Adobe Photoshop CC always present at the top). Wait, then, for the download of the program to start and then start the file Photoshop_Set-Up.exe (on Windows) and then click on Si. If you're using a Mac instead, double-click the file Photoshop_Installer.dmg and then on the icon of Photoshop Installer.
Next, you need to create your Adobe ID: then click on the button Subscribe present in the window that appeared on the screen and fill out the form by entering all the required data and then click on the item Registration to go to the next step. Check the box next to the item I have read and accept the Terms of Use and the Privacy Policy (UPDATED), click here Continue, answer the questions you are asked about your skills related to the use of the program, your education, etc., click the button again Continue and then click on the entry Start installing.
When the program download is finally completed, you can use the powerful tools built into Photoshop to overlay photos. By the way, if you want to have detailed instructions on how to overlay photos in Photoshop, do not hesitate to read the in-depth study that I have dedicated to the specific function of the program that allows you to do this: there you will find useful and detailed information for making overlays with gradient effects that those with outlined objects.
GIMP (Windows / macOS / Linux)

If Photoshop seems too expensive as a solution, why not give it a try GIMP? Many consider this program to be the best free Photoshop alternative (and how to blame it!). Let's be clear, GIMP doesn't offer all of the built-in advanced editing tools that made Photoshop so famous, but if you don't have special needs it can be just fine for your little photo editing jobs.
To download GIMP, connect to its official website and click on the button Download, which also indicates the latest version of the program currently available (eg. version 2.8.22). Once the download is complete, open the GIMP installation package and follow the installation wizard to install the program on your PC (you just need to always click on the button NEXT).
When you have finished downloading GIMP, click on the item Apri ... present in the menu Fillet, select the images you want to overlay and use all the tools included in the program to overlay your photos. If you find it difficult to use GIMP and want more information on the photo overlay feature, check out the tutorial where I explain in depth how to overlay photos with GIMP. I am sure you will find this further study very useful.
Fotoeffetti.com (Online)
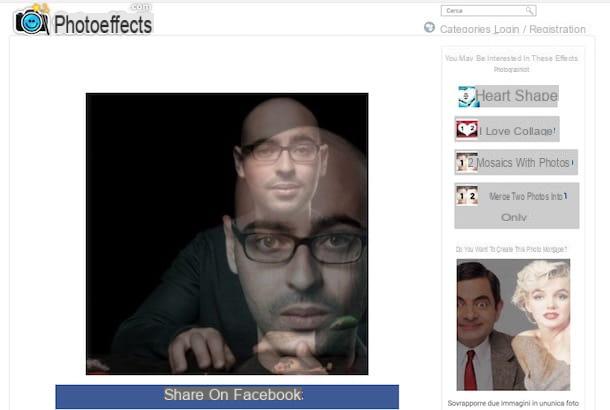
If you don't feel like installing new programs on your PC, you can resort to a few free online service to overlay your photos like Fotoeffetti.com, a web service that can be used by practically any browser thanks to which it is not only possible to overlay photos, but also to create real photomontages using the numerous presets available.
To overlay photos with Fotoeffetti.com, connected first to the appropriate page of the service, click on the red button Upload my photos, click on the orange button Frontal and upload the first image; then click on the orange button Choose photos and uploads the second image (the one to be superimposed on the first).
Before continuing, also consider the possibility of ticking the boxes below to add text, adapt the images uploaded automatically, add filters and remove the watermark applied by the service (you can do this not for the maximum limit of three times a day) .
Next, click on the red button The next, crop the images using the editor provided by Fotoeffetti.com and adjust the transparency of the front photo. If you are satisfied with the final result you see in the box Preview images, click on the green button Finish.
On the page that opens, if you are satisfied with the result, click on the button image Download located below to download the output photo in JPG o PDF or, alternatively, use the button sharing to share it with other users.
App to superimpose two photos
Not very familiar with PC and would you like to be able to overlay photos from your Android or iOS device? Well then take a look at the following photo overlay app: I'm sure you will find someone who can do for you.
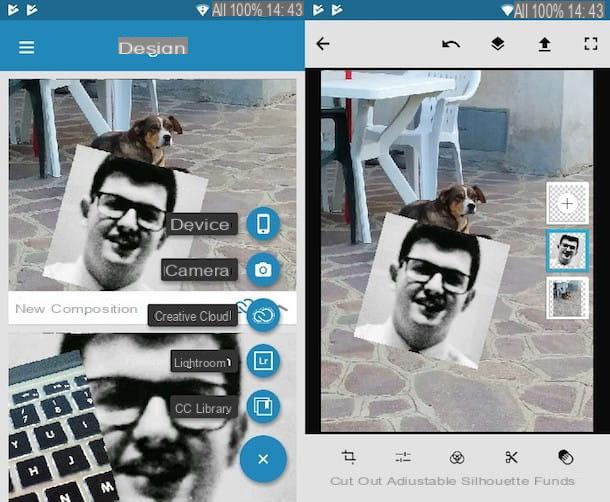
- Photo Layers (Android) - this free app allows you not only to overlay photos (up to a maximum of 11 levels), but also to remove the background and use the photo editing tools useful to act on the main parameters of your shots. For more details on how Photo Layers works, read the in-depth study dedicated to photo overlay apps.
- Join Due Photo In Una (Android) - the name of this app leaves no room for doubt: it is a solution designed exclusively to merge and overlap photos, also creating very suggestive effects. Merge Two Photos Into One is completely free.
- Superimpose (iOS) - this semi-free application not only allows you to overlay photos, but also to retouch them as needed using practical editing tools. However, to use all the integrated tools in Superimpose, you have to buy the full version of the app which, at the time of writing, costs 2,29 euros.


